15 DIY Back to School Crafts for Toddlers on a Budget
Little hands get nervous about school too. These back to school crafts for toddlers turn paper, paint, and pantry supplies into simple, budget-friendly projects that help your child feel excited before the first big day.
This article shares 15 beginner-friendly ideas, from handprint buses and apple stamps to pocket hearts and lunchbox notes. Each one solves a real problem: first-day nerves, a tight budget, or a restless afternoon at home. I’ve noticed that toddlers walk into school more calmly when they’ve already made something about it. In my experience, short, messy, sensory crafts work better than complicated ones. Every project uses washable, toddler-safe supplies, and I’ve flagged the small-part hazards to skip. Scroll through, save your favorites, and start with the idea that fits your child.
Handprint Bus
- Turns one handprint into a keepsake
- Needs only paper and washable paint
- Introduces the school bus in a friendly way
- Finishes in about fifteen minutes
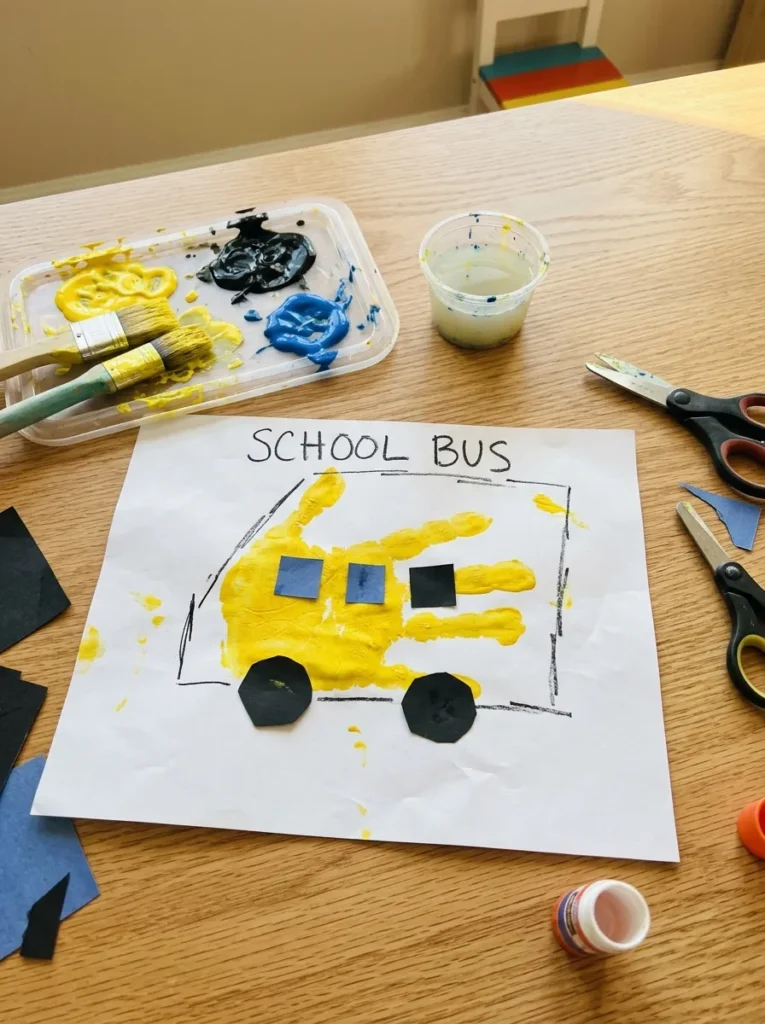
Big yellow buses can feel scary, so make one friendly. Paint your toddler’s palm yellow, press it sideways onto white paper so the fingers look like windows, and add black wheels with a marker once it dries. I’ve noticed that toddlers talk about the bus differently after they make one, which helps calm first-day nerves. The whole project uses one paint color, so cleanup stays easy. Hang the finished art at toddler height, and your child can point to it each morning. It costs almost nothing, takes minutes, and doubles as a keepsake from the year.
Setup matters more than skill with toddlers. Spread newspaper on the table, tape the paper down so it cannot slide, and keep a damp cloth within reach. Use washable, non-toxic paint, since small hands often end up in mouths. In my experience, one quick demonstration works better than any instructions, so press your own hand first. Let your child choose the paint color if yellow feels boring. Cut out the dried bus and glue it onto blue paper for a road scene. The finished piece looks bright, cheerful, and wobbly, and it gives your toddler something to show off.
Also view: 17 Unique Handprint Crafts for Kids to Make and Gift
Apple Stamp Art
- Uses an apple already in your kitchen
- Teaches colors and pressing motions
- Easy for even two-year-olds
- Makes pretty wrapping paper or wall art
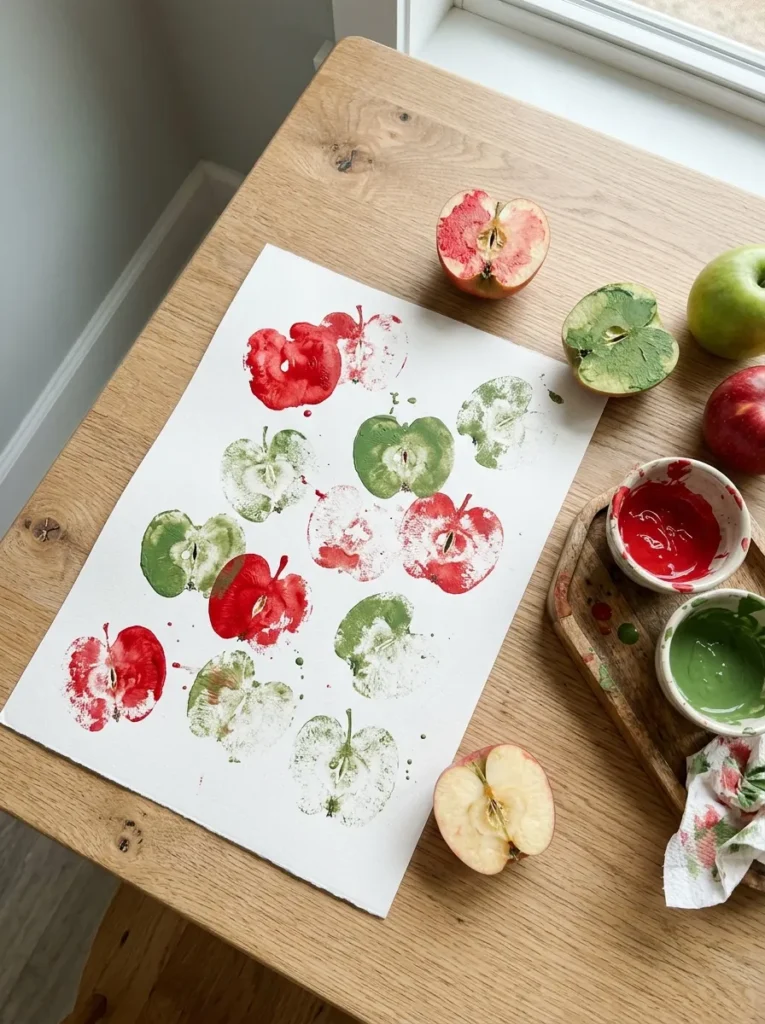
Apples are the classic first-day symbol, and toddlers can stamp them without any skill. Cut one apple in half, pat it dry, and let your child press it into paint. I’ve seen two-year-olds giggle at the squishy sound alone. Use red, green, and yellow paint on white paper, and the prints look like a tiny orchard. The shape also gives a gentle first lesson in colors and patterns. Nothing needs to be perfect, because messy prints still look like apples. Hang the finished sheet on the wall, or use it as wrapping paper for a teacher gift.
Prep keeps the mess small. Cut the apple just before stamping, since cut surfaces brown and soak up paint unevenly. Blot the flat side with a paper towel for crisper prints. Pour a thin layer of paint onto a paper plate, which works better than a deep bowl. Supervise, because toddlers may try to taste the apple or the paint. Keep a bowl of plain fruit nearby so they can snack instead. Add a dot of brown for the stem once it dries. The finished art looks fresh, colorful, and playful, and it costs the price of an apple.
Paper Bag Backpack
- Uses a lunch bag from the pantry
- Builds a pretend backpack for practice
- Lets toddlers choose their own decorations
- Great for role play before day one
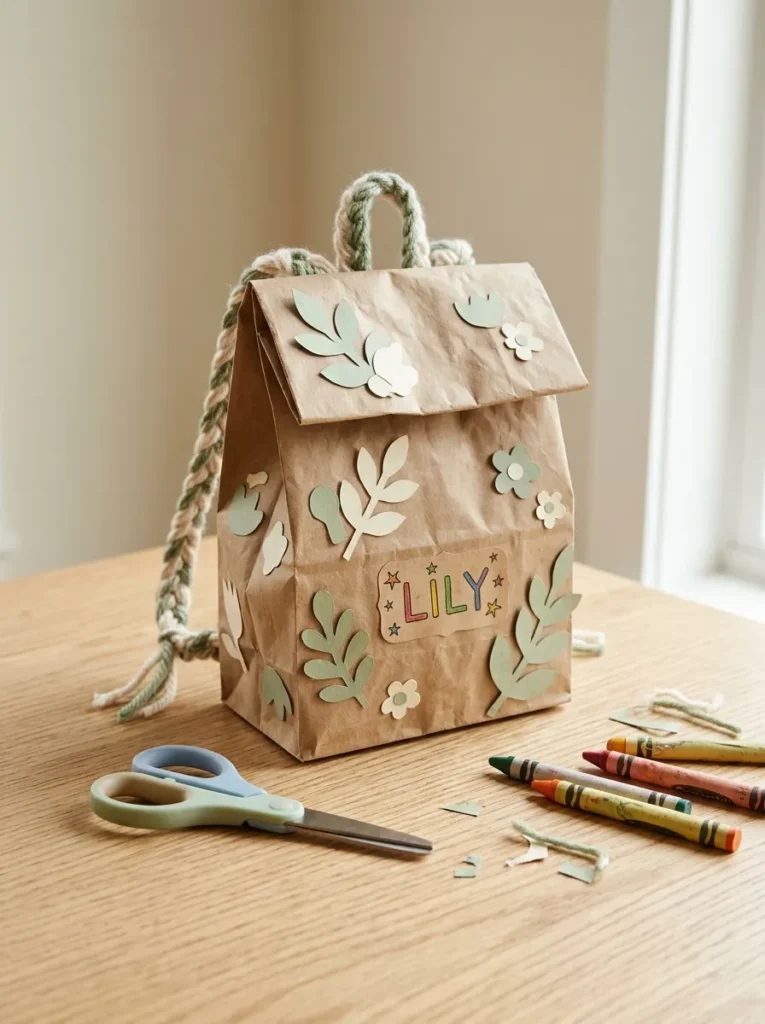
A backpack of their own makes school feel real. Start with a small paper lunch bag, then let your toddler decorate it with stickers, crayon scribbles, and paper shapes. I’ve noticed that toddlers who pack a pretend bag often feel more confident walking into class. Add yarn straps with tape, and the bag is ready for teddy bears and snacks. Role play turns the new routine into a game, which helps little ones feel proud instead of worried. The craft takes about twenty minutes and costs almost nothing. Kids can carry it around the house all week.
Sturdy straps make it last. Cut two long strips of paper or ribbon, and tape them firmly inside the bag. Reinforce the tape with a second layer, since toddlers pull hard. Skip buttons, beads, or googly eyes, because small parts are choking hazards for children under three. Use large stickers and thick crayons instead. Write your toddler’s name on the front in big letters so they recognize it. Fill the bag with a soft toy, a snack-time napkin, and a favorite book for practice. The finished backpack looks cute, personal, and exciting, and it turns the morning routine into play.
Crayon Rubbing Letters
- Shows letters appearing like magic
- Uses crayons and plain paper only
- Builds early letter recognition
- Works with leaves, bark, or foam shapes
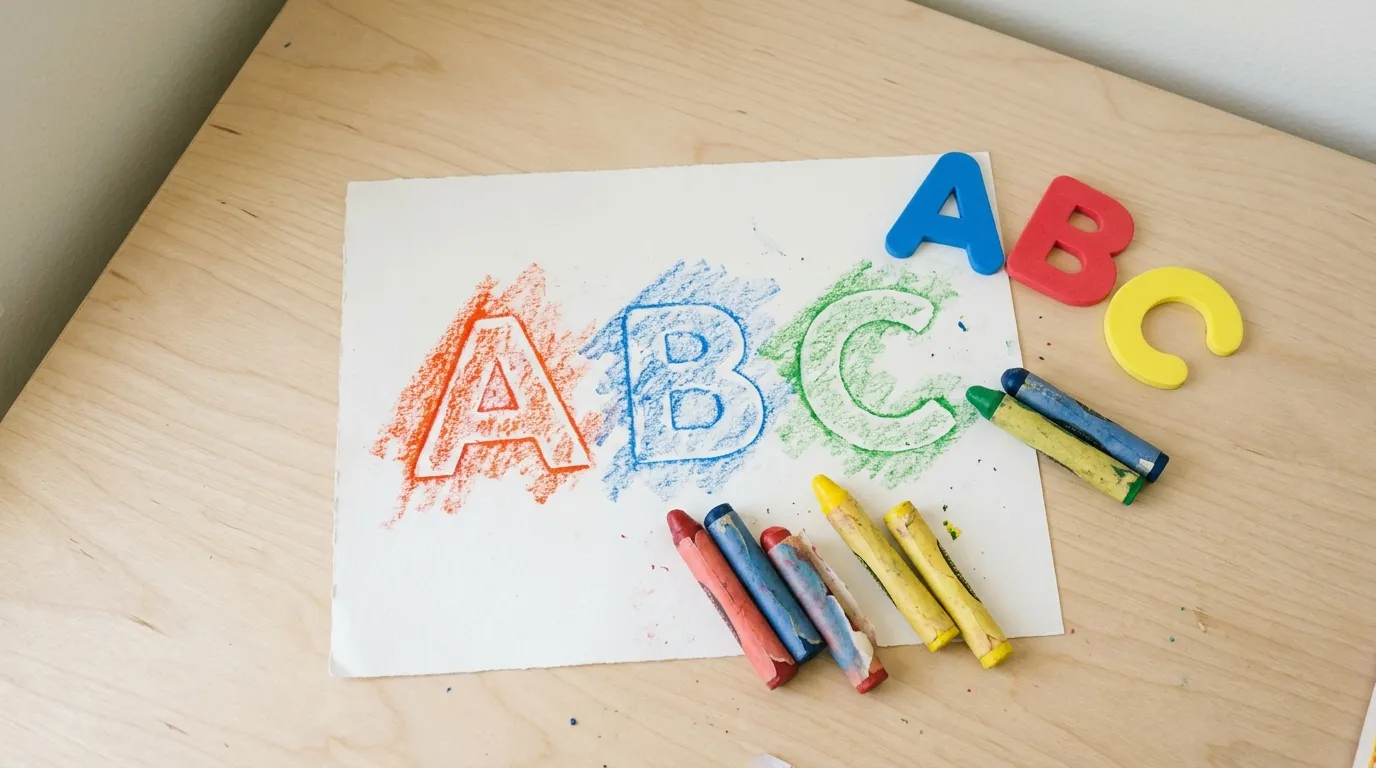
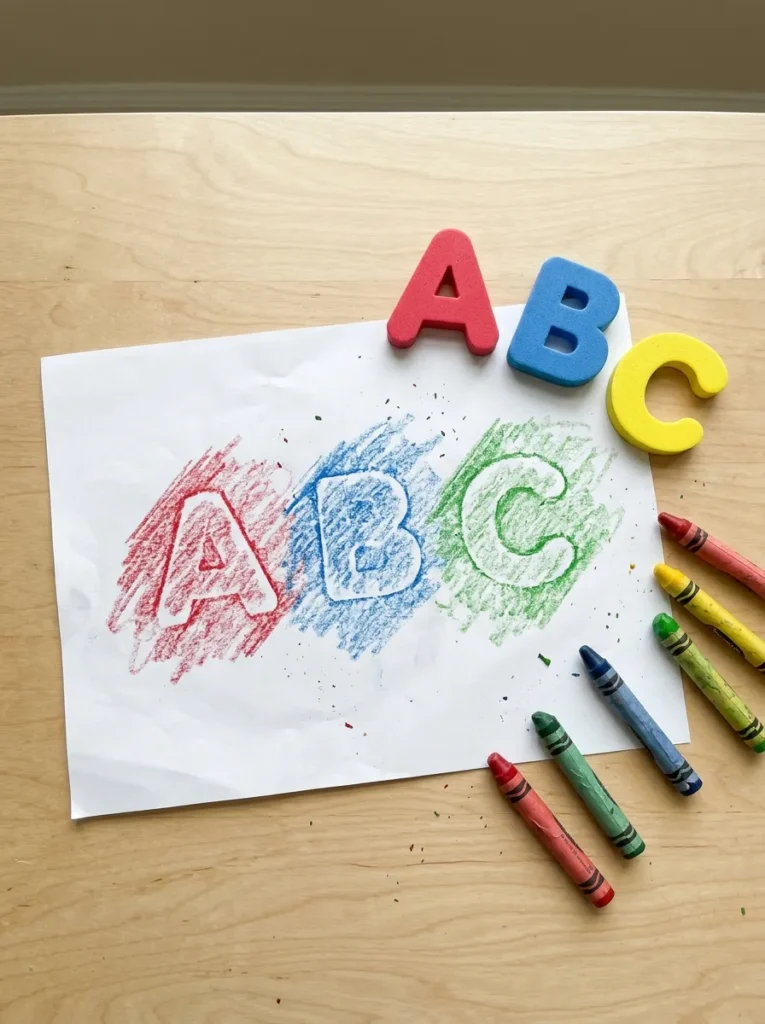
Watch a letter appear like magic. Place a foam or cardboard letter under a sheet of paper, then rub the side of a crayon across the top. Toddlers gasp when the shape pops up, and I’ve seen that moment spark real excitement about letters. Start with the first letter of your child’s name, then add a few more. The activity builds hand strength and early letter recognition without feeling like a lesson. It needs only crayons, paper, and a few cut-out shapes, so the budget stays tiny. Frame the best rubbing for a first-day display.
Peel the paper off the crayons first, since the flat side works best. Tape the letter and the paper to the table so nothing slides. Choose thick, washable crayons that small hands can grip, and sit beside your toddler to guide the first rub. If the letter does not show, press a little harder or switch to a darker color. Try leaves, bark, or textured fabric for a nature-inspired version. Supervise, because toddlers sometimes nibble crayons. The finished sheet looks colorful, bold, and proud, and it makes a perfect first-week decoration for a bedroom wall.
Squishy Letter Bag
- Zero mess, because everything stays sealed
- Great for tracing letters and shapes
- Calms busy toddlers during quiet time
- Costs a couple of dollars
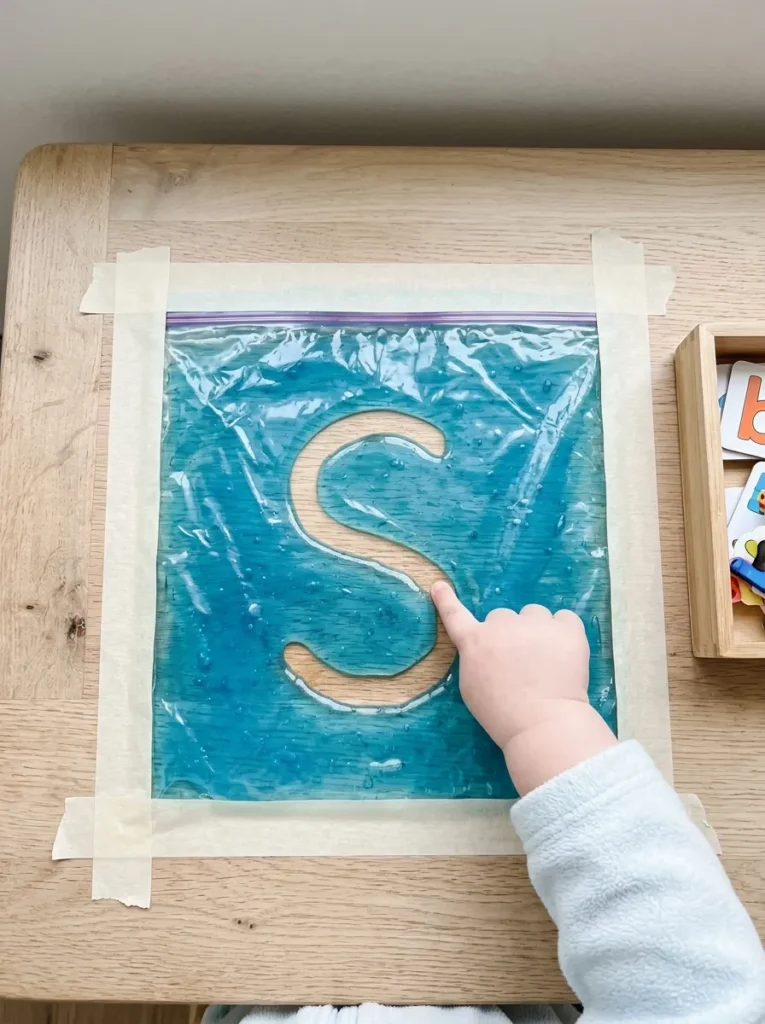
Sensory play can be tidy. Fill a sturdy zip bag with clear hair gel and a drop of blue food coloring, seal it, and tape it flat to a table. Your toddler can trace letters, circles, and lines with one finger and watch the pattern vanish. I’ve tried this on a restless afternoon, and it held a two-year-old’s attention for a surprising twenty minutes. The squishy feel is soothing, and the bag keeps all the mess locked inside. It gives early writing practice without a pencil in sight. It also travels well on car rides.
Seal it well, because leaks ruin the fun. Use a freezer-grade zip bag, squeeze out the air, and reinforce the top with strong tape. Skip beads and glitter for toddlers, since loose pieces become choking hazards if the bag breaks. Stay close and supervise the whole time, and throw the bag away if it tears. Tape it to a window for a glowing version in daylight. Keep hair gel away from mouths and eyes, and choose a gentle, fragrance-free brand. The finished bag looks bright, squishy, and calming, and it makes quiet time easy.
First Day Handprint Sign
- Captures their tiny hand size
- Gives you a ready-made photo prop
- Compare each year to see growth
- Needs only cardstock and paint
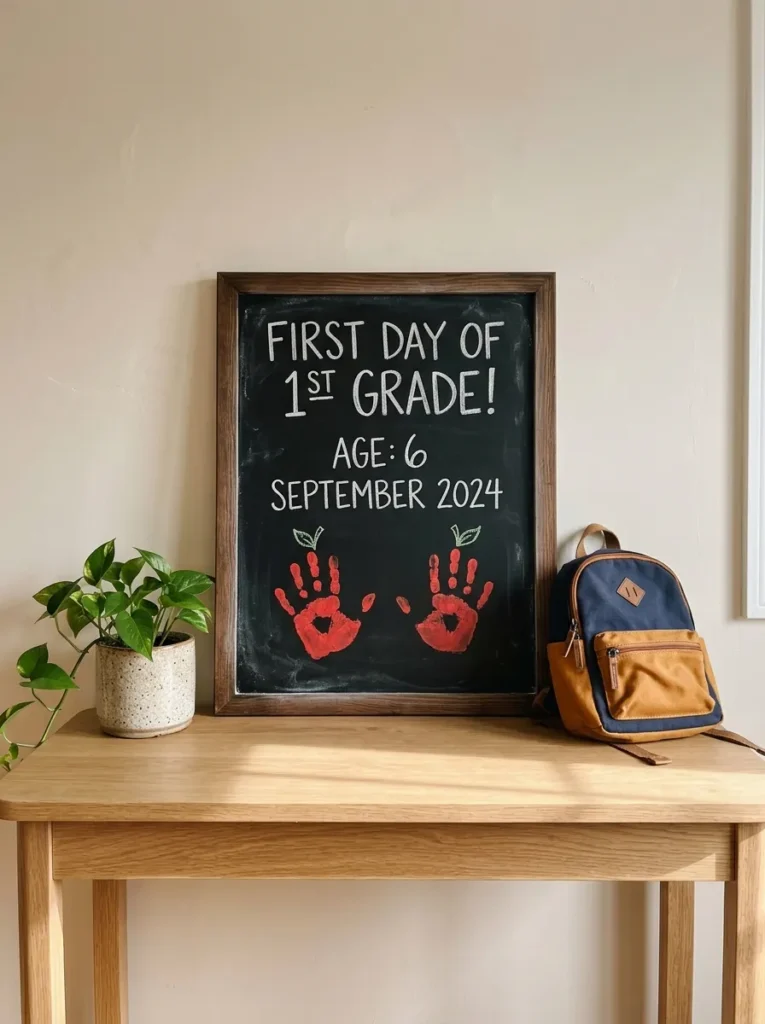
Tiny hands grow fast, so save them. Paint your toddler’s palm and press it onto a sheet of white cardstock, then add a stem and leaf to turn the print into an apple. Write the date and age below in marker. I’ve seen parents treasure these signs years later, because the small hand size is impossible to remember. Hold it up for the first-day photo, and the picture becomes a keepsake. Repeat the craft each year, and you will see growth side by side in a simple, meaningful way. The cost stays very low.
Paint a thin, even layer on your child’s palm with a sponge brush, because thick paint smudges. Press the hand down, rock it gently, and lift straight up. Keep wet wipes nearby, and wash hands right away with warm water. Use washable, non-toxic paint, and test a tiny dot first if your toddler has sensitive skin. Let the print dry flat for an hour before adding details. Mount the card on a small frame or cardboard backing, and it stands on a table. The finished sign looks sweet, simple, and personal, and it gives your first-day photo extra heart.
Paper Plate Clock
- Introduces routines like wake-up and snack time
- Hands move, so toddlers can play
- Uses a paper plate and cardboard
- Supports early number recognition
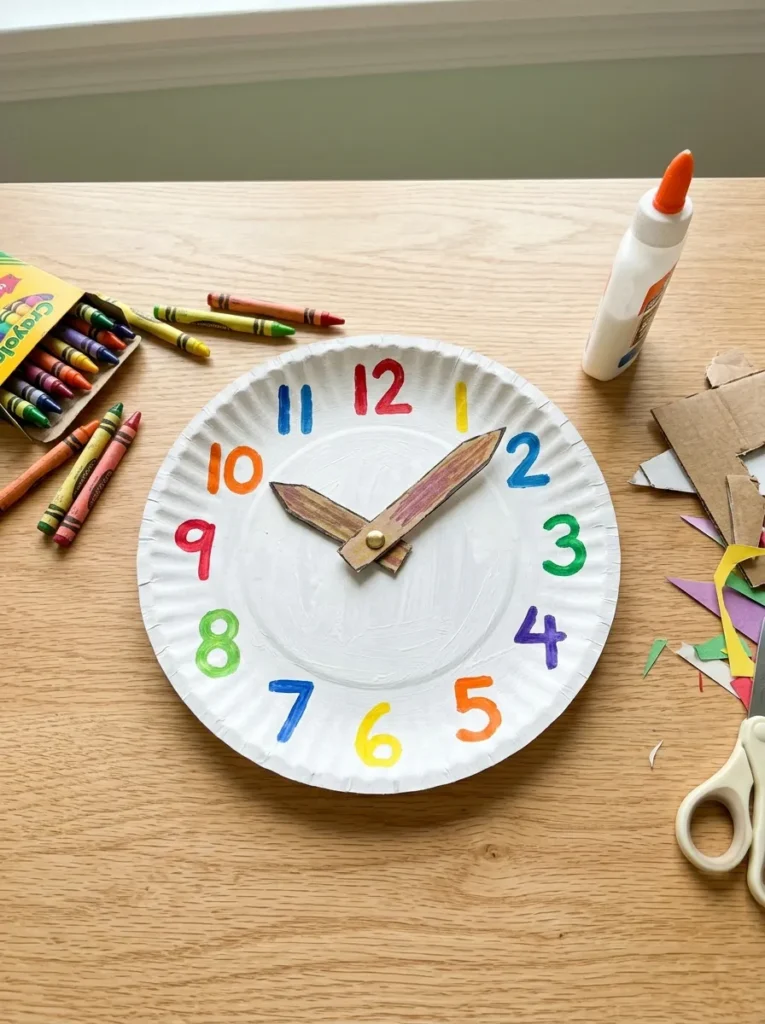
School days run on routines, and clocks help toddlers feel them. Paint a paper plate, write numbers around the edge, and attach two cardboard hands with a fastener. Your child can move the hands to show breakfast, school drop-off, and bedtime. I’ve noticed that toddlers love owning a clock they can control. It turns time into something playful, not scary. Number practice happens naturally, because they point and count as they turn the hands. The whole craft takes about twenty minutes, and it costs only a plate, paint, and cardboard. Display it near the door.
Write the numbers yourself in big, clear marks, since toddlers cannot space them evenly. Let your child add dots, stickers, or crayon scribbles around them for ownership. Cut hands from thick cardboard, and use a brass fastener only under adult control, since the metal prongs can be sharp. Fold the prongs flat with tape on the back to keep little fingers safe. Talk through a simple day while moving the hands, such as wake up at seven. The finished clock looks bright, handmade, and useful, and it helps your toddler understand what comes next.
Torn Paper Pencil
- Tearing paper builds finger strength
- Uses scrap paper or old magazines
- No scissors needed
- Looks like bold school-theme art
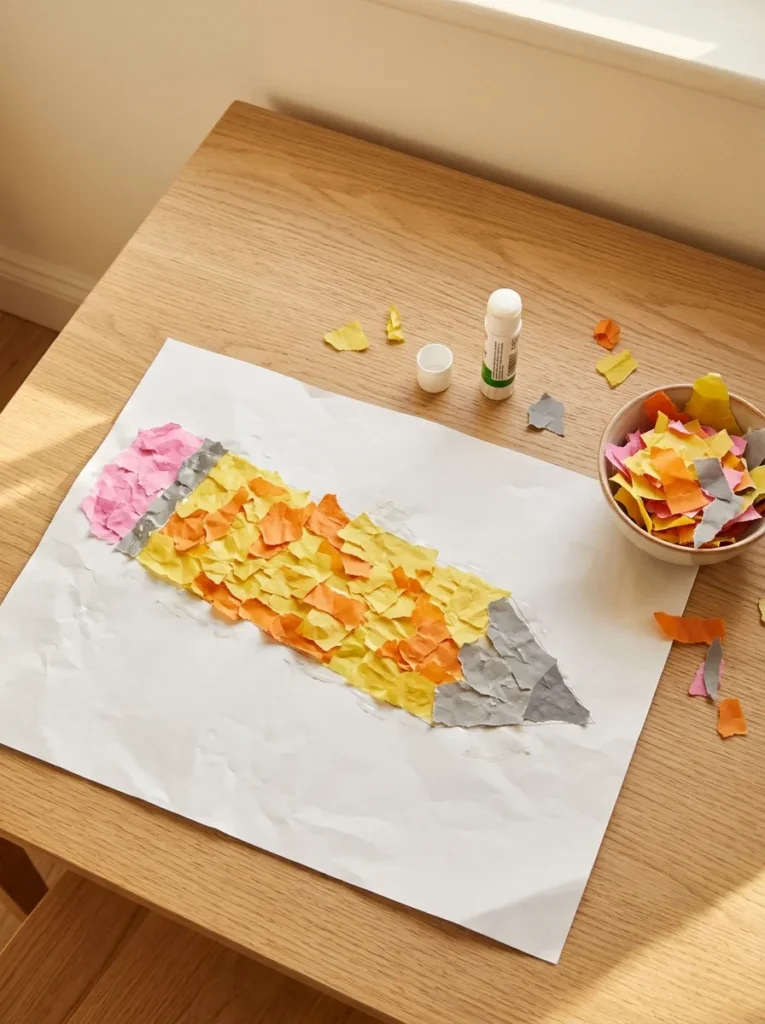
Tearing is a toddler superpower. Draw a big pencil outline on paper, then let your child rip yellow paper into pieces and glue them inside the lines. The motion strengthens tiny fingers, which later helps with holding crayons and pencils. I’ve seen even shy toddlers jump into this craft, because ripping feels like permission to be messy. Add a pink eraser and a gray tip with extra scraps. No scissors are needed, so safety stays simple. The pencil looks bold and sunny, and it fits the school theme. It also makes a great door decoration.
Use a thick glue stick, because liquid glue turns soggy with tissue paper. Draw the pencil with a dark marker first, so your toddler can see where to place each piece. Tear a pile of scraps first, and sort them by color in small bowls. Demonstrate tearing slowly, then let your child take over. Skip glitter and tiny sequins, which are choking hazards and hard to clean. Press the pencil under a heavy book for a few minutes to flatten it. The finished artwork looks cheerful, textured, and proud, and it turns scrap paper into a classroom decoration.
Sticker Name Art
- Builds name recognition
- Peeling stickers strengthens fingers
- Needs only paper and cheap stickers
- Ready to hang above a cubby or bed
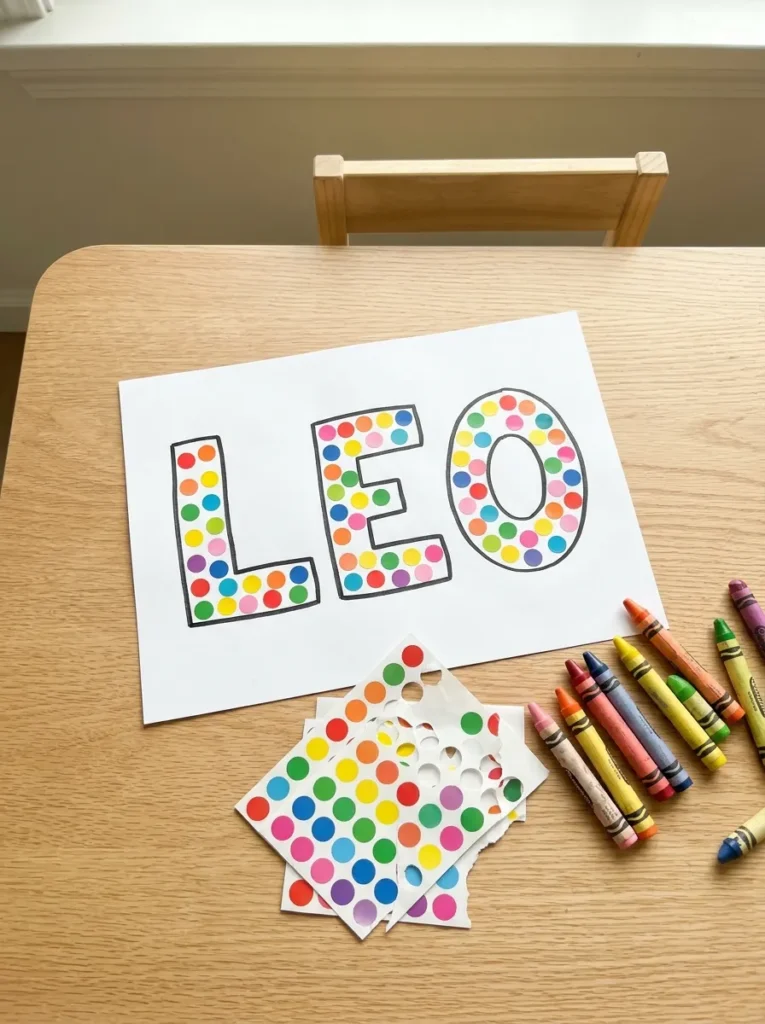
A name is the first word most toddlers learn to love. Write your child’s name in big outline letters on paper, then let them fill each letter with stickers. The peeling and pressing builds finger control, and the repeated letters help the name feel familiar. I’ve noticed that children walk into class more happily when they can spot their own name. Use dot stickers, stars, or hearts in a rainbow of colors. The craft takes about fifteen minutes, and one sticker sheet costs very little. Hang it above their bed or cubby for a daily smile.
Write the name in thick marker, using capital letters first, because they are easier to see. Leave wide gaps inside each letter so little fingers fit. Use large stickers made for toddlers, and keep an eye out for peeled stickers headed for mouths. Pre-peel the edges to help your child get started, then step back. Mix colors by letter for a rainbow effect, or choose one favorite shade. If you do not have stickers, use torn paper or washable dot markers. The finished name looks bold, bright, and personal, and it hangs proudly in any child’s room.
Pocket Heart Keepsake
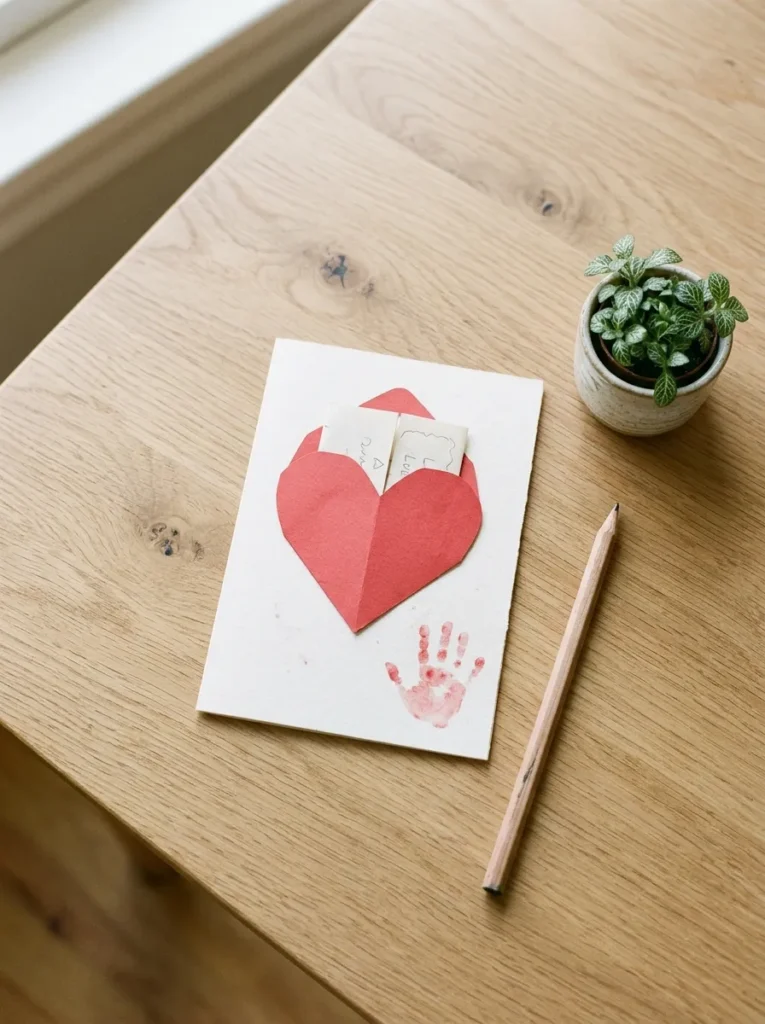
- Eases first-day separation worries
- Pocket holds a tiny note or heart sticker
- Takes only paper, glue, and a marker
- Fits in a backpack or lunchbox
Goodbyes can feel big, so give your toddler something to hold. Cut a heart from red paper, glue it onto a card to form a pocket, and slip in a tiny love note. I’ve seen this simple keepsake calm tearful drop-offs, because it reminds a child that you are still close. Add a little hand drawing or a sticker for extra comfort. Your toddler can tuck it into a backpack or pocket and touch it whenever feelings get big. It costs almost nothing, yet means a great deal. Make two, so you can keep one too.
Keep the note short and warm, since toddlers cannot read yet. Draw a smiley face, a hug symbol, or a small kiss mark instead of long words. Glue only the sides and bottom of the heart, leaving the top open as a pocket. Cover it with clear tape for durability. Practice the goodbye routine at home with the keepsake first, so it feels familiar. Avoid small decorations that could come loose. The finished keepsake looks sweet, simple, and comforting, and it gives your child a tiny anchor during busy school days.
Teacher Thank You Card
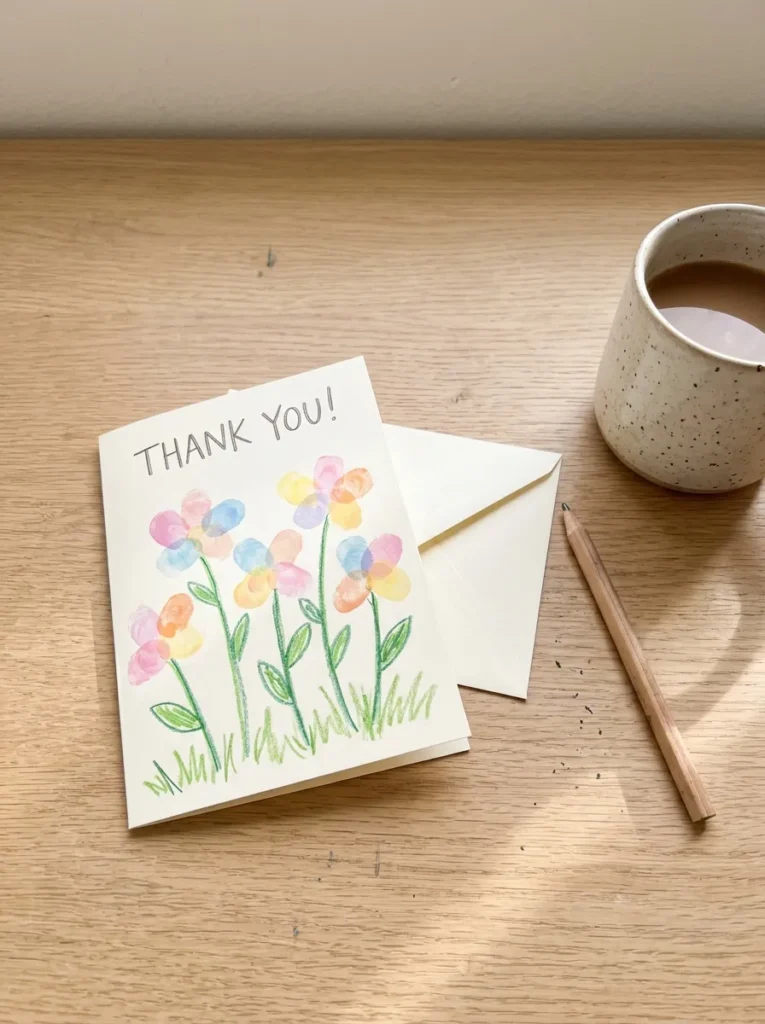
- Builds early gratitude habits
- Fingerprint flowers need only washable paint
- Costs far less than a store gift
- Teachers often keep these cards for years
Teachers remember the cards that come from little hands. Dip your toddler’s fingertip in paint, press it onto cream cardstock for flower petals, and add green stems with a marker. I’ve noticed that teachers often keep these cards for years, because they capture a child at that exact age. The craft also introduces gratitude in a gentle way, by connecting a small gesture to a person they will see every day. Write a short thank-you inside, and let your toddler add a scribble signature. It costs very little. A card feels warm and personal.
Plan the design on scrap paper first, so the final card goes smoothly. Use a few paint colors on a flat plate, and let your child press fingertips like stamps. Draw stems and leaves while the petals dry, since wet paint smears. Fold a sheet of cardstock in half for the card, and write the message before decorating. Use washable, non-toxic paint, and wipe fingers right away. Slip the card into a small envelope with the teacher’s name on the front. The finished gift looks thoughtful, colorful, and kind, and it starts the school year with warmth.
Shape School House
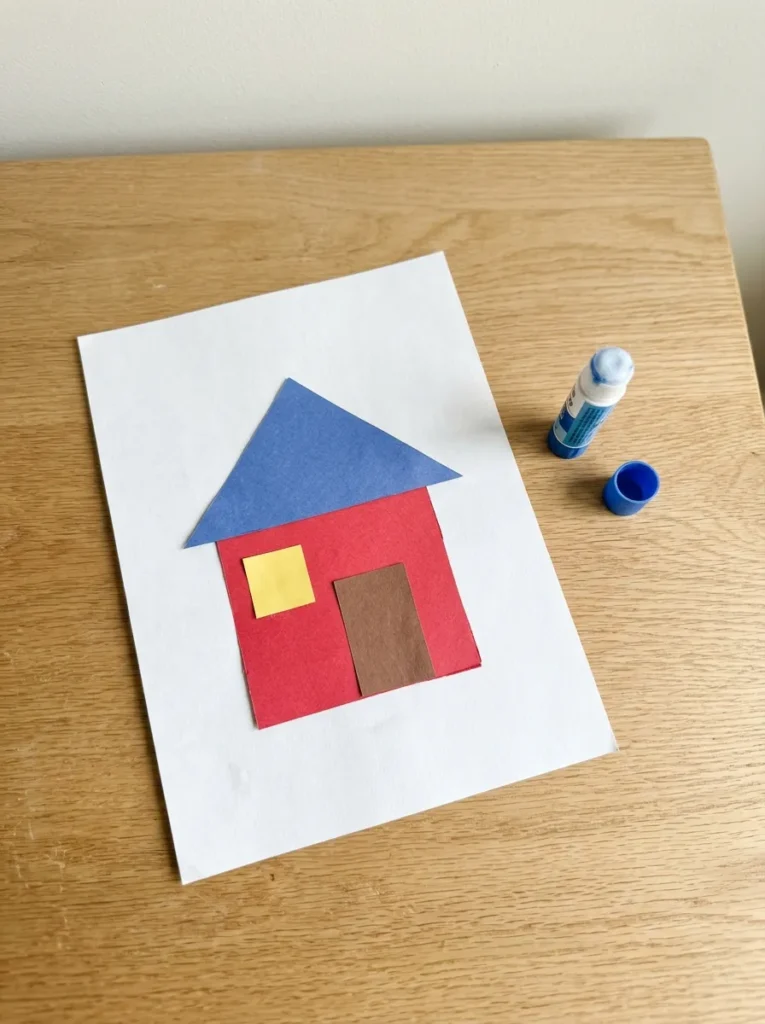
- Teaches shapes through building
- Uses colored paper scraps
- Makes school feel like a friendly place
- Easy to cut ahead for little hands
Shapes make a school house simple. Cut a red rectangle, a blue triangle, a yellow square, and a brown door from colored paper. Let your toddler glue them onto a white sheet and build the little house piece by piece. I’ve noticed that naming shapes while gluing helps toddlers remember them. It also makes school feel like a friendly place they can picture. The cutting is the only adult job, so little hands handle the fun part. Display the finished picture near the door to talk about the first day. Paper scraps work perfectly.
Cut the shapes ahead of time, and lay them out on a tray so choosing feels easy. Use a glue stick, since liquid glue pools and makes paper curl. Show your toddler where each piece goes by placing the first two, then let them finish. Offer extra shapes so they can add windows, flowers, or a sun. Smooth each piece with a flat palm so edges stick. Round the corners for gentle edges. The finished house looks colorful, tidy, and cheerful, and it becomes a little story about the place they will soon visit.
Rainbow Sponge Paint
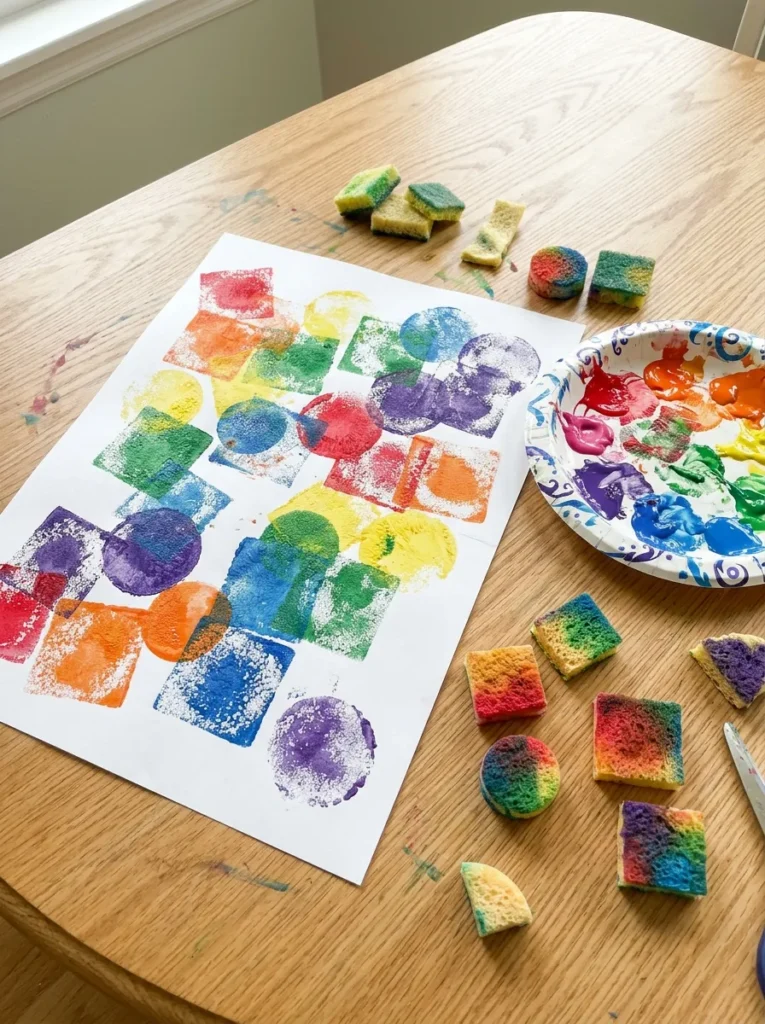
- Sponges are easy for small hands to grip
- Creates bold rainbow patterns
- Uses cheap kitchen sponges
- Teaches color mixing naturally
Color is the star of early childhood, and sponges make it easy. Cut a kitchen sponge into small squares, dip them in washable paint, and press them onto paper. I’ve tried this with a toddler who disliked brushes, and the sponge grip changed everything. Rainbow rows appear quickly, and colors blend where they touch. Your child learns to compare shades and see new colors form. It takes about fifteen minutes, and the finished sheet works as a welcome poster, a banner, or a gift wrap for a teacher. Hang it up on the first morning.
Keep the setup simple. Pour small puddles of red, yellow, and blue paint onto a paper plate, and let your child dip a sponge into each. Tape the paper to the table so it stays put. Use thick paper, because thin sheets soak through and curl. Cut the sponges into pieces too large to swallow, and watch closely so none end up in mouths. Use washable, non-toxic paint, and wash hands afterward. Let the art dry flat for an hour. The finished page looks bold, bright, and joyful, and it fills a wall with energy.
Foam Backpack Tag
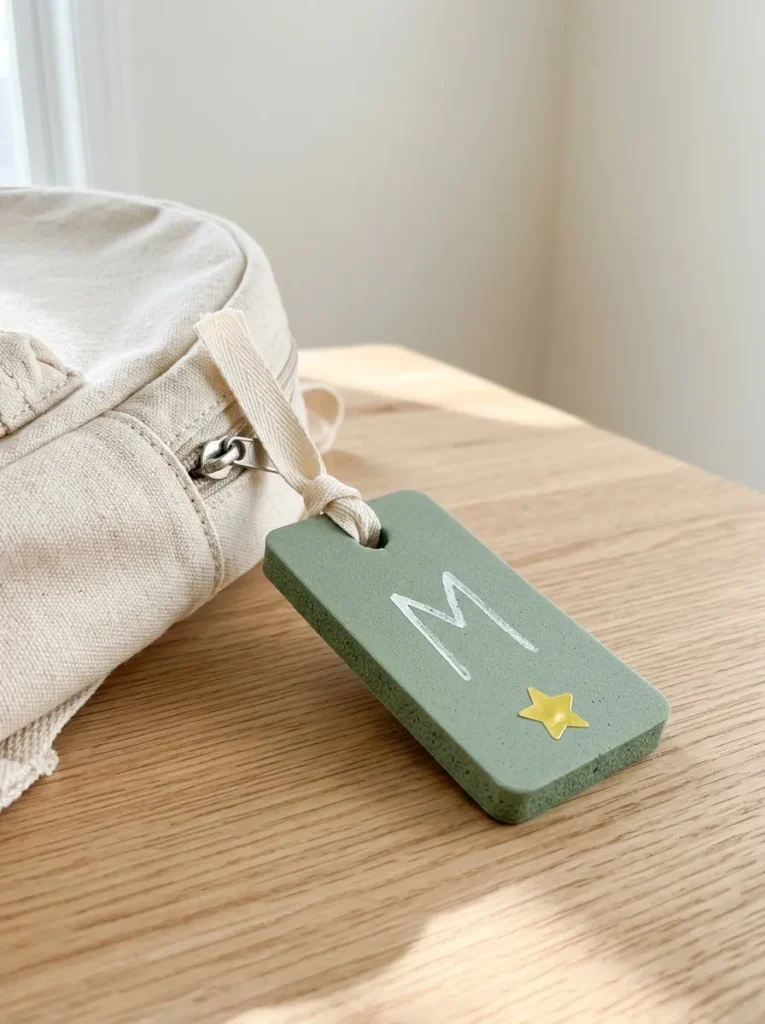
- Helps toddlers find their bag quickly
- Craft foam is soft and cuts easily
- Stickers and an initial make it personal
- Takes about ten minutes
Backpacks all look alike in a crowded cubby area. A handmade tag helps your toddler spot theirs in seconds. Cut a rectangle from craft foam, write an initial with a paint pen, and let your child add stickers. I’ve seen kids point proudly at their own tag, which builds a small sense of ownership. Loop a ribbon through a punched hole and tie it onto a zipper. Foam is soft, light, and waterproof, so it handles rain and spills. The tag takes about ten minutes, and it makes the first week feel easier.
Choose bright foam that contrasts with the bag, since color helps recognition. Punch the hole yourself, and keep the ribbon short, about ten centimeters, so it never wraps around a small neck. Add safety by choosing a breakaway clip or attaching the tag inside the bag. Use an initial or a favorite picture instead of a full name, since strangers can use names to seem familiar. Stickers should be firmly pressed down, so edges don’t peel. The finished tag looks cheerful, sturdy, and personal, and it makes the backpack feel more like your toddler’s own.
Lunchbox Love Notes
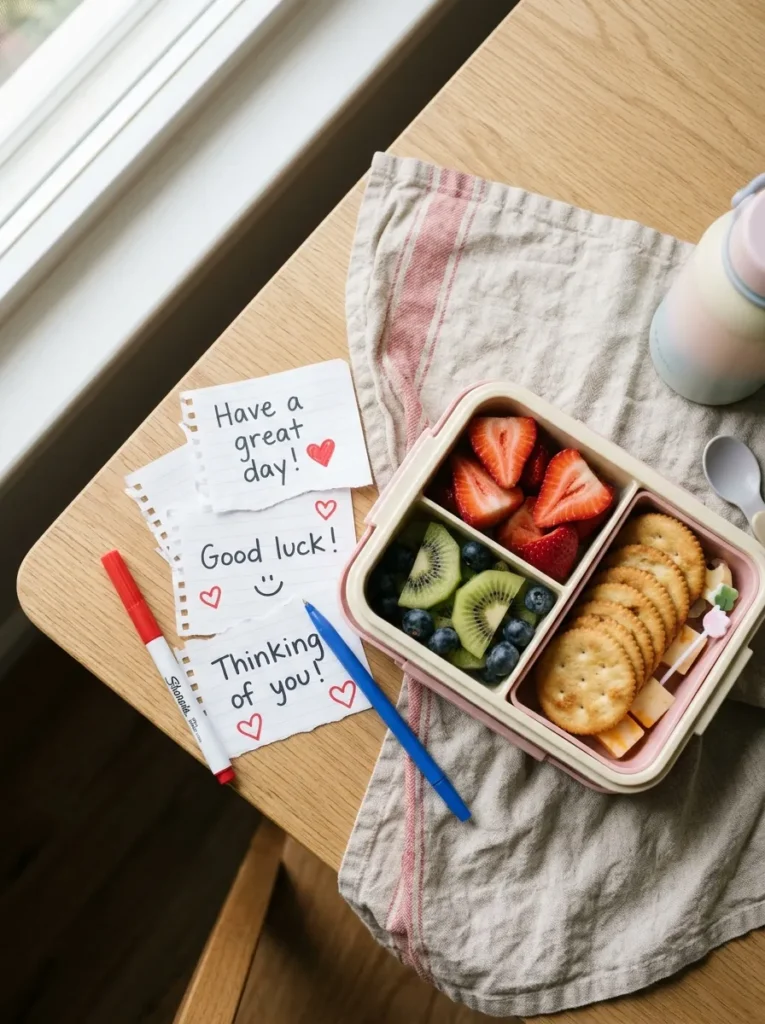
- Small drawings make lunchtime feel warm
- Cut from cardstock or sticky notes
- No reading skills required
- Make a week’s worth in one sitting
Lunchtime can feel lonely for new students, so send a little love. Draw hearts, smiley faces, or tiny animals on small cards, then slip one into the lunchbox each day. Toddlers cannot read yet, but they understand pictures, and a smile on a card feels like a hug. I’ve noticed that kids often show these notes to teachers and friends, which sparks conversation. Make a week’s worth in one sitting, and tuck them into a small envelope. It costs almost nothing, yet adds warmth to every school day. Your toddler can help color them.
Use thick cardstock or sticky notes, since thin paper bends in a lunchbox. Keep each note simple with a drawing, a short word, or a tiny sticker. Check the school rules first, because some classrooms limit what comes in lunch bags. Place the note on top of the food, away from anything wet, and wrap it in a small zip bag if needed. Skip tape that could stick to snacks, and avoid loose decorations. The finished notes look sweet, simple, and personal, and they remind your toddler that love goes along to school.
Conclusion
Big feelings need small, simple outlets. A few supplies, washable paint, and some patience can turn first-day nerves into something your toddler can hold, stick, and show off. Whether you press a handprint bus, stamp apples, or tuck a pocket heart into a backpack, these back to school crafts for toddlers make the new routine feel familiar and fun. I’ve seen how small, hands-on moments like these can completely shift the way a child feels about starting school. Save this post on Pinterest, try one idea this week, and share it with a parent who needs a calm, creative start.