19 Dollar Tree DIY Crafts Decor Ideas on a Budget
Your decor budget doesn’t need to be big to look beautiful. These Dollar Tree DIY crafts turn simple, low-cost finds into stylish pieces that make your home feel warm, personal, and pulled together.
This article shares 19 beginner-friendly ideas, from faux ceramic vases and gold candlesticks to woven mirrors, pressed flower frames, and cozy wreaths. Each one solves a real problem: a bare wall, a plain shelf, or a tight budget. I’ve noticed that most rooms don’t need more things. They need a few well-styled details. In my experience, one afternoon and a handful of supplies can change the look of a whole corner. Scroll through, save your favorites, and start with the idea that fits your home.
Candlestick Pedestal Bowl
- Turns two cheap items into a designer-style bowl
- Adds height and shape to a flat surface
- Works for fruit, dried stems, or seasonal decor
- Finishes in about twenty minutes plus drying time
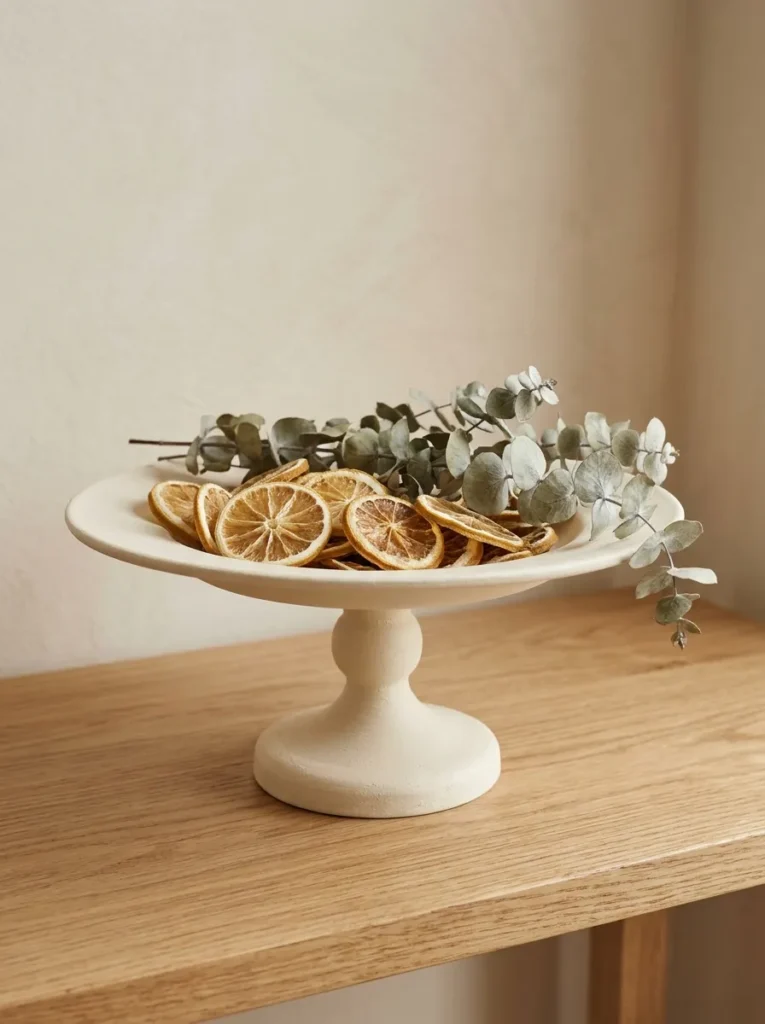
Two cheap pieces can look like a designer bowl. Glue a glass candlestick to the center of a plain plate, flip it over, and you have a pedestal dish worth showing off. I’ve seen this trick fool guests who swore it came from a boutique. Use strong adhesive made for glass, and let it cure overnight. Paint it cream, sage, or soft white with spray paint for a ceramic look. Fill it with lemons, pinecones, or dried stems. The result feels elegant, airy, and surprisingly sturdy, and it lifts any console, coffee table, or kitchen counter instantly.
Prep makes the finish look expensive. Wash both pieces, wipe them with rubbing alcohol, and sand the glue spots lightly for a stronger bond. Press the candlestick firmly into the plate center and hold it for a minute. Apply two thin coats of spray paint instead of one thick coat, which prevents drips. Seal with a clear matte finish so the surface wipes clean. Keep it for dry items only, because glued joints dislike water. The finished bowl looks tall, sculptural, and neat, and it makes a perfect centerpiece for holidays, shelves, and entryway tables.
Gallery Mirror Wall
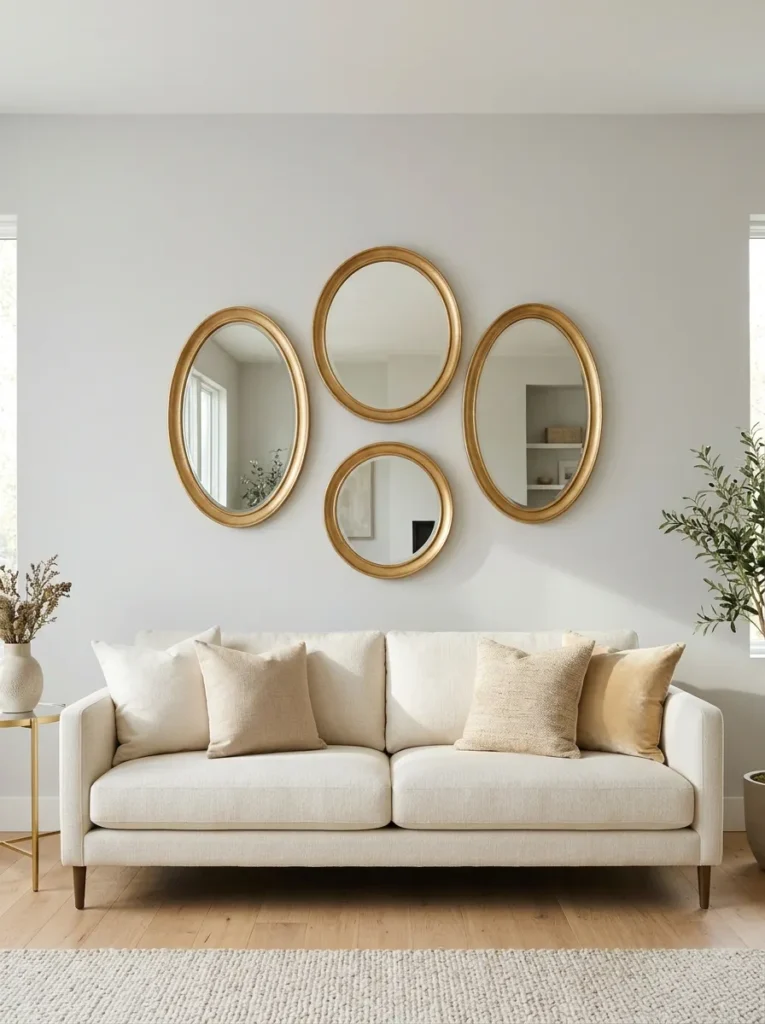
- Makes a small wall feel bigger and brighter
- Mixes shapes for a collected, designer look
- Costs a fraction of one large mirror
- Easy to rearrange before you hang
One mirror is nice, but five feel like a statement. Grab small round and oval mirrors, spray the frames gold or matte black, and group them in a loose cluster. I’ve noticed that mirrors bounce light better than any lamp, which makes dim rooms feel open. Vary the sizes, and keep the spacing close, about five centimeters apart. Hang them above a sofa, console, or bed. The cluster looks curated, glamorous, and layered, and it costs far less than a single large designer mirror. Guests often assume it was a pricey purchase, which is exactly the point.
Layout planning saves frustration. Cut paper templates for each mirror, tape them to the wall, and move them around until the cluster feels balanced. Then mark the nail spots and hang each mirror with removable strips or small hooks, depending on weight. Dollar store mirrors are light, but still check the packaging for hanging limits. Wipe the glass before you hang it, since fingerprints show under daylight. Keep the paint finish consistent across every frame for a unified look. The finished wall feels bright, stylish, and personal, and rearranging it later takes only minutes.
Painted Terracotta Pots
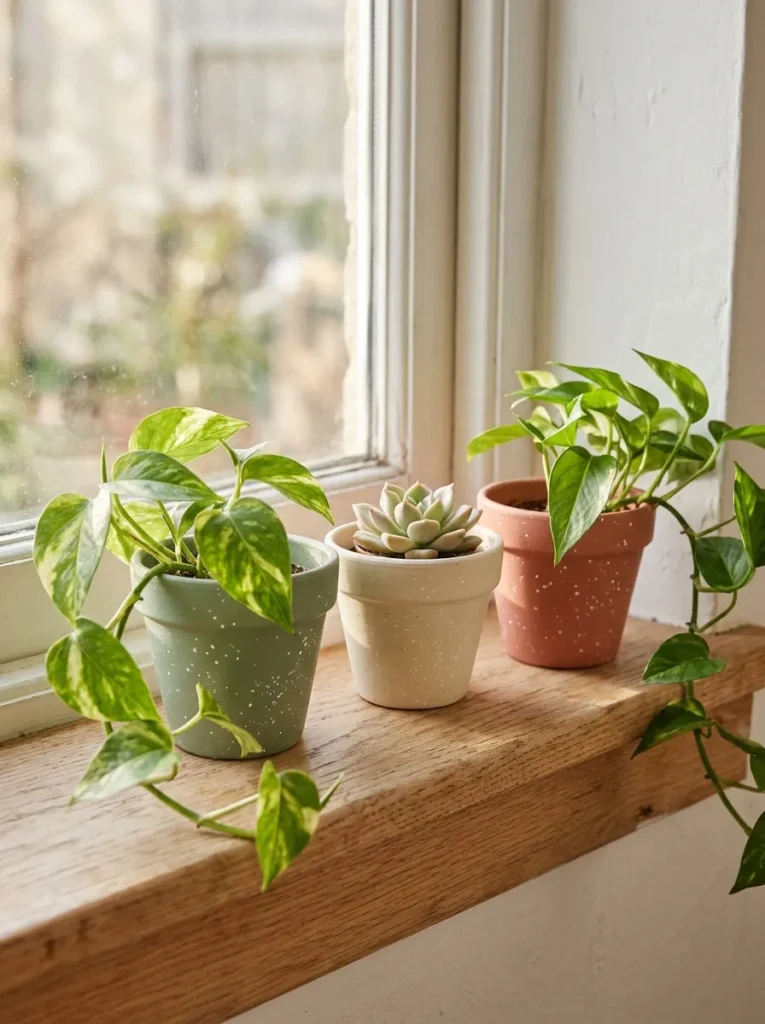
- Turns basic pots into boutique planters
- Speckle paint mimics handmade ceramic
- Works with real or faux plants
- Costs only a few dollars per set
Plain pots can look handmade with a little paint. Brush on matte cream or sage acrylic, let it dry, then flick white paint from a stiff brush for a speckled stoneware effect. I’ve tried this on a windowsill trio, and visitors asked where I bought them. Terracotta soaks up color well, so two coats usually cover everything. Fill them with pothos, succulents, or faux greenery for a soft, natural look. Group three pots in different heights, and the display feels intentional. The finished planters look earthy, modern, and warm, and they cost less than a single store-bought ceramic pot.
A few steps protect your work. Seal the inside with a waterproof sealer, or paint only the outside and use a plastic liner for real plants. Terracotta is porous, so unsealed paint can peel when soil stays damp. Apply a clear matte varnish to the outside for durability. Keep the drainage hole open, and place a saucer underneath to protect furniture. Let the paint cure for a full day before planting. Choose a calm color palette so the pots match nearby decor. The finished set looks fresh, clean, and thoughtfully styled, and it brightens any shelf or sill.
Placemat Wall Art
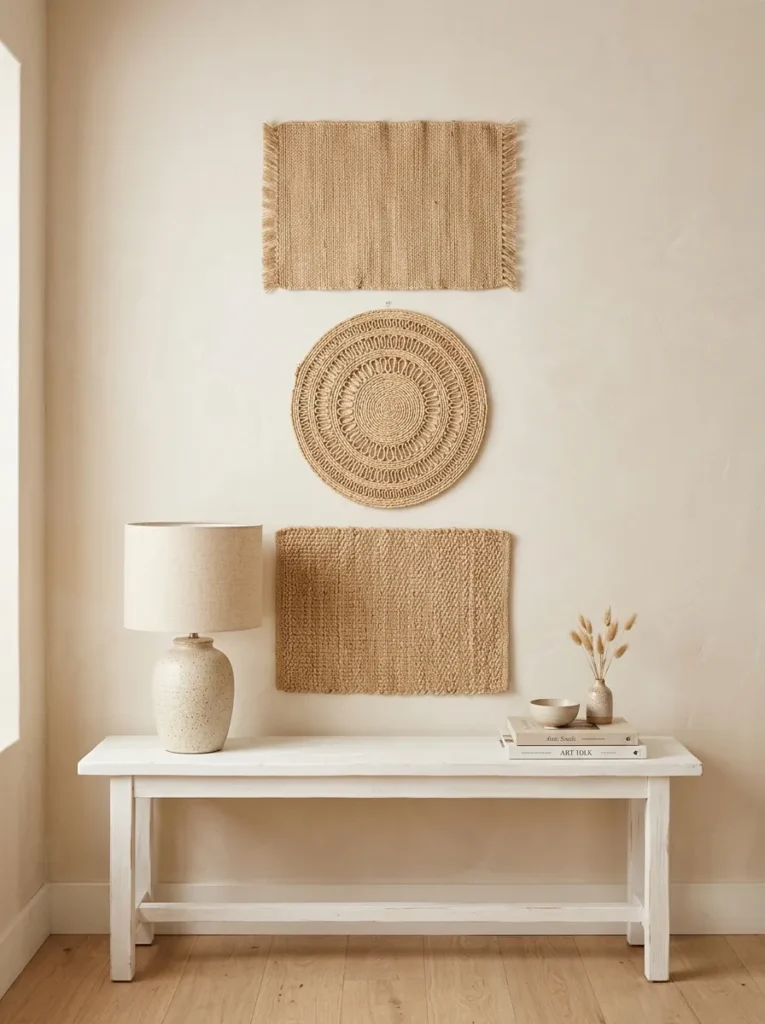
- Adds woven texture without any paint
- Creates a boho gallery wall in minutes
- Lightweight, so hanging is simple
- Mixes round and square shapes for interest
Texture can be art. Woven placemats hung on the wall give you a boho gallery that looks like a pricey import. Choose a mix of round, rectangular, and scalloped shapes in natural tones. I’ve seen this idea rescue a blank wall above a console in under ten minutes. Hang them in a vertical line or a loose cluster. The weave catches light and adds warmth, even in a cool white room. Because the pieces are light, small removable hooks hold them well. The result looks collected, calm, and earthy, and it feels far more expensive than the cost.
Small details raise the finish. Flatten curled edges by pressing the placemats under books overnight. Check for loose fibers and trim them with sharp scissors. Attach a small adhesive strip behind each placemat and press it firmly onto the wall. Leave consistent gaps between pieces so the arrangement looks planned. Pair the wall with a ceramic lamp and a simple vase below for balance. Avoid humid areas, since natural fibers can warp. The finished display looks relaxed, textured, and welcoming, and it works equally well in living rooms, bedrooms, and entryways.
Faux Ceramic Vases
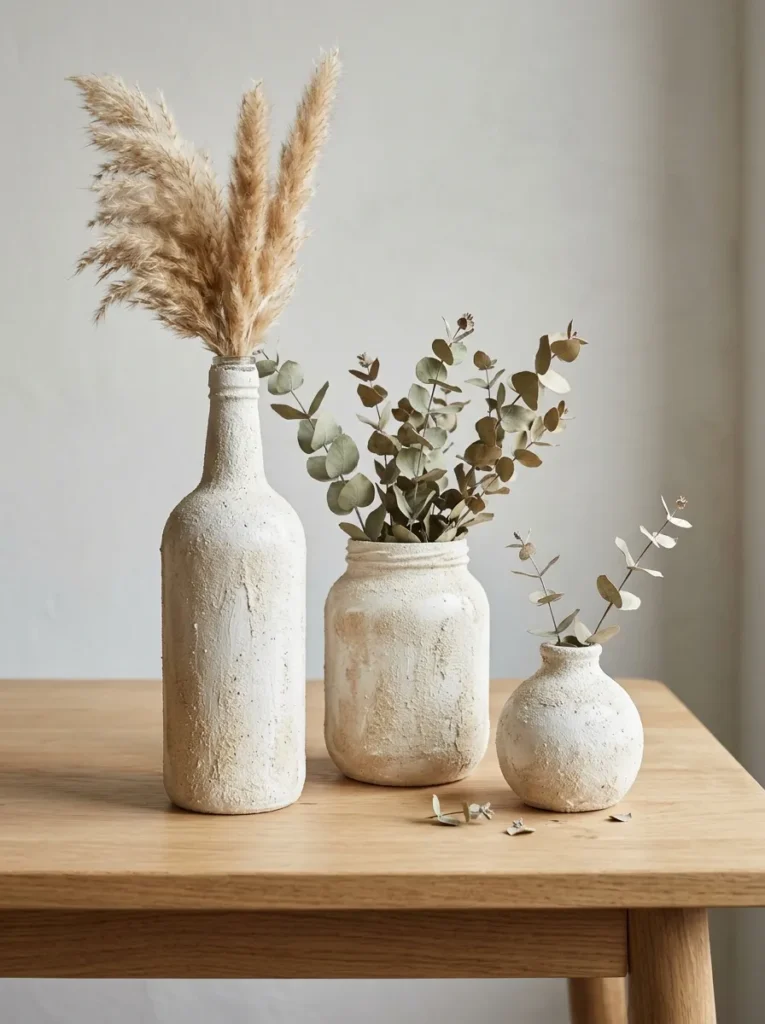
- Turns cheap glass into textured stoneware
- Looks like pricey designer ceramics
- Sizes and shapes can be mixed
- Needs only paint, sand, and a brush
Cheap glass can look like handmade stoneware. Mix acrylic paint with a spoonful of fine sand or baking soda, then brush it onto a clear jar or bottle. The gritty texture mimics ceramic, and the matte finish hides the glass completely. I’ve tried this with old jars from my kitchen, and the results looked shockingly like store vases. Choose warm white, oatmeal, or soft clay for an earthy look. Group three pieces in different heights, and drop in dried pampas or eucalyptus. The finished vases look sculptural, calm, and modern, and they cost almost nothing to create.
Technique makes the texture look real. Clean the glass with alcohol, then apply a thin base coat of paint so the mix grips. Dab the gritty paint with a sponge, rather than brushing it flat, for an uneven, handmade surface. Let each coat dry for an hour before adding the next. Seal with a matte varnish to prevent flaking. These vases are best for dried stems, since water can loosen the paint over time. If you want fresh flowers, slide a small glass jar inside. The finished set looks organic, soft, and tailored, and it fits any shelf.
Mason Jar Lanterns
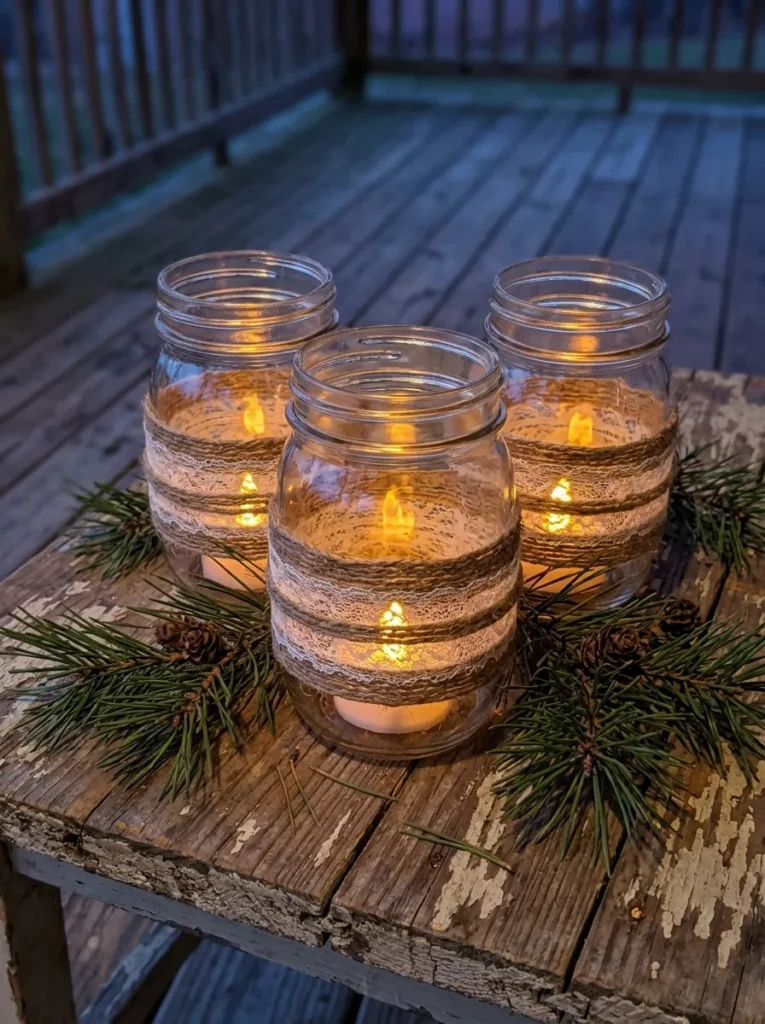
- Adds a warm glow to patios and tables
- Uses jars you may already own
- Twine and lace give a farmhouse look
- LED lights keep it safe around kids
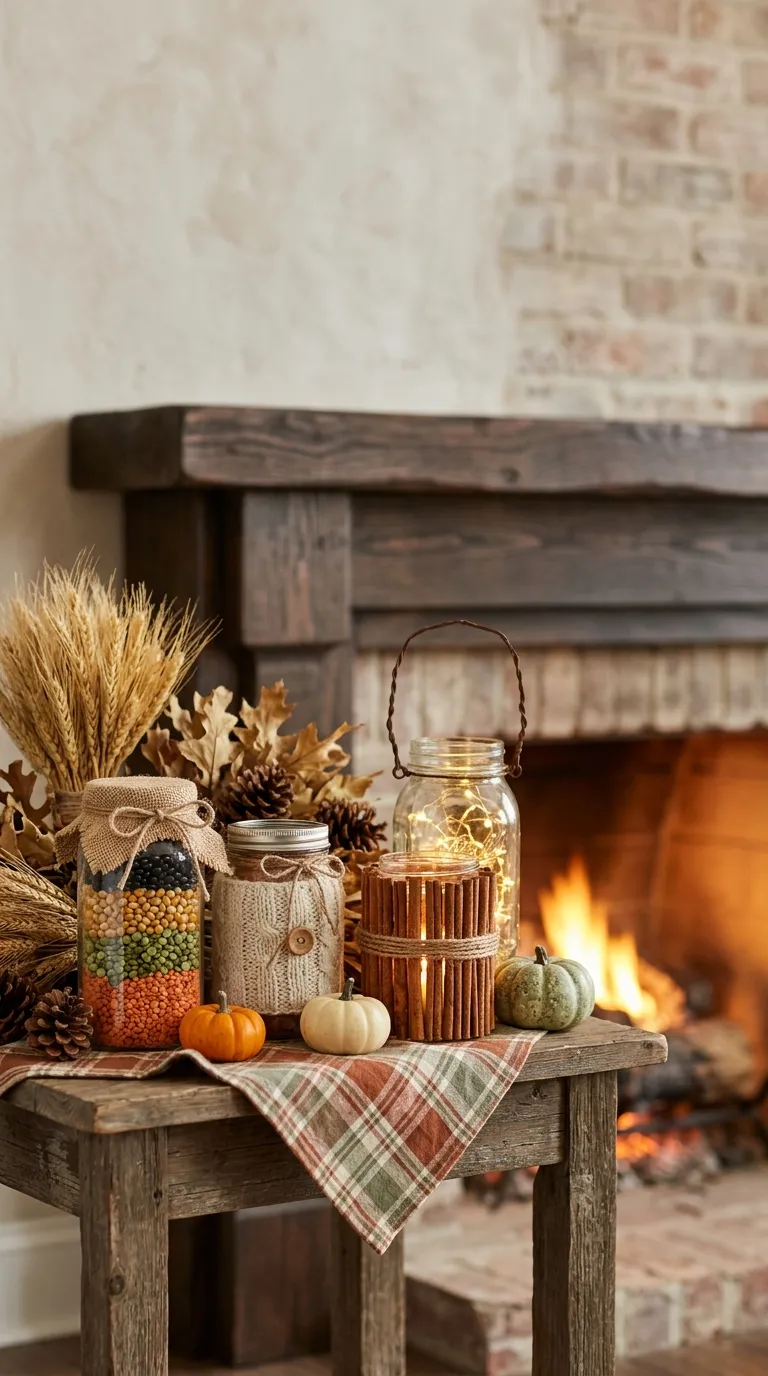
Glow makes any space feel special. Wrap a glass jar with jute twine, add a strip of lace, and drop in a battery-powered tea light. Instantly, you have a cozy lantern for a porch, mantel, or dinner table. I’ve noticed that three jars of different heights look better than a row of identical ones. Tie a small sprig of greenery to the twine for a fresh touch. Warm white LEDs feel like candlelight without the risk. The finished lanterns look rustic, soft, and welcoming, and they transform an ordinary evening into something relaxed and beautiful.
Small steps keep it neat. Wash the jar and remove sticky labels with warm soapy water. Wrap the twine tightly, starting at the neck, and secure each end with a dab of hot glue. Add a loop of wire or twine around the rim for a hanging handle. Use LED lights only, since twine and lace can burn near real flames. Place the lantern on a stable surface away from curtains. If you want color, brush a thin wash of white paint over the glass. The finished jars look charming, homey, and handmade, and they cost just a few dollars.
Wooden Bead Garland
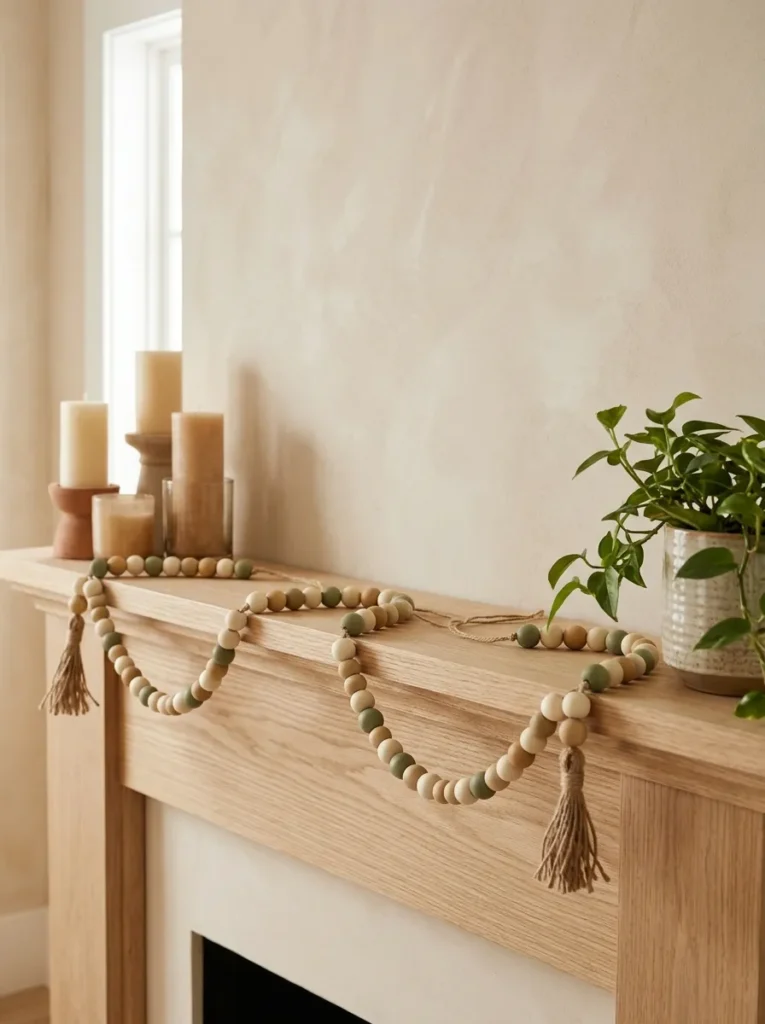
- Adds texture to mantels, shelves, and trees
- Beads are cheap and easy to paint
- Mix colors for a custom palette
- Takes about thirty minutes to make
Beads add instant farmhouse charm. Thread wooden beads onto thick twine, alternate natural wood with painted cream and sage pieces, and finish with a tassel at each end. I’ve made one of these while watching a movie, and the whole thing took about half an hour. Drape it across a mantel, wrap it around a lamp base, or hang it on a mirror. The soft colors blend with almost any style. The garland looks relaxed, textured, and calm, and it adds a handmade detail that makes a plain shelf feel finished without much money.
Preparation helps the strand hang well. Paint the beads first with acrylic, then let them dry on a skewer so the color covers evenly. Stiffen the end of the twine with tape, and the threading goes faster. Leave about fifteen centimeters of twine on each end for tassels. Tie a firm knot after the last bead, and trim loose threads. Vary bead sizes so the garland looks natural, not stiff. Store it flat in a box after the season. The finished piece looks soft, organic, and welcoming, and you can restyle it with new colors every year.
Floral Stem Wreath
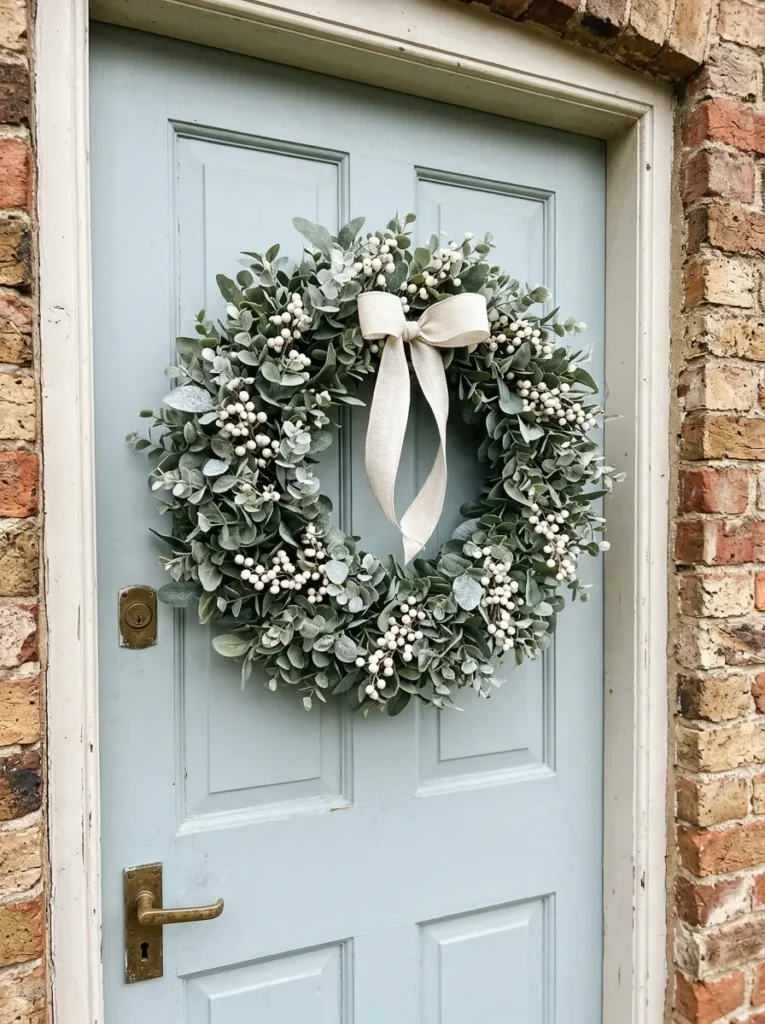
- Builds a full wreath from a few cheap stems
- Works for every season with simple swaps
- Looks lush and professional
- Easy for first-time crafters
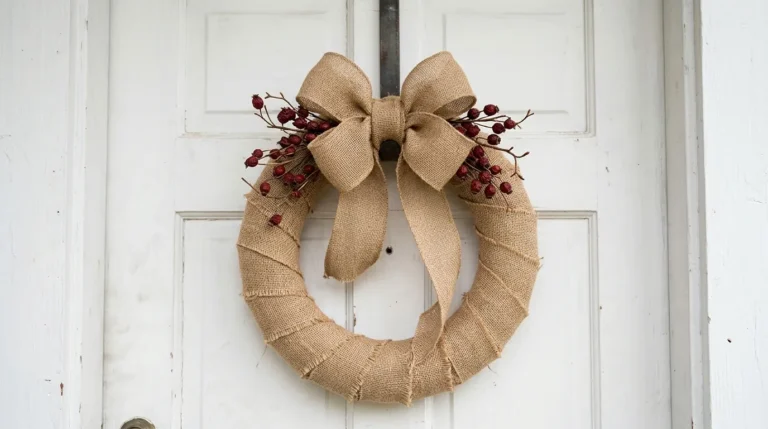
A wreath welcomes everyone before they knock. Buy faux greenery stems and a foam ring, cut the stems short, and tuck them in at one angle. The fullness comes from overlapping layers. I’ve seen first-timers finish a wreath in an hour, and it looked like it came from a florist. Eucalyptus, white berries, and ferns create a soft, natural look. Tie a cream ribbon at the top for a final touch. The wreath looks lush, fresh, and welcoming, and it saves you the high price that shops charge for similar designs.
Technique keeps it full. Cut each stem about fifteen centimeters long and push it into the foam at a slight angle, always in the same direction. Add the longest pieces first, then fill gaps with shorter stems and berries. Use a dab of hot glue on each stem to prevent shifting. Wrap floral wire around the back to create a hanger. Keep the wreath under a covered porch, since sun and rain fade faux leaves. Swap the ribbon or add small pumpkins or ornaments for each season. The finished wreath looks balanced, natural, and polished on any door.
Cutting Board Tray
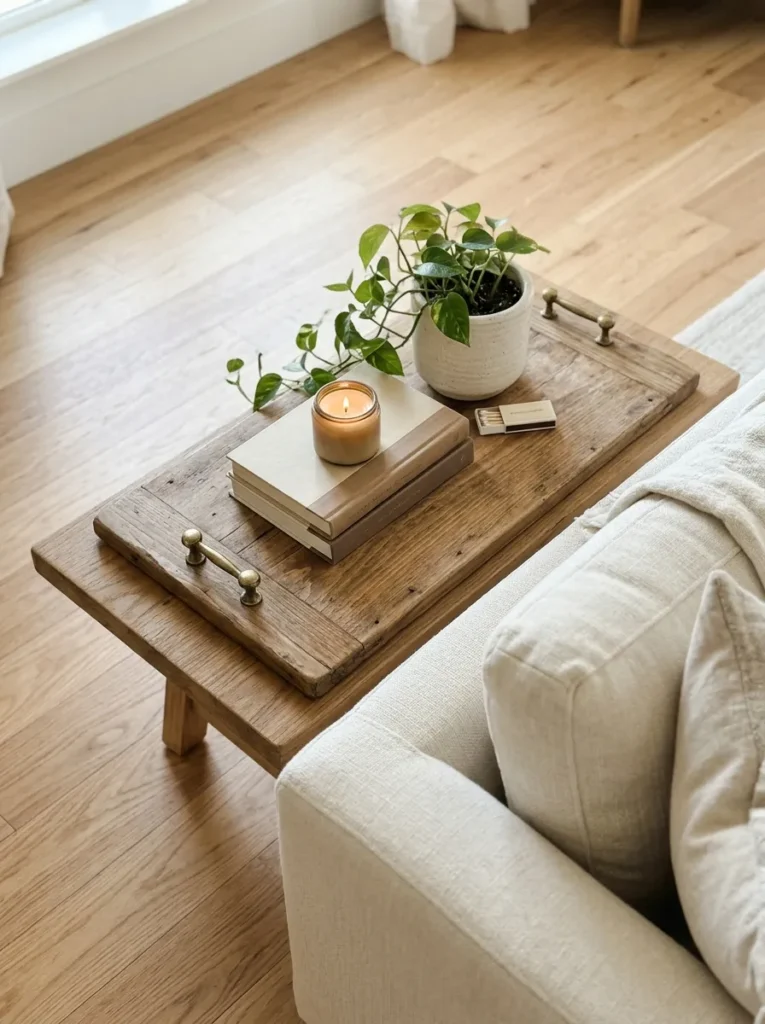
- Turns a kitchen board into a styled tray
- Two knobs make it easy to carry
- Corrals candles, remotes, and plants
- Finishes in about twenty minutes
A cutting board can serve more than dinner. Screw two brass knobs or drawer pulls onto each end, and you have a stylish serving tray. I’ve used one on a coffee table to corral remotes and a candle, and the clutter looked intentional. Choose a round or rectangular board in light wood, then add a coat of white wax or stain for a custom finish. The tray adds warmth and structure, and it makes a small surface feel organized. It looks chic, practical, and natural, and it costs a fraction of any boutique tray you might find.
Installation takes minutes. Mark the handle spots on each end, drill small pilot holes to avoid splitting, and attach the knobs with the screws that come with them. Sand the surface lightly and wipe on a thin coat of food-safe oil or wax for protection. Add felt pads underneath to protect your furniture. If you plan to serve food, use parchment paper on top. Keep the tray away from heavy moisture. The finished piece looks warm, tidy, and useful, and it ties together candles, books, and plants in a way that feels calm and designed.
Rattan Charger Mirror
- Creates a boho sunburst mirror cheaply
- Rattan adds warm woven texture
- Looks like a designer wall piece
- Glue-only project with no special tools
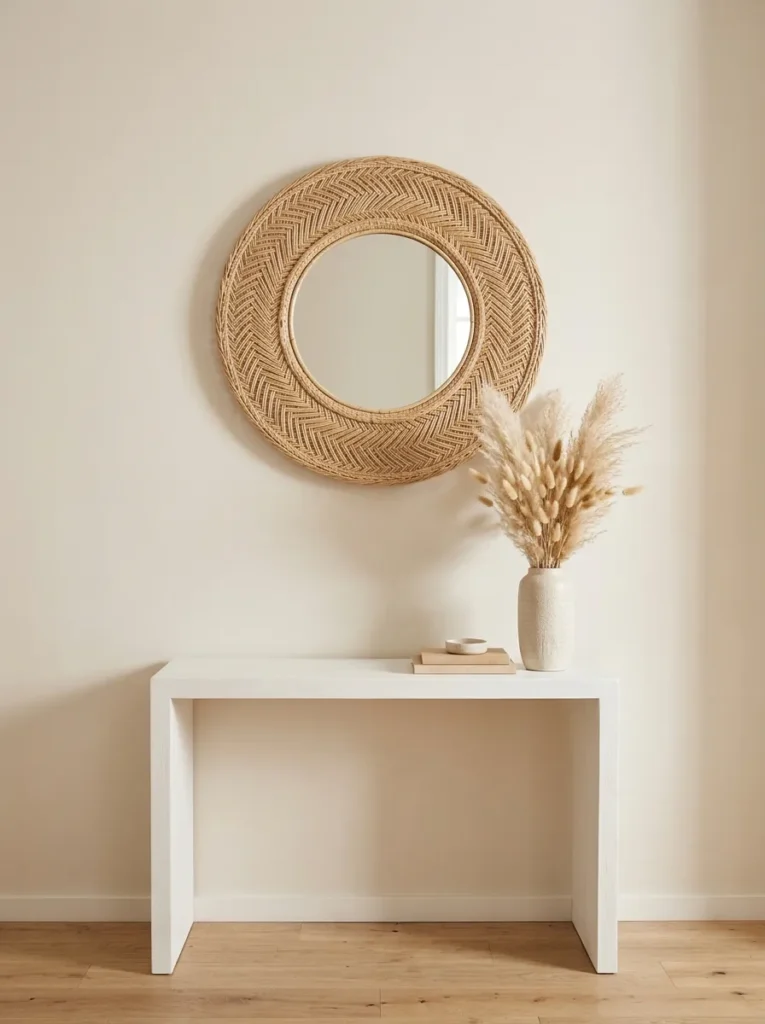
Boho mirrors usually cost a lot, but you can build one for a few dollars. Glue a small round mirror to the center of a woven charger, and the weave becomes a soft, textured frame. I’ve seen this idea turn a plain entry wall into a focal point instantly. Choose a charger that is at least twice the width of the mirror for a balanced look. Natural rattan pairs well with white walls and wood furniture. The finished piece looks airy, warm, and stylish, and it brightens any space by reflecting light while adding texture.
Gluing takes care. Clean the mirror and the center of the charger, then apply strong adhesive made for glass and wicker in a ring pattern. Press the mirror into place and weigh it down with a heavy book for several hours. Add a loop of wire or a small hanger at the back, glued to a sturdy spot. Keep the piece away from damp bathrooms, since woven fibers can warp. For a darker look, brush on a thin wash of brown stain. The finished mirror looks relaxed, sculptural, and welcoming, and it hangs beautifully above a console or bed.
Pressed Flower Frames
- Turns plain frames into botanical art
- Uses flowers from your garden or a bouquet
- Looks like a gallery print
- Costs less than any framed art
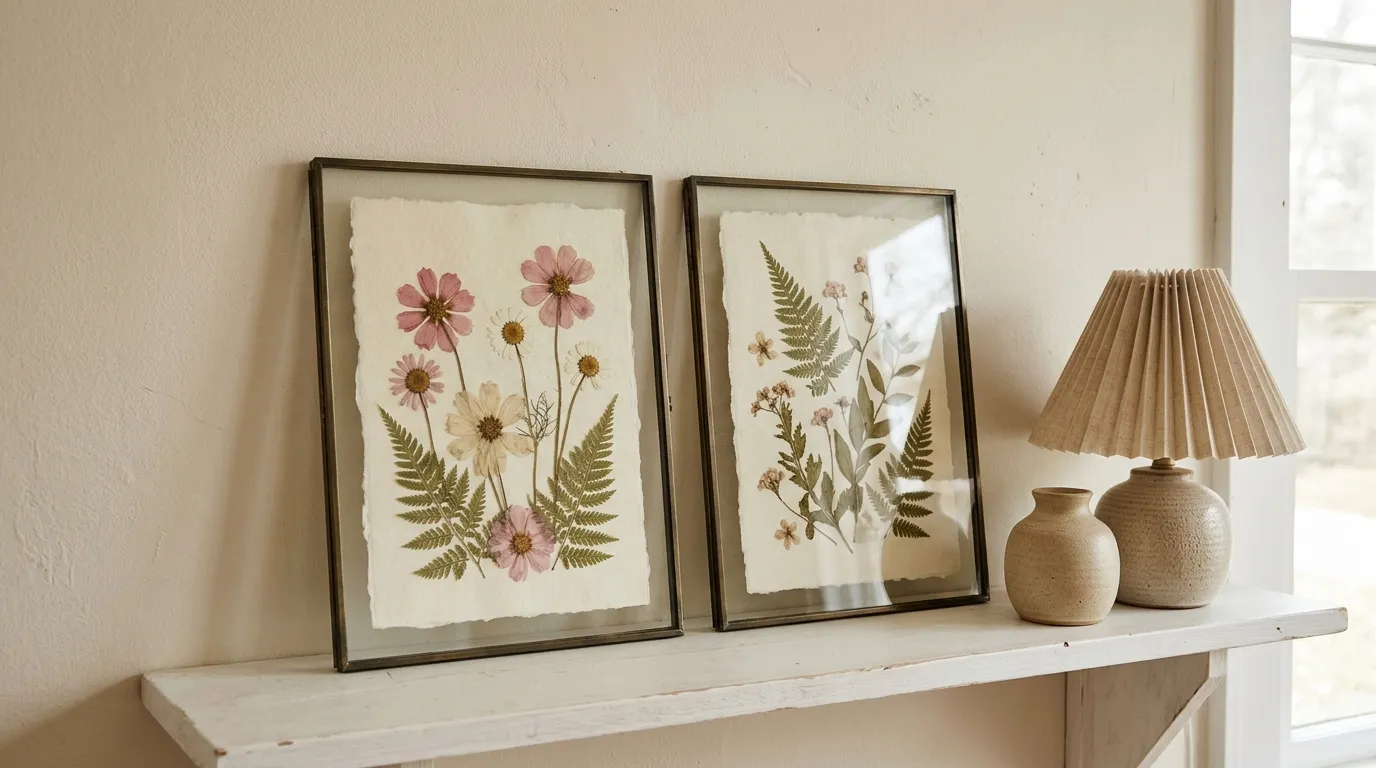
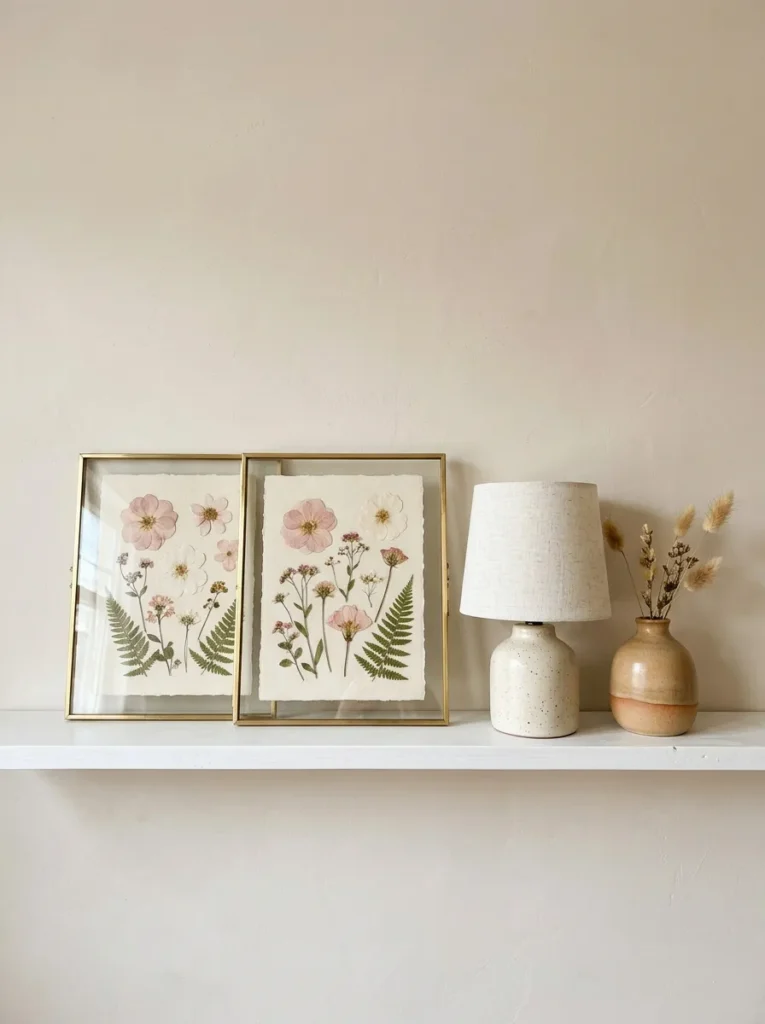
Flowers can become art that lasts. Press blooms between heavy books for about two weeks, then arrange them on cream paper inside a simple frame. I’ve tried this with garden cosmos and baby’s breath, and the results looked like a botanical print from a gallery. The soft colors suit bedrooms, hallways, and shelves. Choose thin flowers, since thick blooms stay lumpy. A double-glass frame makes the petals appear to float. It looks delicate, calm, and sentimental, and it lets you save a bouquet from a special day while decorating your walls for almost nothing.
Patience gives the best result. Place flowers between parchment sheets, close a heavy book, and stack another book on top. Check them after one week and replace damp paper if needed. When the petals feel dry and papery, handle them with tweezers. Arrange them in an open, natural shape, leaving empty space around the stems. A tiny dot of clear glue holds each piece. Keep the frame out of direct sun to protect the color. Add a handwritten date in small letters below. The finished piece looks soft, timeless, and personal, and it brings a quiet garden feeling indoors.
Brass Taper Holders
- Makes budget glass look like solid brass
- Gives a dinner table a luxe glow
- Pairs with cream or ivory tapers
- Takes just one can of spray paint
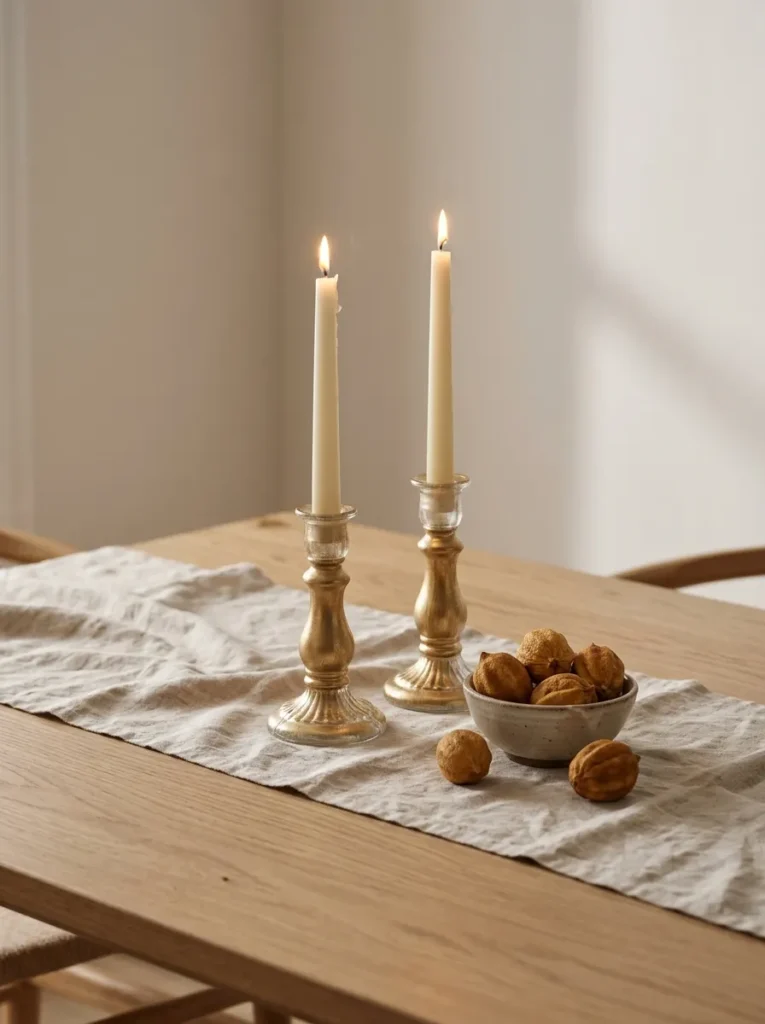
Gold makes simple things look expensive. Spray cheap glass candlesticks in brushed gold, and they look like antique brass. I’ve seen guests pick them up to check the weight, and they were surprised by how light they were. Use a primer first, then two thin coats of metallic paint. Pair them with cream tapers on a linen runner for a calm, elegant table. Odd numbers of candles, like three or five, look natural. The finished set looks warm, refined, and timeless, and it gives dinners a soft glow that makes every meal feel like an occasion.
Spray painting rewards patience. Work outdoors or in a ventilated space, and hold the can about twenty centimeters from the glass. Sweep the paint in light passes, and let each coat dry before adding another. For an aged brass look, dab a little dark wax on the surface and wipe it back. Seal with a clear topcoat to prevent flaking. Fit the tapers securely with a little museum putty or a dab of wax. Never leave burning candles unattended, and keep them away from fabric. The finished holders look rich, vintage, and polished.
Woven Basket Planter
- Hides plain plastic pots behind natural weave
- Adds warmth and texture to any corner
- Great for ferns, pothos, and faux plants
- Costs far less than a designer planter
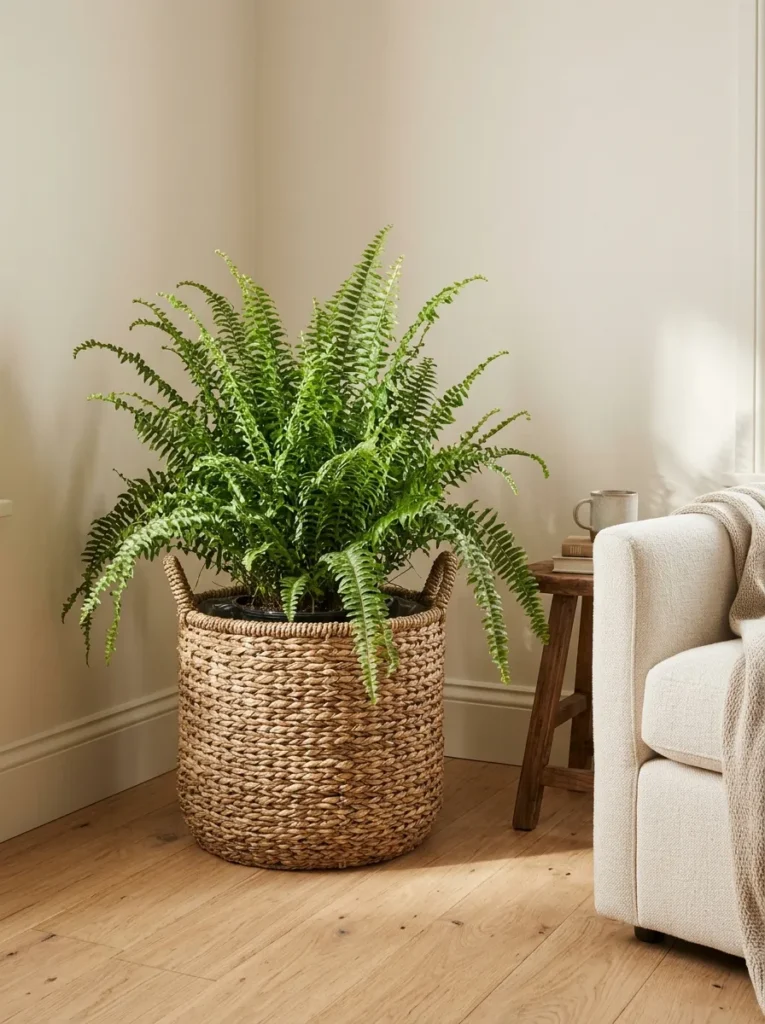
Plain plastic pots hide well in baskets. Slip a nursery pot into a woven basket, and the plant suddenly looks boutique. I’ve used this trick in a corner that felt empty, and it softened the whole room. Choose a basket slightly wider than the pot, so the weave frames the leaves. Seagrass, rattan, and cotton rope all look lovely. Add a tall fern or snake plant for height. The finished planter looks natural, relaxed, and cozy, and it costs far less than a ceramic floor planter. It also moves easily when you want to rearrange your room.
Protect the basket and the floor. Line the inside with a plastic bag or a plastic tray, so water never touches the weave. Keep the nursery pot’s drainage holes open, and place a saucer inside the liner. Water the plant in the sink, let it drain, then return it to the basket. Raise the pot with a small upturned bowl if the basket is too deep. Trim loose fibers with scissors. Place the basket away from heaters, which can dry out the weave. The finished piece looks lush, calm, and put together, and it makes every corner feel alive.
Tiered Tray Display
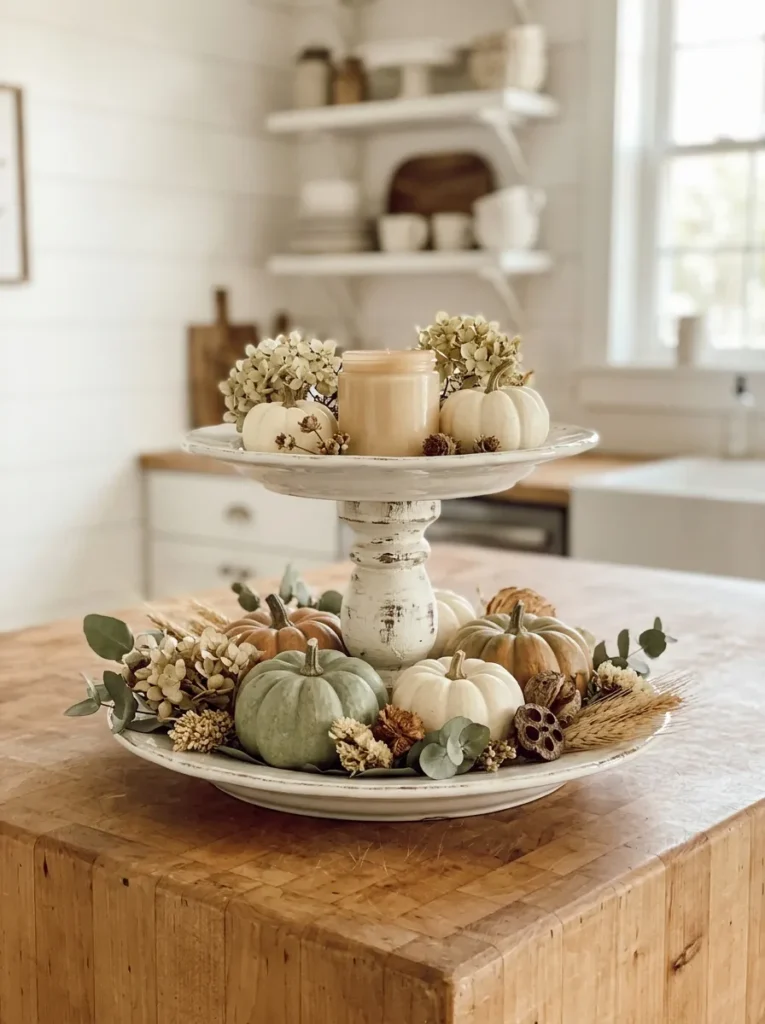
- Builds height with plates and candlesticks
- Perfect for seasonal styling
- Gathers small decor into one neat spot
- Easy to disassemble and store
Height adds style to any surface. Stack two plates of different sizes on glass candlesticks, glue them in place, and you have a tiered tray worth styling. I’ve seen this display carry everything from spring eggs to winter ornaments. Choose white, cream, or wood-look plates for a farmhouse feel. Arrange items in groups of three, and keep the largest at the bottom. The tray gathers small decor into one neat spot, so counters look clean. It feels charming, versatile, and balanced, and it changes with every season while using the same simple base.
Strong glue makes it sturdy. Use a strong adhesive for glass and ceramic, and press the candlestick to the center of each plate. Let it cure for a full day before you load it. Stack the second plate on top of the stem, checking that it sits level. Keep heavy items on the bottom tier and light pieces up high. If you plan to hold food, use a parchment liner. Hand wash gently, since glued joints dislike hot water. The finished tray looks layered and welcoming, and it turns simple items into a centerpiece you will use every season.
Marble Contact Trays
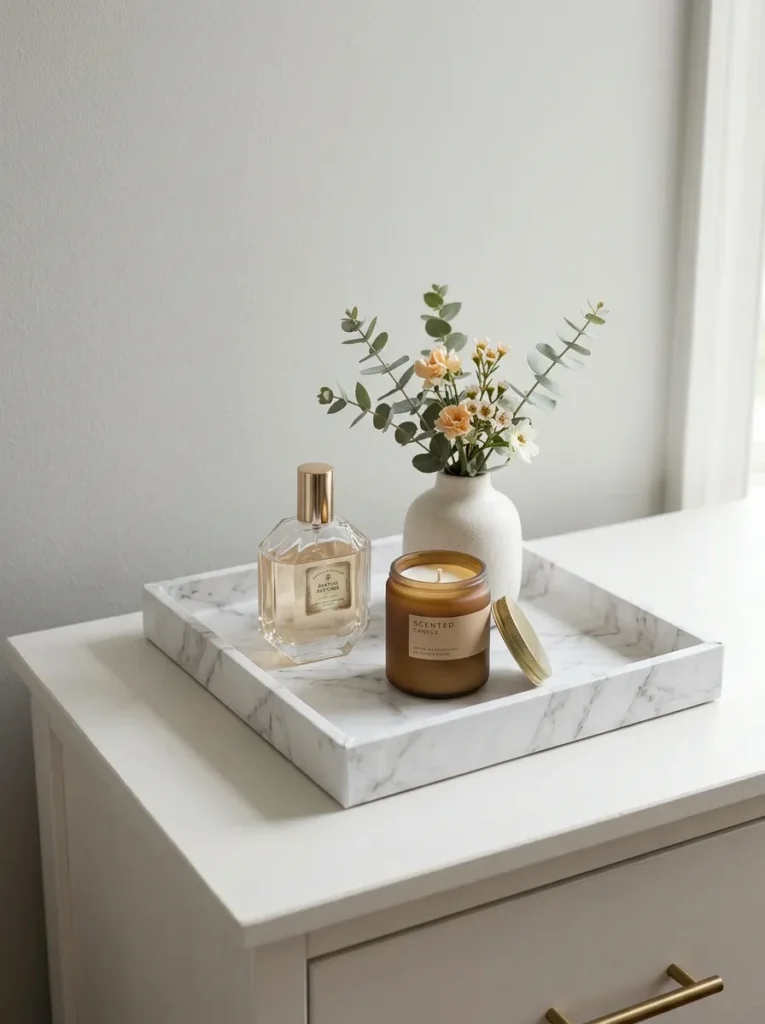
- Gives plastic trays a stone look
- Corrals perfume, jewelry, and candles
- Peels off cleanly if you change your mind
- Needs only a roll of contact paper
Marble looks luxe, and contact paper makes it affordable. Cover a plain plastic or wooden tray with white marble film, and it reads as polished stone from a few steps away. I’ve tried this on a bathroom tray, and friends assumed it was real marble. Group perfume, a candle, and a flower on top for a vanity vignette. Black marble pattern adds drama, while soft grey keeps things calm. The finished tray looks sleek, clean, and expensive, and it keeps small items organized in one neat spot, which makes any dresser or counter look calmer.
Smooth application is everything. Clean the tray with alcohol and let it dry. Cut the contact paper slightly larger than the tray base, peel back a corner, and press it down with a plastic card, moving slowly to avoid bubbles. A hair dryer on low heat softens the film around corners. Trim the edges with a craft knife, and wrap the rim for a clean finish. Choose a fine-veined pattern, since bold swirls look fake. Wipe with a damp cloth. The finished tray looks refined, polished, and modern, and it adds a high-end touch for a very small price.
Pom-Pom Garland
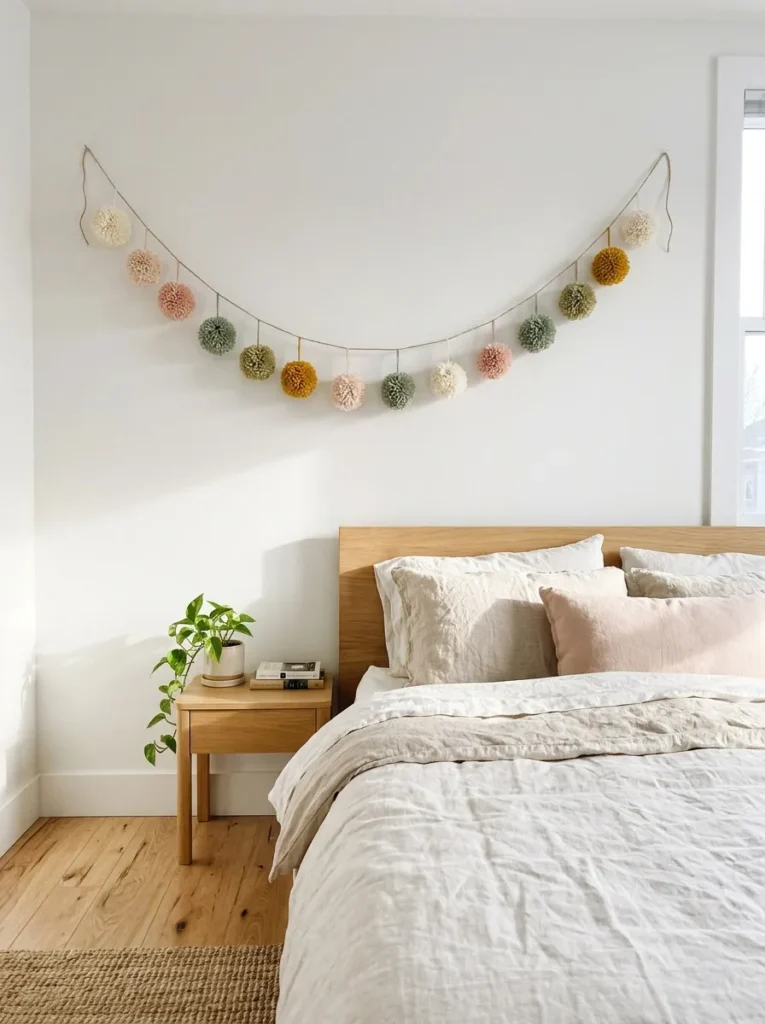
- Adds soft color and playful texture
- Uses leftover yarn and a fork
- Perfect for nurseries, dorms, and parties
- Easy to restyle in new color combos
Fluff makes a room feel friendly. Wrap yarn around a fork, tie the center, snip the loops, and you have a pom-pom. String a dozen along a cord, and the wall becomes soft and playful. I’ve made these with kids, and the whole project took one rainy afternoon. Use cream, blush, and sage for a calm look, or bright colors for a party. Space the pom-poms evenly, or cluster them in bunches. The finished garland looks cheerful, cozy, and handmade, and it adds color to a plain wall for the price of a few skeins of yarn.
Tight knots keep every pom-pom intact. Wind the yarn about forty times around the fork, slide a strong piece of yarn between the tines, and tie it twice. Cut the loops, fluff the ball, and trim it into a round shape. Thread each pom-pom onto a cord using a needle, and add a knot on each side to hold it in place. Vary the sizes by using two or three fingers instead of a fork. Hang the garland with removable hooks. The finished piece looks fluffy, sweet, and bright, and it suits nurseries, dorms, and party corners.
Monogram Letter Decor
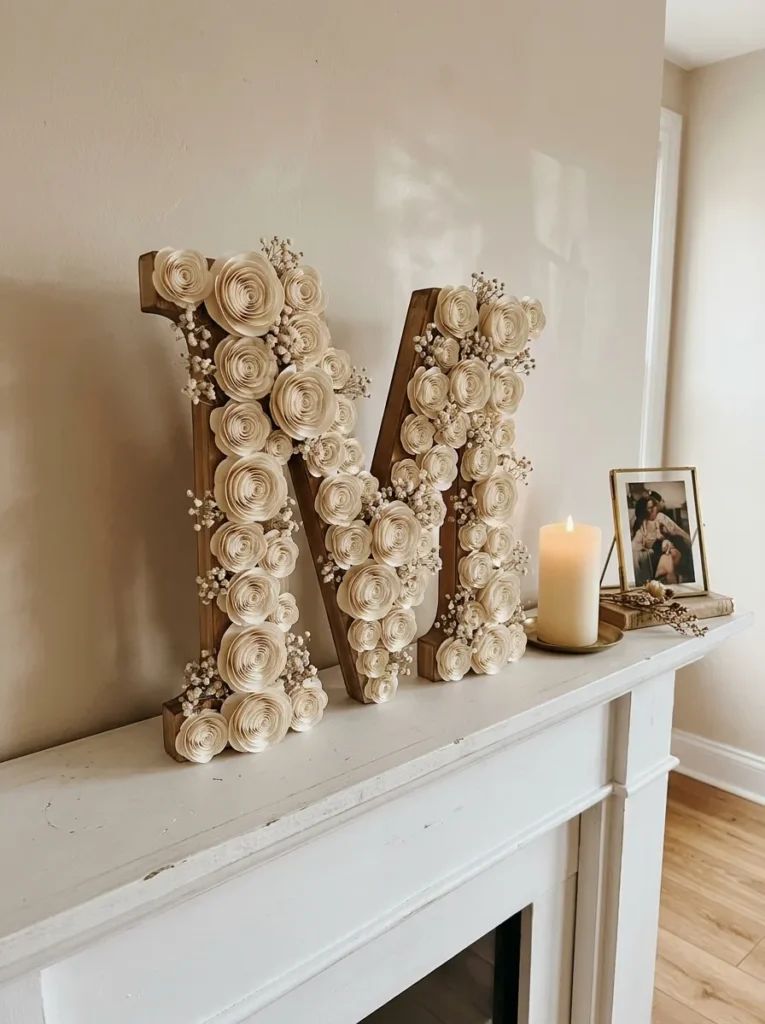
- Adds a personal initial to shelves and mantels
- Cover it with flowers, yarn, or fabric
- Works as a housewarming or wedding gift
- Customizable to any color palette
A single letter can say a lot. Cover a wooden or cardboard monogram with paper flowers, yarn, or burlap, and it becomes a personal piece of decor. I’ve seen this idea shine as a housewarming gift because it feels so thoughtful. Cream paper roses and dried baby’s breath create a soft, romantic look. Stand it on a mantel, shelf, or desk. Choose the first letter of your family name, or spell a short word with several. The finished letter looks sweet, handmade, and warm, and it brings a personal touch to a room for a very small cost.
Cover it carefully for a clean look. Paint the letter’s edges first in a color that matches your flowers. Roll strips of paper into small rosettes, and glue them in rows, starting at the outer edge. Fill gaps with smaller rosettes or dried stems. Work in sections so the glue doesn’t set before you press the pieces in place. Keep rosettes about the same size for a tidy surface. Seal with a light mist of clear spray to protect from dust. The finished monogram looks textured, soft, and special, and it stands proudly on any shelf.
Soap Dispenser Makeover
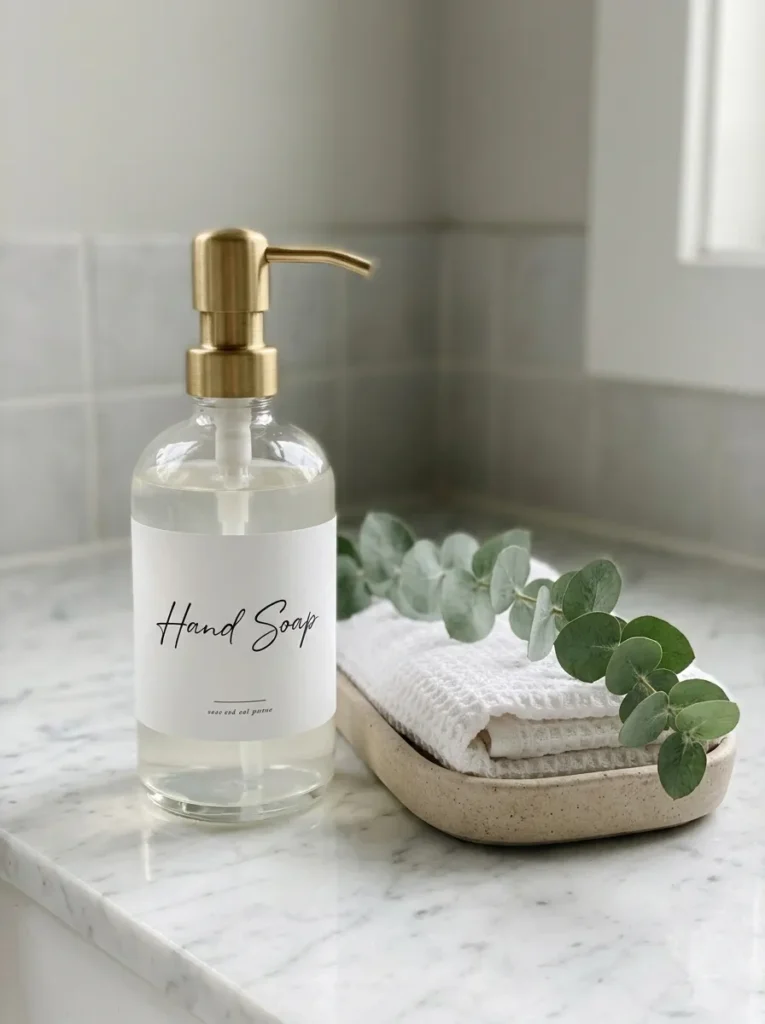
- Hides branded plastic bottles
- Looks like boutique spa decor
- Refillable and budget friendly
- A small change that calms a bathroom
Branded bottles make a bathroom look busy. Pour soap into a plain glass or ceramic dispenser, add a neat label, and the counter looks like a spa. I’ve swapped bottles this way, and the whole sink area felt calmer within minutes. Paint the pump top in matte gold or black for a custom detail. Use a handwritten tag or a printed label in simple lettering. Refill it from large bottles, which saves money. The finished dispenser looks clean, modern, and thoughtful, and it takes only a few minutes, which makes it a satisfying quick project.
Choose the right materials for lasting results. Use a waterproof label or vinyl sticker, since regular paper peels in humid rooms. Spray the pump with a light coat of metallic paint, and let it dry completely before reassembling. Clean the dispenser thoroughly before you fill it, and avoid mixing different soaps. Match your accents to other bathroom hardware, such as faucets or towel bars. Keep the dispenser on a small tray to catch drips and protect the counter. The finished set looks neat, calm, and polished, and it makes a bathroom feel like a small hotel retreat.
Glass Cloche Display
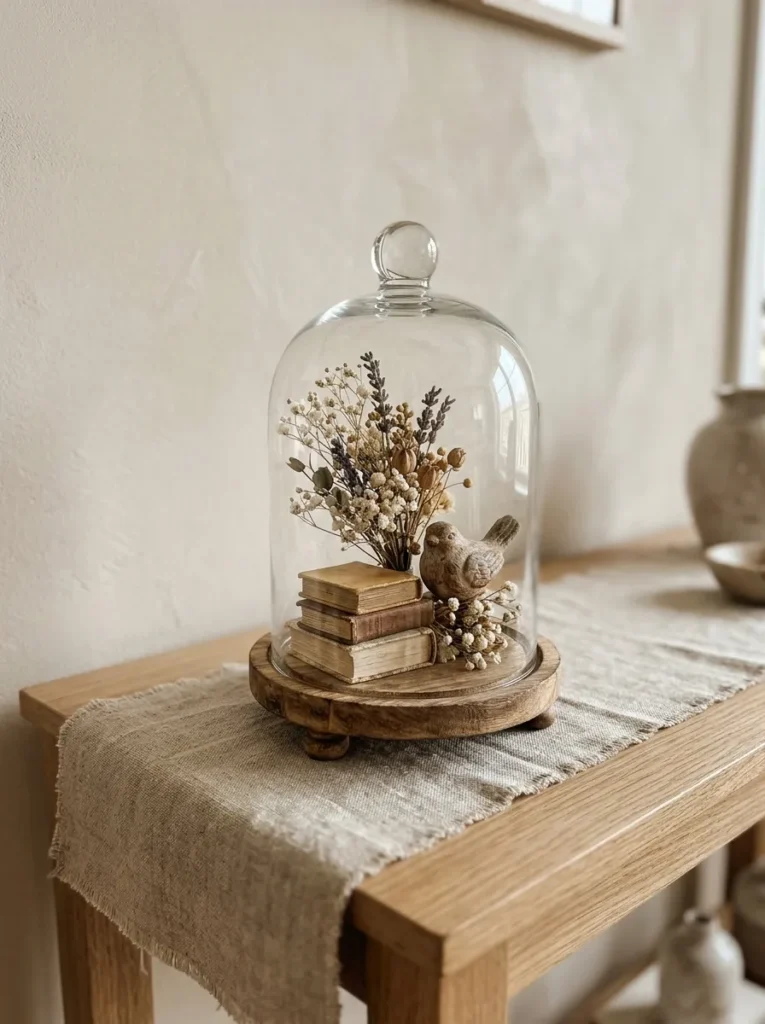
- Turns an upside-down glass bowl into a cloche
- Protects delicate dried flowers from dust
- Gives small treasures a museum feel
- Easy to restyle for each season
Small treasures look special under glass. Flip a clear glass bowl or vase over a wooden slice or plate, and you have a cloche that rivals pricey boutique ones. I’ve used one to display dried flowers, and it stayed dust-free for months. Fill it with seasonal items, like shells in summer, pinecones in winter, or a tiny bird figurine. The glass adds a gallery feeling to ordinary objects. Place it on a console, shelf, or coffee table. The finished display looks refined, curious, and calm, and it makes small things feel important without spending more than a few dollars.
Style it in layers for the best effect. Start with a base, such as a wood slice, a small tray, or a plate, then add a few items of different heights beneath the glass. Keep the arrangement simple, with three elements at most. Wipe the glass inside and out for a crystal-clear finish. Add a small piece of felt under the base to protect furniture. Rotate the contents every season so the display always feels new. Handle the glass carefully, since it can chip. The finished cloche looks elegant, tidy, and collected, and it gives your shelf a museum-quality touch.
Conclusion
Beautiful decor doesn’t have to cost much. It only needs a little creativity and a few simple supplies. Whether you start with a pedestal bowl, a mirror gallery, or a pressed flower frame, these Dollar Tree DIY crafts prove that small budgets can still create big style. I’ve seen how small changes like these can completely shift the way a space feels. Save this post on Pinterest, try one idea this weekend, and share it with a friend who loves a good budget makeover. Your next favorite piece of decor is only a few dollars away.