15 DIY Paper Plate Crafts for Kids for Every Season
DIY paper plate crafts for kids turn a 9-inch plate into a bunny, a snowman, or a sun using paint, paper scraps, and glue you likely already own. This guide gives you 15 seasonal projects, each with simple steps, a skill it builds, and a shopping list, so you can plan a year of rainy afternoons.
A paper plate is a blank, round canvas with a built-in border. It takes paint without fuss and holds its shape when little hands press and pull. There’s a hushed, absorbed quality to a table covered in cotton balls and glitter glue, when the only sound is a child narrating their own creation. Cleanup is a trash bag, not a project.
Here are 15 ideas worth saving, and stealing.
Why DIY Paper Plate Crafts for Kids Work So Well
Paper plate crafts grew out of mid-20th-century classroom art. Teachers needed cheap, uniform, disposable bases, and the plate’s circle suggested faces, suns, wreaths, and bodies immediately. They differ from cardstock crafts because the plate’s slight curve and rim give projects dimension without any folding skill.
The core materials are uncoated white 9-inch plates, washable tempera paint, jumbo craft sticks, felt, craft foam, pipe cleaners, cotton balls, tissue paper, and self-adhesive googly eyes. Primary reds, sunshine yellow, and ocean blue read best on white, while pastel pinks and mint suit spring projects.
These crafts are trending because families want screen-free, low-cost activities that fit around school schedules, and “seasonal crafts for kids” searches spike every few months as holidays and weather shift. Plates are also easy to buy in bulk and easy to recycle.
Small spaces work well. A card table, a wipeable placemat, and a shoebox of supplies are enough. Prioritize one messy step per session, such as painting only, and let drying happen overnight.
| Element | Detail |
|---|---|
| Philosophy | Simple base, big imagination, minimal cleanup |
| Key Materials | Uncoated paper plates, washable tempera, felt, craft foam, pipe cleaners |
| Key Colors | Sunshine yellow, ocean blue, pumpkin orange, snow white, spring pink |
1. Paper Plate Bunny Face with Cotton Ball Fur (Spring)
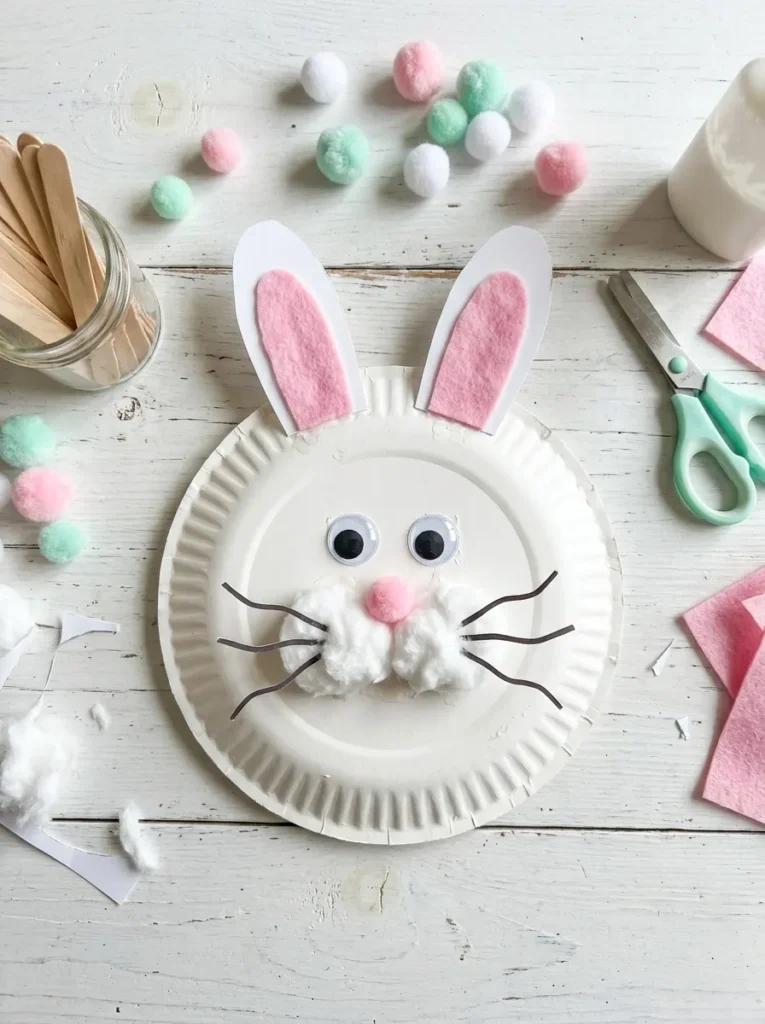
Vibe: Soft, like a spring morning you can hold in your hands.
Why it works: Gluing cotton balls builds the pincer grip toddlers need for writing, and the texture contrast between fluffy fur and a flat plate gives the bunny instant personality.
How to make it: Paint the plate white, glue two felt ears to the back top edge, then dot glue along the cheeks and press cotton balls on. Finish with a pink pom-pom nose.
💡 Quick Win: Use a cotton swab to dab glue, so little fingers stay clean.
Shop the Look
| Product |
|---|
| Uncoated white 9-inch paper plates, 100 pack |
| Jumbo cotton balls, 200 count |
| Pink craft pom-poms, assorted sizes |
| Self-adhesive googly eyes, assorted sizes |
| White pipe cleaners for whiskers |
Also view: 17 Fall Paper Crafts to Make for Cozy Autumn Decor
2. Sunshine Plate with Paper Strip Rays (Summer)
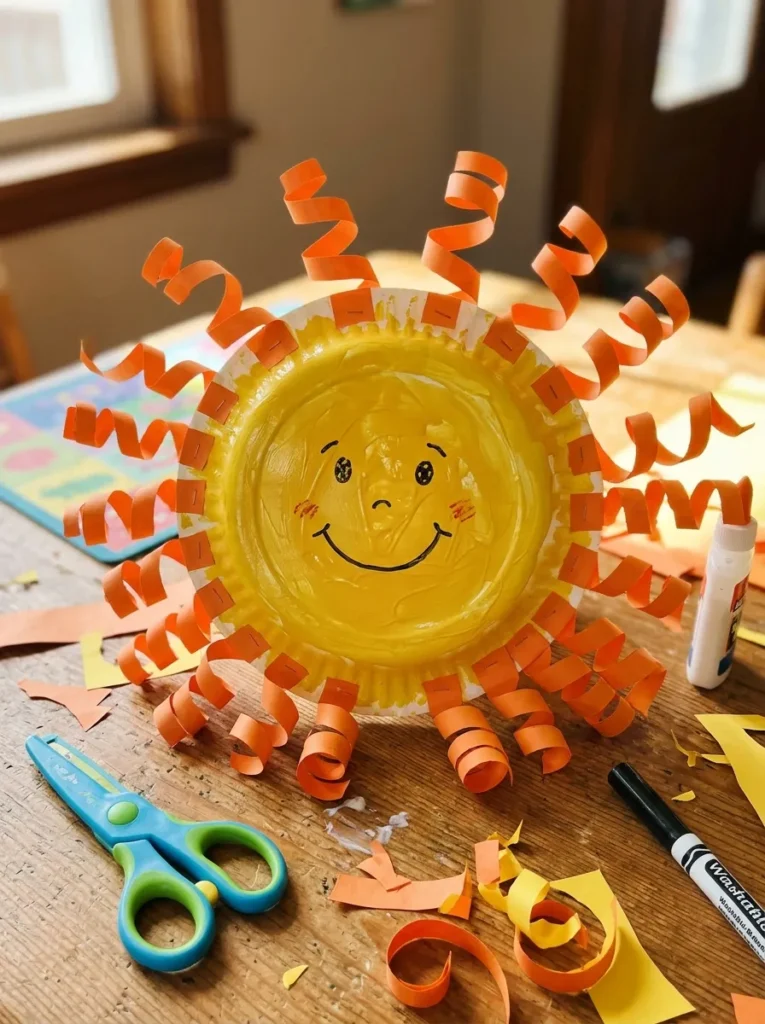
Vibe: Sun-warmed, like the project already smells like summer.
Why it works: Cutting and curling paper strips practices scissor control and hand strength, and the curl gives the flat plate a dimensional halo that looks designed rather than drawn.
How to make it: Paint the plate yellow, cut orange and yellow paper into one-inch strips, curl each around a pencil, and glue them around the back of the rim. Draw a face with a black marker.
Shop the Look
| Product |
|---|
| Orange and yellow construction paper pack |
| Orange washable tempera paint |
| Round-tip kids’ scissors, set of 12 |
| Jumbo glue sticks, 12 count |
| Black washable markers, broad tip |
3. Autumn Leaf Wreath with Tissue Paper Collage (Fall)
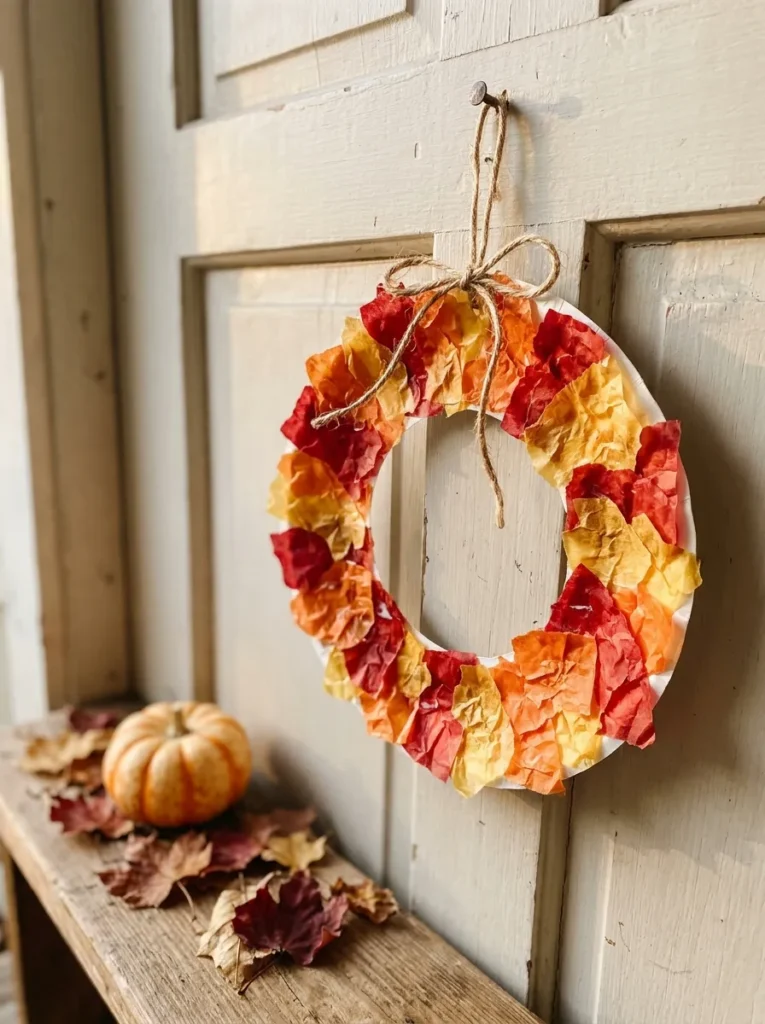
Vibe: Layered, like a pile of fallen leaves you got to keep.
Why it works: Tearing tissue paper, rather than cutting it, works fine motor muscles without needing scissor skills, and overlapping translucent layers creates new colors where they meet.
How to make it: An adult cuts out the center of the plate to make a ring. Kids brush white glue on the ring and press torn tissue pieces overlapping until it’s covered, then loop twine through the top.
💡 Quick Win: Cut the center ring ahead of time so the group starts gluing immediately.
Shop the Look
| Product |
|---|
| Autumn tissue paper squares, assorted |
| Clear-drying white school glue |
| Wide kids’ paintbrush set, 10 count |
| Red, orange, and yellow foam leaf shapes |
| Natural jute twine for hanging |
4. Fluffy Snowman Face with Felt Hat (Winter)
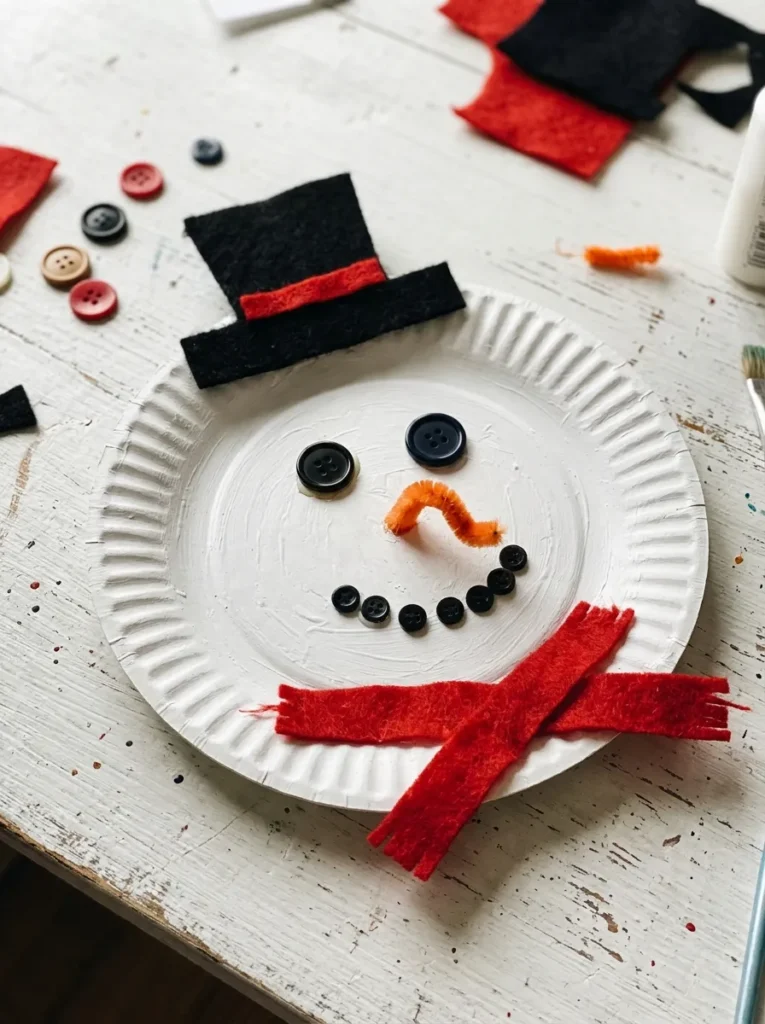
Vibe: Hushed, like the first quiet snowfall of the year.
Why it works: Layering felt over paint adds texture contrast, and choosing between buttons, markers, or stickers for the face teaches kids that the same character can look completely different.
How to make it: Paint the plate white, glue a black felt rectangle across the top for a hat, and add button eyes, a chenille-stem nose, and a strip of fabric as a scarf along the bottom.
Shop the Look
| Product |
|---|
| White washable tempera paint |
| Black felt sheets, 12-count pack |
| Orange chenille stems |
| Assorted flat buttons, mixed colors |
| Red fleece fabric scrap strips |
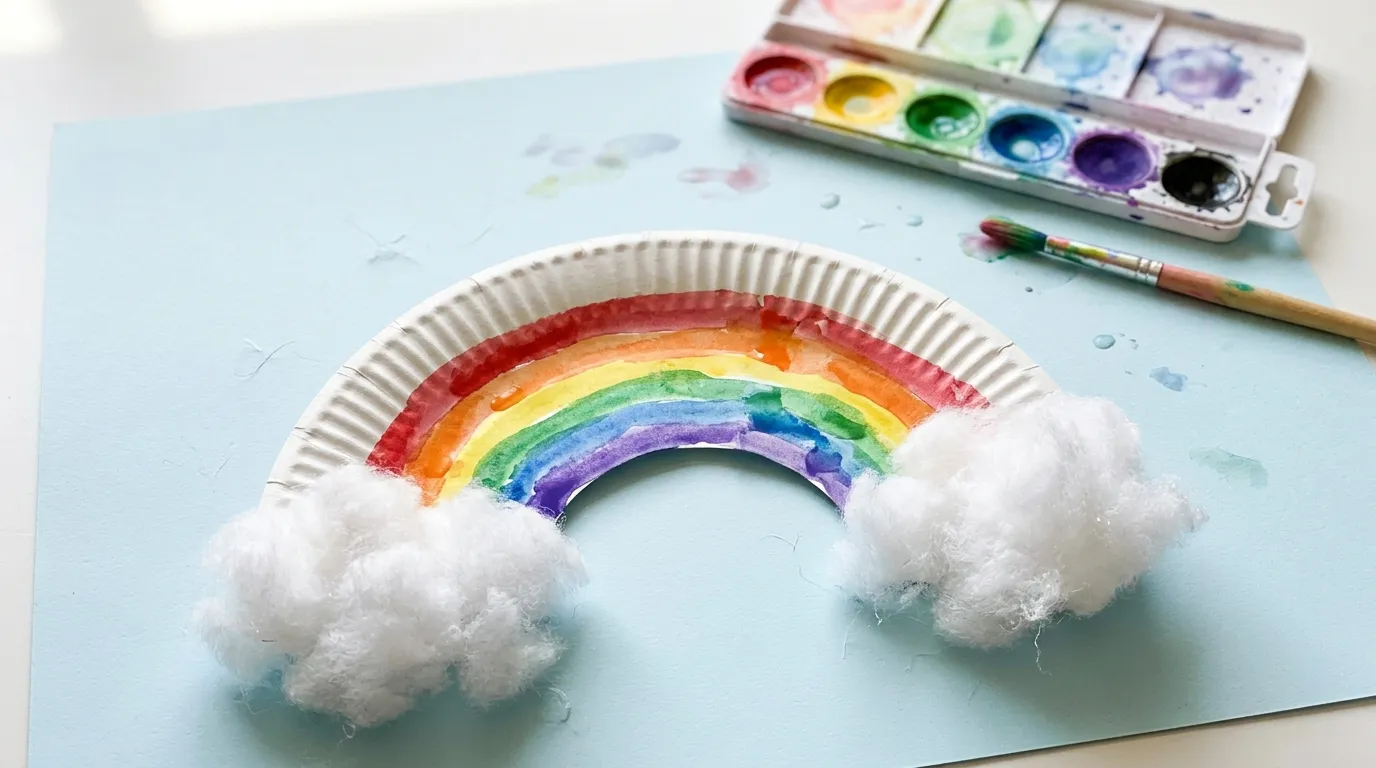
5. Rainbow with Fiberfill Clouds (Spring)
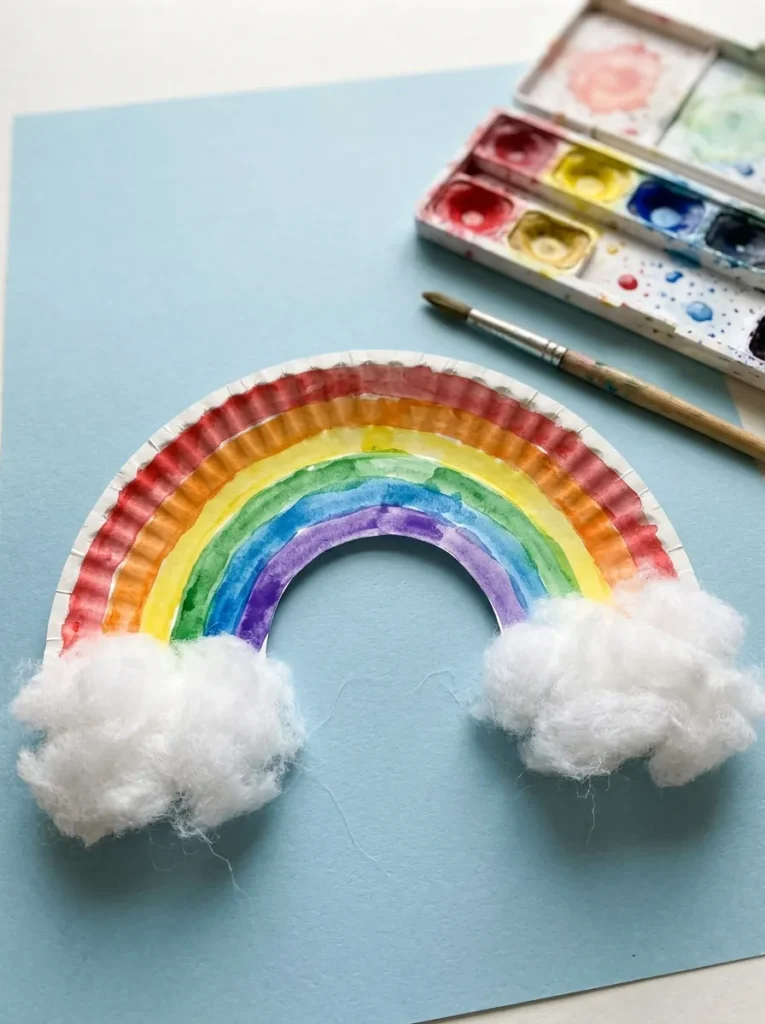
Vibe: Luminous, like the sky right after rain.
Why it works: Painting stripes in a fixed color order introduces sequencing and color mixing, and the soft clouds give contrast against crisp painted bands.
How to make it: Cut a plate in half, paint curved stripes from the outside in using red, orange, yellow, green, and blue, then glue fiberfill clouds at both bottom corners. Tape a ribbon on the back to hang it.
💡 Quick Win: Pre-moisten a watercolor set so colors flow smoothly on the first brush stroke.
Shop the Look
| Product |
|---|
| Washable watercolor paint set, 8 colors |
| Polyester fiberfill stuffing, 1 lb bag |
| Rainbow ribbon streamers, 7 colors |
| Single hole punch, kid-friendly |
| Chunky yarn for hanging |
6. Dangling Jellyfish with Ribbon Tentacles (Summer)
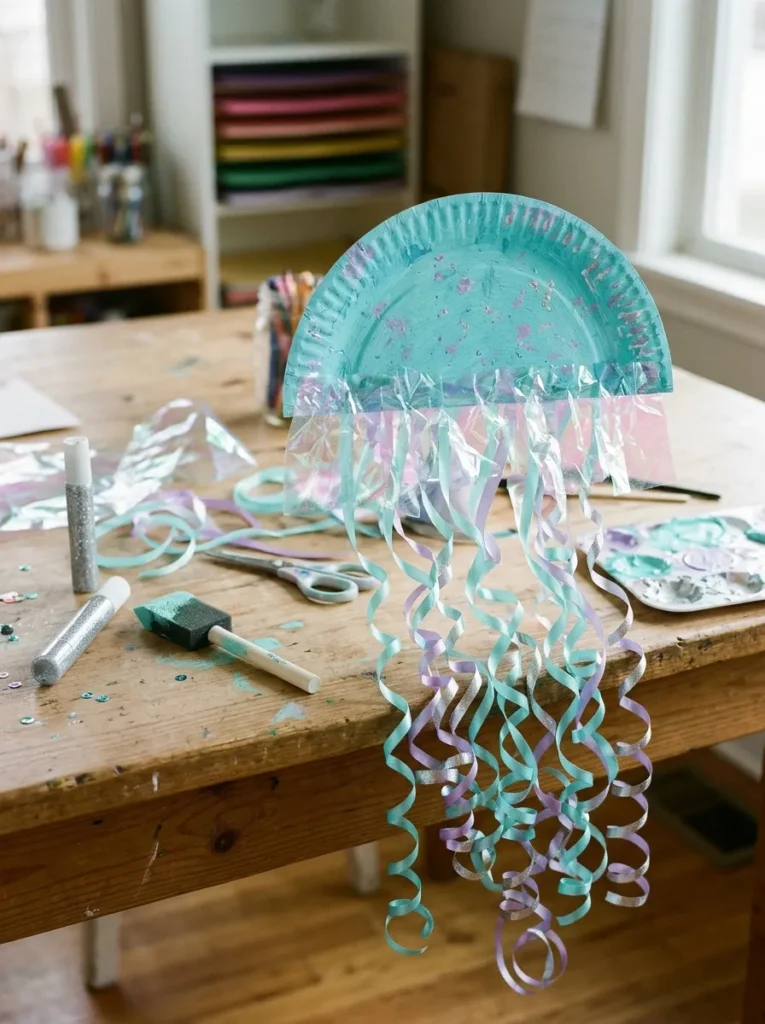
Vibe: Floating, like a creature drifting through slow green water.
Why it works: Dangling elements add movement, and kids watch the tentacles sway, which turns a static craft into a toy that responds to breath and air.
How to make it: Paint a half plate aqua, glue a strip of iridescent cellophane across the curve, and tape curled ribbon strands to the flat edge. Draw eyes and add glitter spots.
Shop the Look
| Product |
|---|
| Iridescent cellophane wrap roll |
| Curling ribbon, ocean blue assortment |
| Foam paintbrushes, 2-inch, 10 count |
| Glitter glue pens, 6-pack |
| Glue dots roll, permanent |
7. Painted Pumpkin with Twisted Streamer Ribs (Fall)
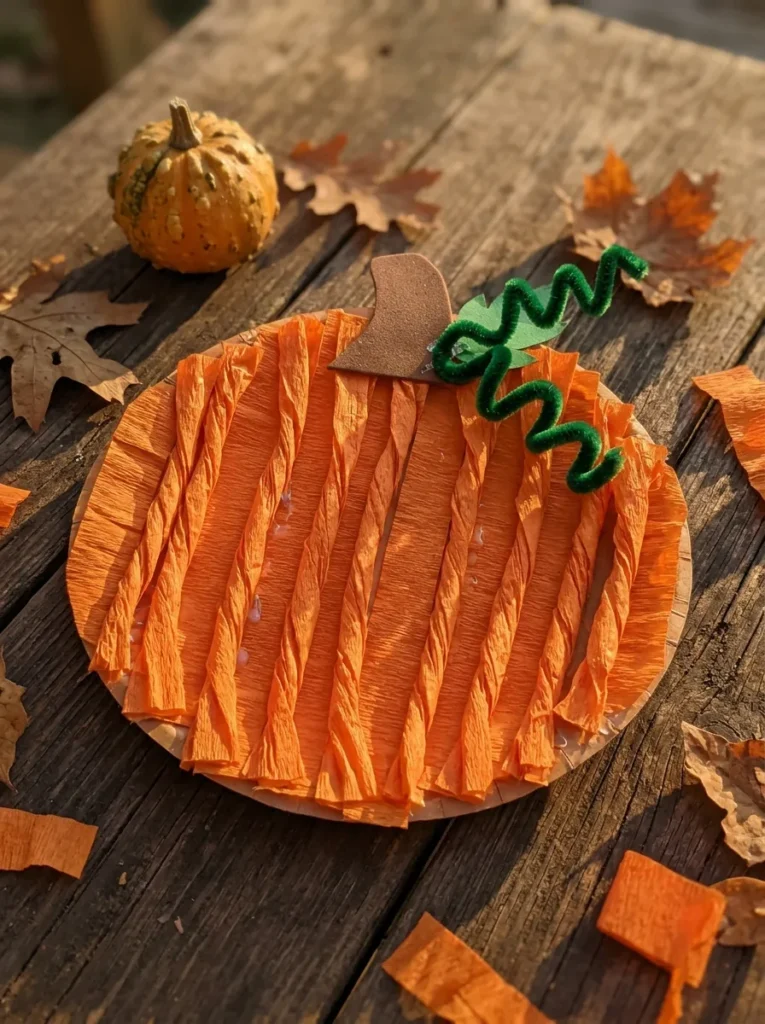
Vibe: Grounded and harvest-warm, like a farm stand in October.
Why it works: Twisting crepe paper builds bilateral coordination, using both hands in opposite directions, while the ribbed lines mimic real pumpkin segments.
How to make it: Cut orange crepe into long strips, twist each into a rope, and glue them in curved lines from top to bottom across the plate. Add a brown foam stem and wind a green chenille vine around a pencil.
💡 Quick Win: Pre-twist a handful of streamers before craft time so kids can focus on gluing.
Shop the Look
| Product |
|---|
| Orange crepe paper streamer rolls |
| Green chenille stems |
| Brown craft foam sheets |
| Mini brass paper fasteners |
| Washable black paint pens |
8. Popsicle Stick Snowflake on a Blue Plate (Winter)
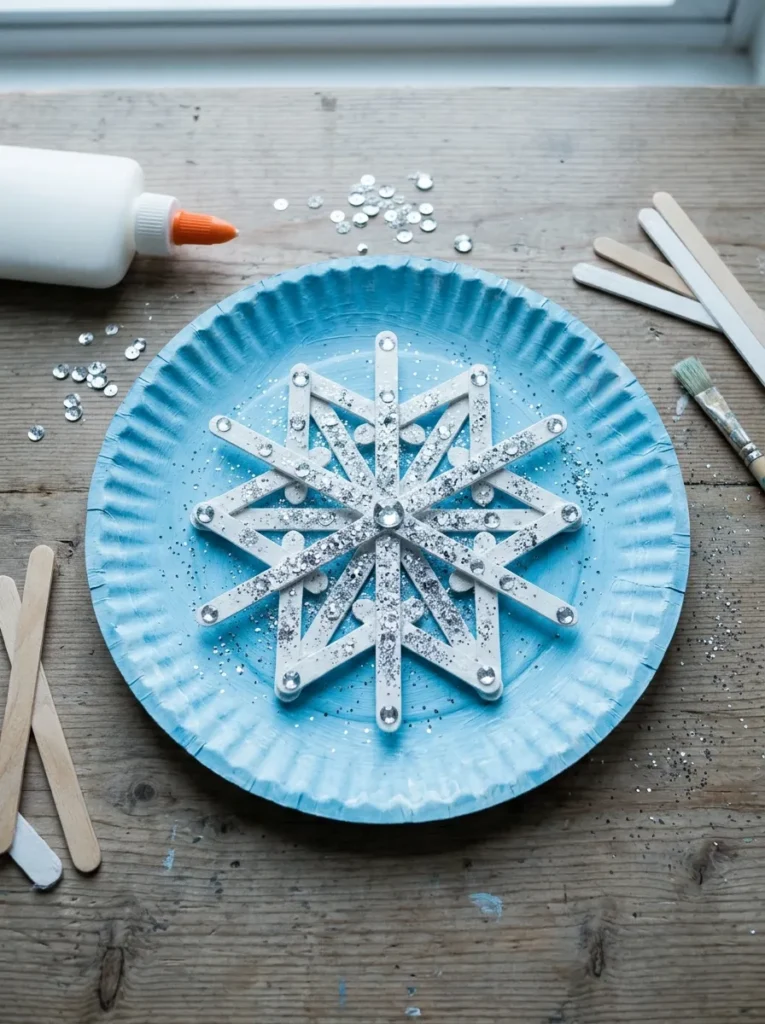
Vibe: Crystalline, like frost forming across a window.
Why it works: Arranging sticks in a radial pattern teaches symmetry, and the contrast between the dark blue plate and white sticks makes even a wobbly snowflake look striking.
How to make it: Paint the plate blue, glue three craft sticks crossing at the center like a star, then add small sticks at the tips. Decorate with faux pearl gems and a shake of glitter.
Shop the Look
| Product |
|---|
| Jumbo craft sticks, 200 count |
| Blue iridescent glitter shaker |
| Silver metallic paint markers |
| Clear fishing line for hanging |
| Faux pearl adhesive gems |
9. Spotted Ladybug with Pipe Cleaner Antennae (Spring)
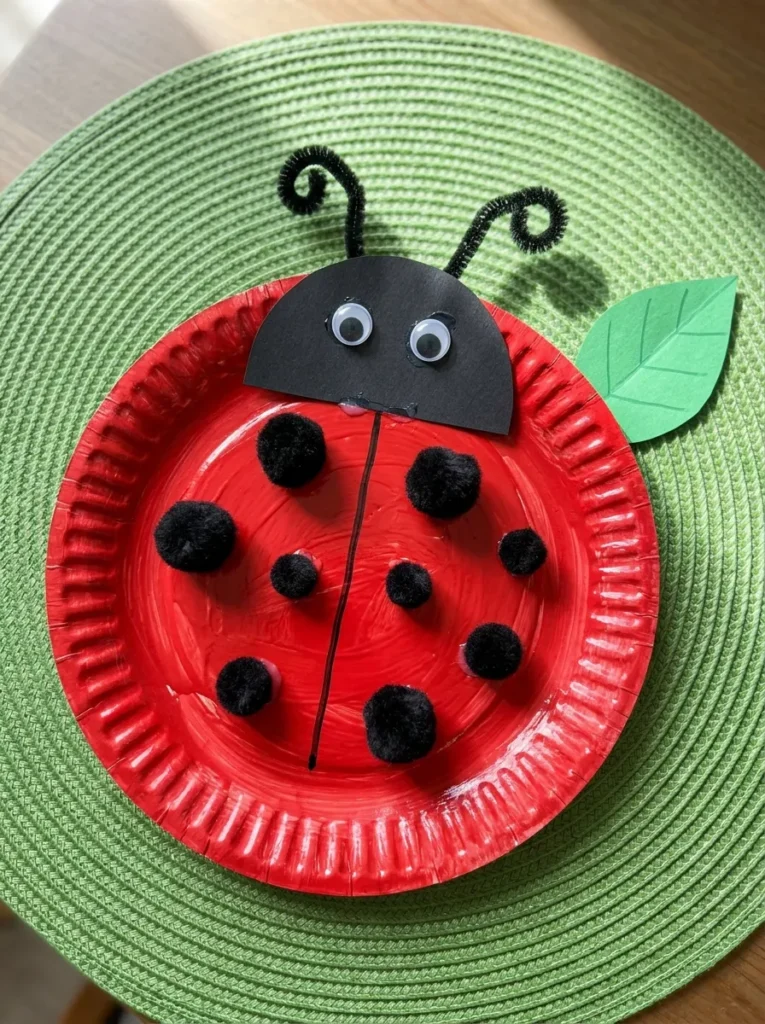
Vibe: Bright and busy, like a garden in full bloom.
Why it works: Counting spots as they’re glued reinforces one-to-one correspondence, and the bold red-and-black contrast is one of the strongest color pairings for young children’s visual attention.
How to make it: Finger-paint the plate red, fold it in half slightly, then glue a black paper circle at one end for the head. Press on black pom-pom spots and tuck in curled pipe cleaner antennae.
💡 Quick Win: Use a hole punch on black paper to make perfect spots instantly.
Shop the Look
| Product |
|---|
| Red washable finger paint |
| Black craft pom-poms, medium |
| Wiggle eyes, 12mm black |
| Black pipe cleaners |
| Black paper hole-punch dot circles |
10. Sea Turtle with Sponge-Stamped Shell (Summer)
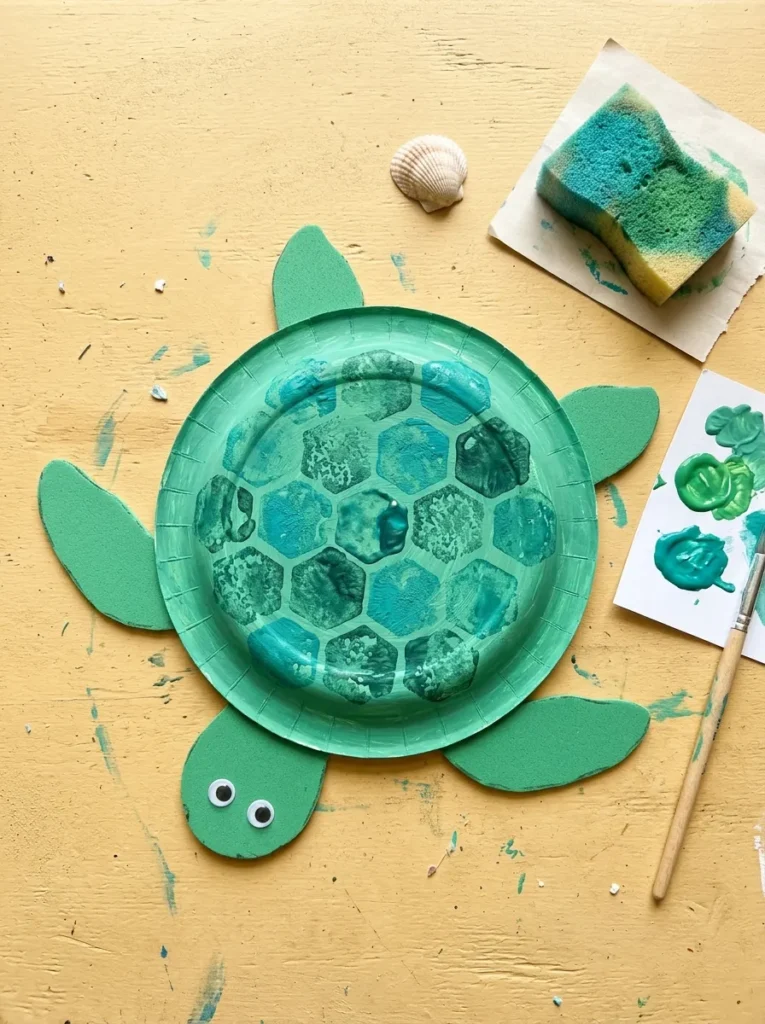
Vibe: Slow and sea-salted, like a long afternoon at the shore.
Why it works: Stamping with a sponge shape introduces pattern repetition, and slightly smudged prints give each shell its own character, which supports the idea that there’s no wrong way to make art.
How to make it: Paint the plate green and let it dry, then dip a hexagon sponge stamp in darker green paint and press it across the middle. Glue four foam flippers and a head to the edges.
Shop the Look
| Product |
|---|
| Green washable tempera paint |
| Green craft foam sheets |
| Ocean-animal sponge stamp set |
| Craft glue tape runner |
| Yellow felt shell-shaped cutouts |
11. Wide-Eyed Owl with Layered Feathers (Fall)
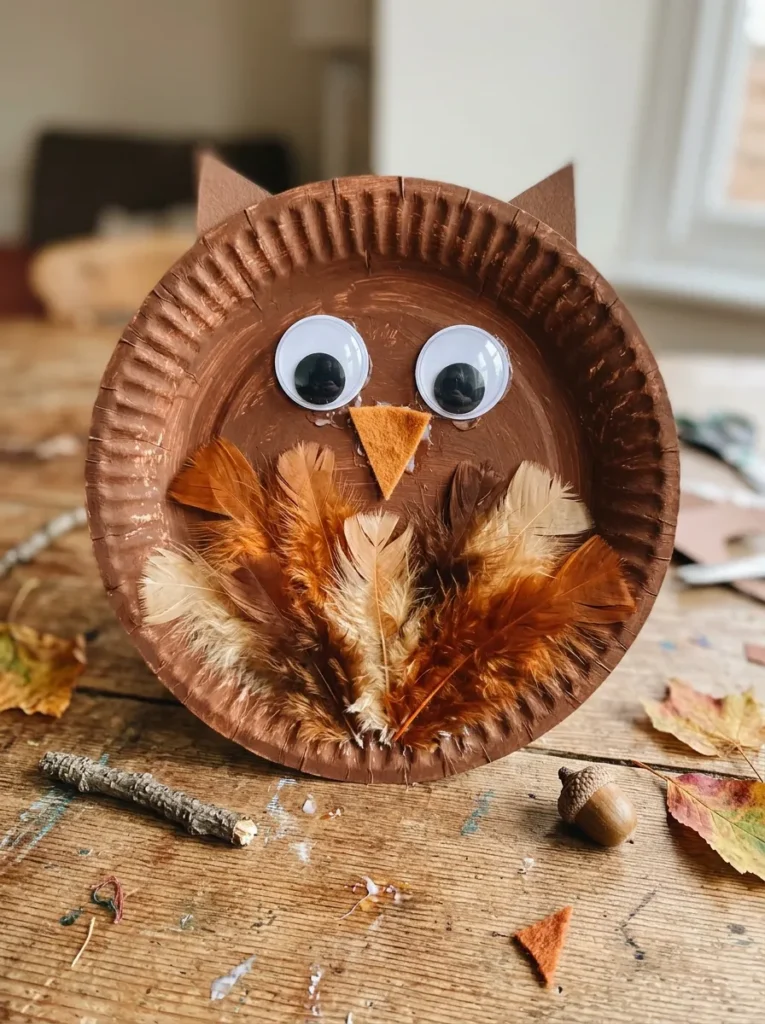
Vibe: Cozy, like a sweater that watches over you.
Why it works: Layering feathers from bottom to top builds sequencing skills, and the oversized eyes give the owl a recognizable face even if the rest of the craft is abstract.
How to make it: Paint the plate brown, fold two top corners down to make ear tufts, then glue rows of feathers across the lower half, working from the bottom up. Add large eyes and a felt beak.
💡 Quick Win: Tacky craft glue holds feathers better than a glue stick.
Shop the Look
| Product |
|---|
| Autumn craft feathers, assorted colors |
| Large 25mm googly eyes |
| Orange felt sheets |
| Tacky craft glue, 8 oz |
| Brown kraft paper lunch bags |
12. Waddling Penguin with Felt Belly (Winter)

Vibe: Waddling and warm, like a tiny tuxedo on ice.
Why it works: A black plate with a white oval teaches the high-contrast “belly” shape that defines penguins, and kids can discuss why animals have different colors for warmth and camouflage.
How to make it: Paint the whole plate black, glue a white felt oval to the center, then add orange foam triangles for the beak and feet. Dress the penguin with a small fabric scarf.
Shop the Look
| Product |
|---|
| Black washable tempera paint |
| Orange craft foam sheets, bulk |
| Self-adhesive white felt circles |
| Mini red knit scarf craft set |
| Fine-tip washable marker set |
13. Fluffy Chick in a Raffia Nest (Spring)
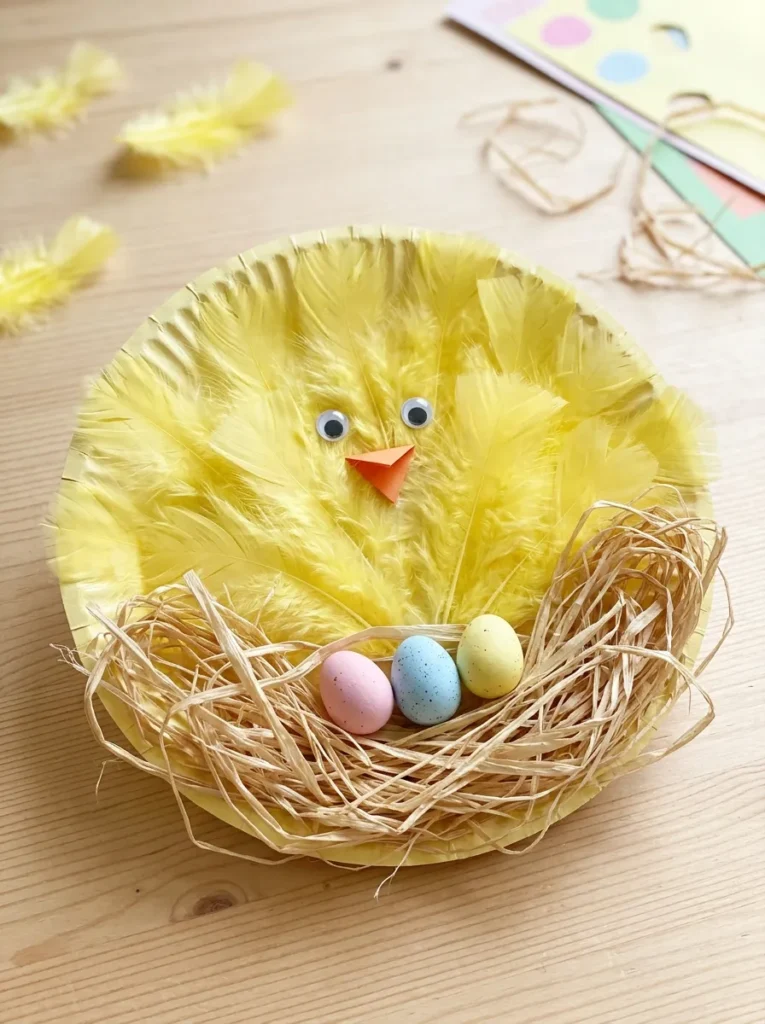
Vibe: Tender, like something newly hatched.
Why it works: Combining natural raffia with bright feathers introduces material variety, and the nest-and-chick pairing gives kids a story to retell about animal habitats.
How to make it: Paint half the plate yellow, glue small yellow feathers across the top for fluff, then wrap raffia around the bottom edge to form a nest. Add an orange paper beak and two eyes.
💡 Quick Win: Pre-cut raffia into six-inch lengths so it’s easy to glue.
Shop the Look
| Product |
|---|
| Yellow craft feathers, 100 count |
| Natural raffia grass, 1 lb bundle |
| Yellow washable paint, quart |
| Mini plastic eggs, pastel set |
| Orange origami paper for beaks |
14. Watermelon Slice Plate with Black Seed Stickers (Summer)
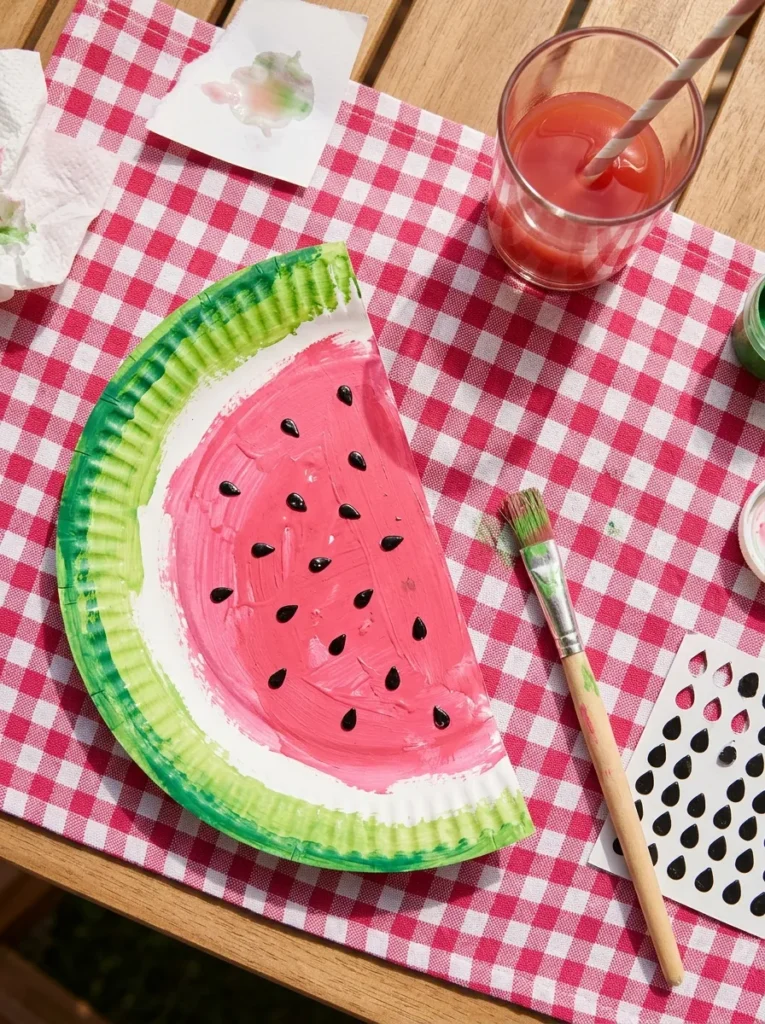
Vibe: Juicy, like sticky fingers on a hot afternoon.
Why it works: Painting a gradient from pink to green teaches color blending, and placing seeds one at a time gives practice in spacing, a skill that carries into early math.
How to make it: Cut a plate in half, paint the outer rim lime green and the inside pink, then let it dry. Stick on black seed shapes, then add a white painted line between rind and flesh.
Shop the Look
| Product |
|---|
| Pink and red washable paint set, 2-pack |
| Lime green craft paint |
| Jumbo paint dabbers, 6-pack |
| Black seed-shaped foam stickers |
| Half-plate paper folding template |
15. Handprint Turkey with Feather Fingers (Fall)
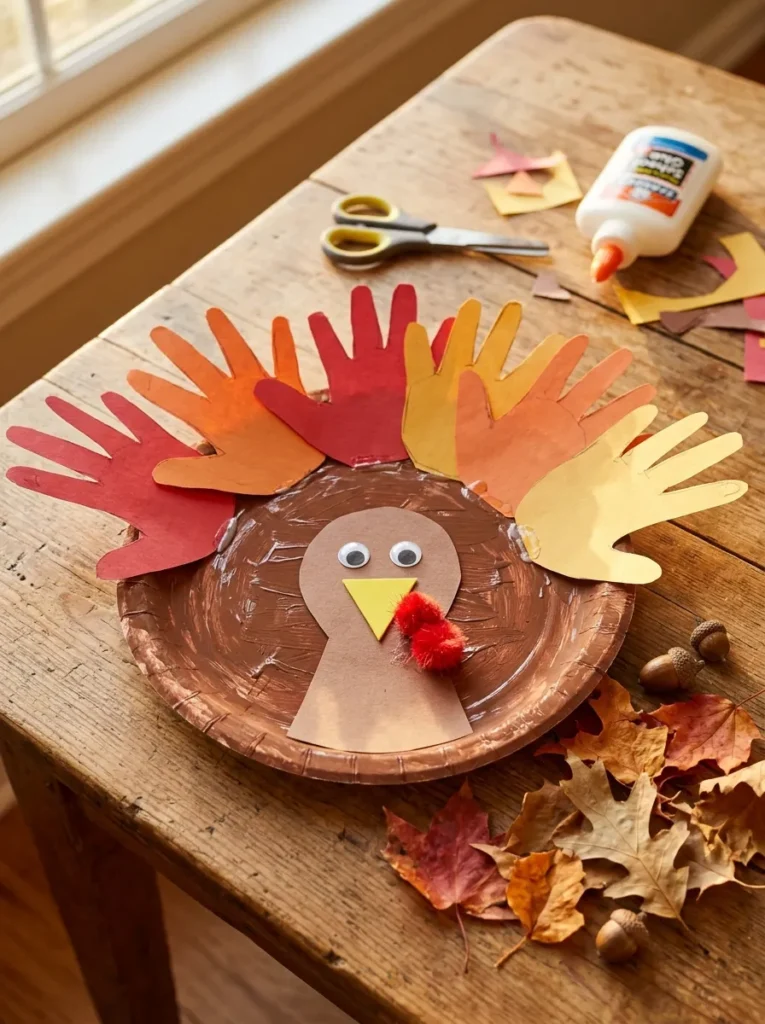
Vibe: Heartfelt, like a keepsake that grows older than the child who made it.
Why it works: Handprints are a personal, time-stamped record of size, and fanning them around the plate gives the turkey a wide, dramatic silhouette with almost no drawing skill required.
How to make it: Press a child’s hand into washable ink and stamp it five or six times on construction paper, cut them out, and glue the fan to the back of a brown plate. Add a yellow foam beak and a red pom-pom wattle.
💡 Quick Win: Write the child’s age and the year on the back with a marker before it dries.
Shop the Look
| Product |
|---|
| Washable multicolor handprint ink pad |
| Autumn foam feather stickers |
| Red craft pom-poms, small |
| Yellow craft foam beak triangles |
| Washable brown paint, 8 oz |
How to Start Your Paper Plate Craft Routine
Start with one move: buy a 100-pack of uncoated white 9-inch paper plates. Because every craft here begins with a plate, owning a stack removes the biggest barrier to saying yes when a child asks, “Can we make something?”
The most common mistake is buying coated, glossy plates. Paint beads up and slides off them instead of soaking in, leaving streaky, tacky messes that never dry flat. Check the label for “uncoated,” or press a fingertip on the surface, because it should feel slightly matte and absorbent.
Three items under $50 create immediate impact: a 12-color washable tempera paint set, a 500-count pack of self-adhesive googly eyes, and a pack of 100 jumbo craft sticks. Each fits in a shoebox and works across multiple seasons.
A single craft takes 20 to 40 minutes, plus overnight drying if you paint. A starter supply kit runs about $25 to $60, and adding felt, foam, and feathers across all four seasons brings it to roughly $100.
Frequently Asked Questions About DIY Paper Plate Crafts for Kids
What’s the difference between a paper plate craft and a cardstock craft?
Paper plates have a built-in curve and rim, which gives projects natural dimension without folding or scoring. Cardstock is flat and holds crisp folds better but needs more cutting. For ages 2 to 6, plates are easier because the shape already looks like a face, wheel, or wreath.
What paint works best on paper plates?
Washable tempera paint is the best choice because it soaks into uncoated plates, dries matte, and cleans up from skin and tables with water. Acrylic is more vivid but stains clothing permanently. If you want a glossy look, brush a thin coat of white school glue over dry tempera as a sealant.
How much do paper plate crafts cost per project?
Most projects cost between $1 and $3 per child once you own the basic supplies. A pack of 100 plates runs about $8 to $12, and paint, glue, and felt are reused across many crafts. Specialty items like feathers, raffia, or gems add a few dollars per season.
What ages are paper plate crafts suitable for?
Ages 2 and up can do the painting, gluing, and sticker steps, with an adult handling cutting. Ages 5 to 8 can cut shapes and follow multi-step directions on their own. Skip small items like buttons and googly eyes for children under 3, since they are choking hazards.
What glue holds heavy items like felt and craft foam on a paper plate?
Tacky craft glue is the most reliable for felt, foam, and feathers because it grabs quickly and dries clear. Standard school glue works for paper and tissue but can let heavier pieces slide. Hot glue is the strongest option, but only an adult should use it.
Ready to Make Your Own DIY Paper Plate Crafts for Kids?
You’ve now got 15 projects spanning spring bunnies, summer jellyfish, fall owls, and winter penguins, using paint, collage, stamping, and layering. Starting small is the right approach, so one craft on a quiet afternoon is a complete success on its own. Today, pull out a paper plate and a bottle of washable paint, and ask your child what animal they want to make first. As the stack of plates turns into a gallery on the fridge, the table becomes a place where mess is welcome and imagination moves at its own pace. Pin your favorite three or four now, before the pom-poms, feathers, and glitter start to blur together in your saved tab.