16 Easy Christmas DIY Crafts for Beautiful Holiday DecorMeta Description
A few simple supplies can make your whole home feel like Christmas. These easy Christmas DIY crafts turn paper, twine, pinecones, and fabric scraps into warm, beautiful decor you’ll be proud to show off.
This article shares 16 beginner-friendly projects, from cinnamon ornaments and paper snowflakes to pinecone trees, felt garlands, and glowing jar lanterns. Each idea solves a real problem: a tight budget, bare shelves, or not enough time for complicated crafts. I’ve noticed that handmade pieces get the most compliments, even when they take less than an hour. In my experience, two or three projects are enough to change the whole mood of a room. Scroll through, save your favorites, and start with the idea that fits your home.
Cinnamon Ornaments
- Fills the room with a warm holiday scent
- Needs only pantry basics and cookie cutters
- Doubles as a gift tag or tree ornament
- A fun, relaxed project for kids and adults
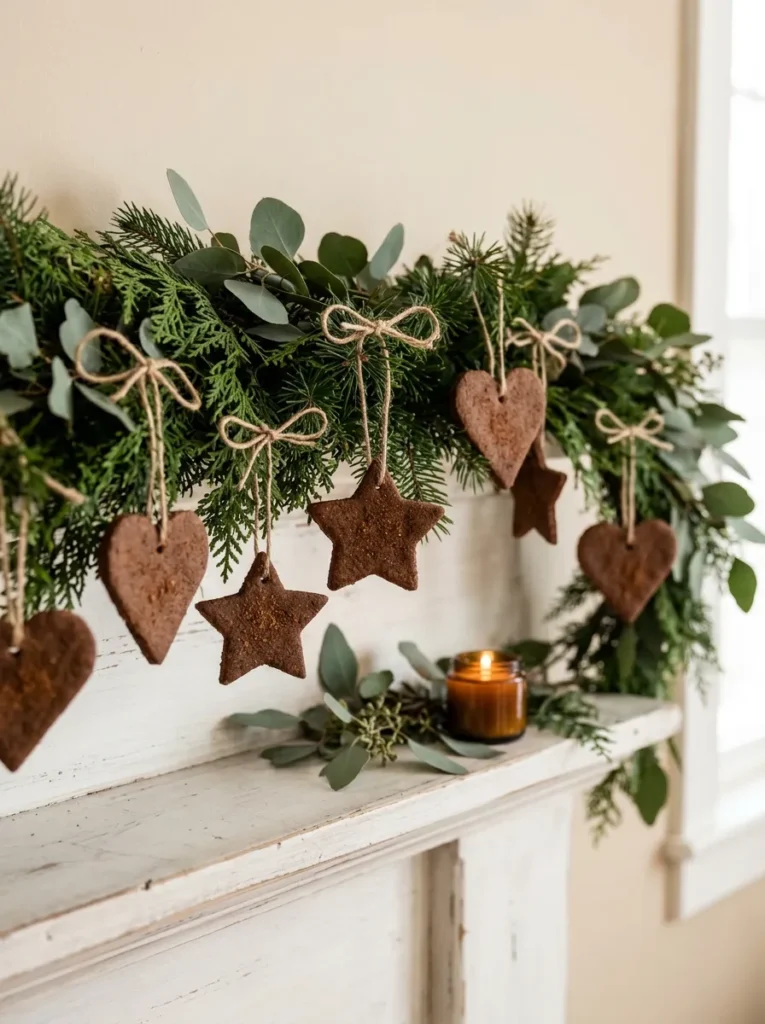
Some decorations fill the whole house with scent. Mix cinnamon and applesauce into a dough, roll it out, and cut stars or hearts with cookie cutters. I’ve noticed that the smell alone makes guests smile the moment they walk in. Poke a hole at the top, let them dry for a few days, and thread each one with twine. The warm brown color looks lovely on a green garland or a white tree. They cost very little, last for years, and make a sweet handmade gift tag too. Hang a few near a window for extra charm.
Baking-free and beginner-friendly, this craft works well with kids. Use equal parts cinnamon and applesauce, then add a spoonful of white glue for strength. Roll the dough about six millimeters thick, since thinner pieces crack easily. Let them air dry on a rack for two to three days, flipping once. These are decorations, not food, so keep them away from pets and small children. Store them in a dry box after the season. The finished ornaments look rustic, fragrant, and cozy, and they bring an old-fashioned feeling to any tree. Make a dozen in one afternoon.
Paper Snowflake Window
- Turns a plain window into a winter scene
- Costs almost nothing, just paper and scissors
- Tape peels off cleanly, so it suits renters
- Every flake is different and one of a kind
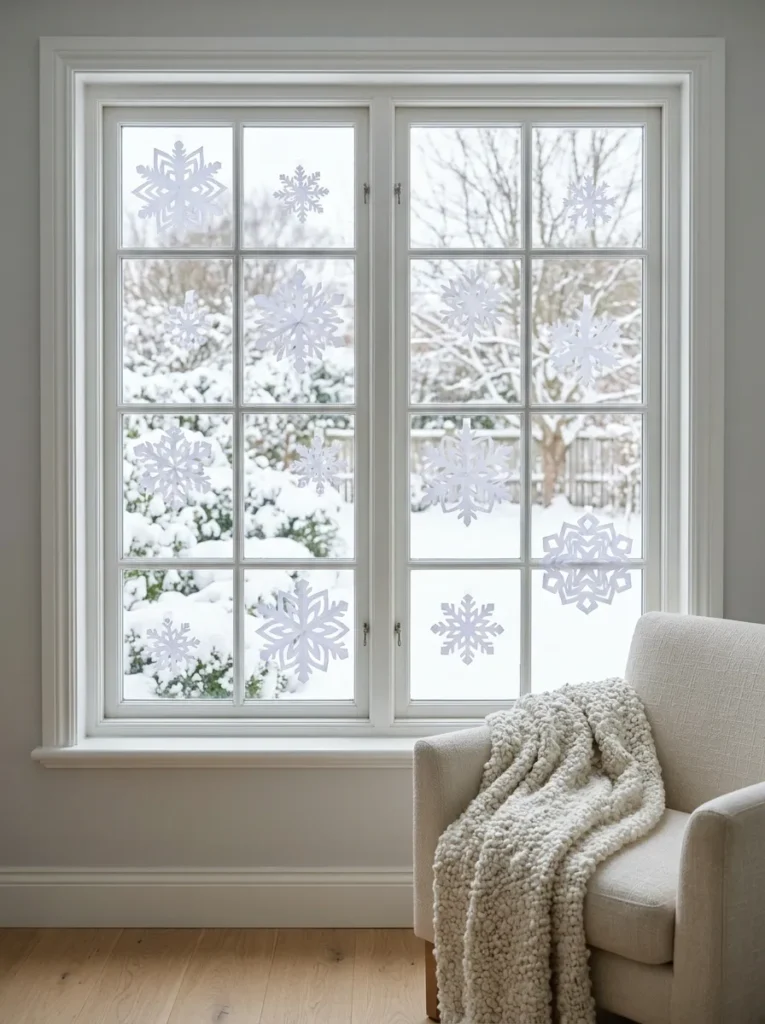
Snow without the cold is a lovely thing. Fold a square of white paper into a triangle, cut small shapes along the edges, and unfold the pattern. Every flake turns out different, which is part of the magic. Tape them to a window in different sizes, and the glass becomes a winter scene. I’ve seen this work well in rentals, since tape peels off cleanly. Morning light shines through the paper and casts soft shadows on the floor. The room feels bright, calm, and wintry. It costs almost nothing, and kids love helping.
Crisp folds make crisp flakes. Use a six-inch square, and fold it three times for six-sided symmetry. Sharp small scissors help with tiny cuts, and cutting a few curves before straight lines keeps the paper from tearing. Coffee filters also work beautifully and look soft and lacy. Press each flake flat under a book before hanging, so the edges lie neatly against the glass. Mix three or four sizes for a natural, falling-snow look. The finished window looks delicate, airy, and festive, and it brightens a room without adding any clutter. Take them down in January and recycle them.
Pinecone Mini Trees
- Uses pinecones you can gather for free
- Adds natural texture to mantels and shelves
- Looks best grouped in threes
- Quick to build with a glue gun
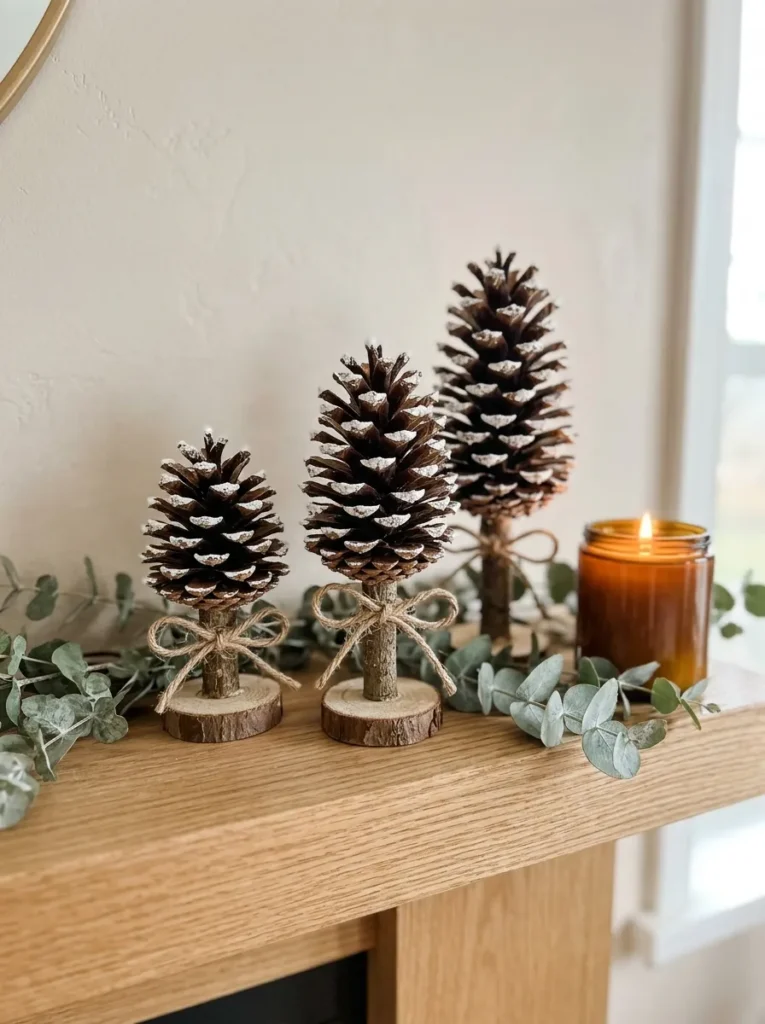
Nature already made the best tree shape. Glue pinecones in a cone shape onto a small wooden base, or stack them around a foam cone. I’ve tried this with pinecones from a walk in the park, and the results looked like shop pieces. Brush white paint on the tips for a snowy look. Make three in different heights, and group them on a mantel or shelf. The natural texture pairs well with twine, candles, and greenery. The tiny forest feels earthy, calm, and cozy. It costs next to nothing, since the pinecones are free.
Clean pinecones first, or tiny guests may move in. Bake them on a tray at about 100 degrees Celsius for thirty minutes to remove sap and insects, and the scales will open wider. Let them cool before gluing. Use hot glue for a quick hold, starting with the largest cones at the bottom. Keep the tree shape tidy by choosing cones of similar size in each layer. Add a tiny gold star or a bead on top. The finished trees look rustic, handmade, and warm, and they fit on any small surface. Save them for next year.
Felt Ball Garland
- Adds soft color without any painting
- Works on mantels, shelves, and window frames
- Easy to restyle with new colors each year
- Can be finished in one movie night
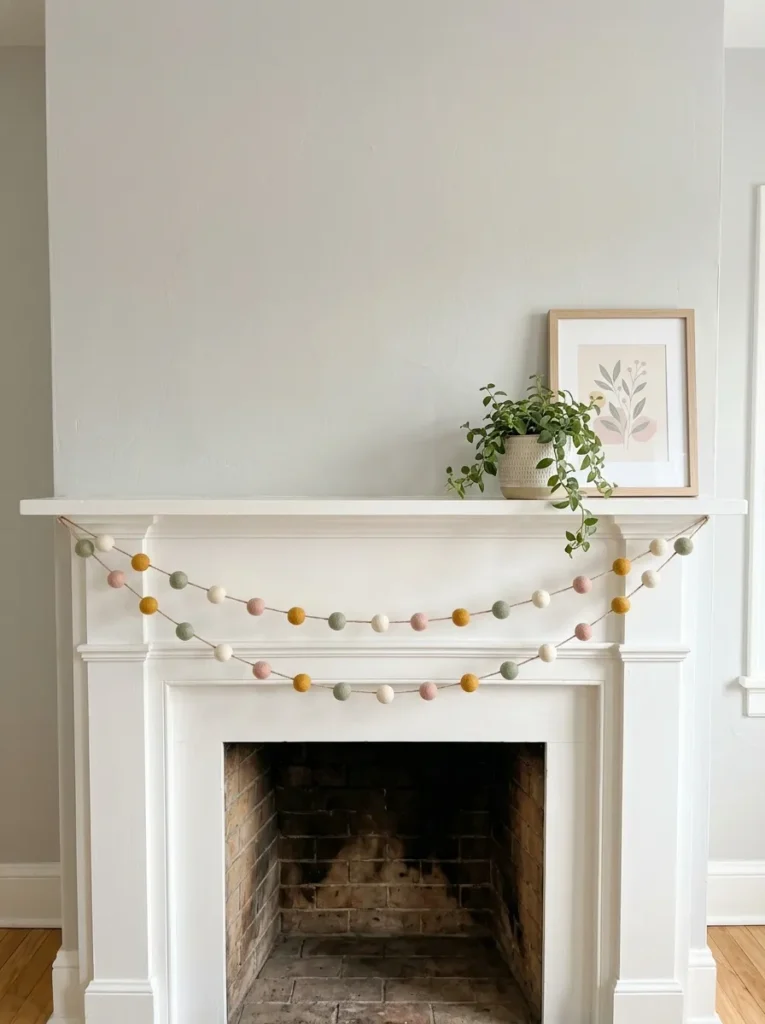
Soft color makes a mantel feel friendly. Buy wool felt balls in a few shades, then thread them onto strong twine with a large needle. I’ve noticed that cream, sage, and blush look calmer than traditional red and green. Space the balls close together for a full look, or leave small gaps for a lighter feel. Drape the garland across a mantel, a shelf, or a window frame. The soft texture adds warmth to hard surfaces. It looks playful and modern at once, and it takes about an hour to finish while watching a movie.
Small tricks keep the strand neat. Tie a small knot after every few balls to stop them sliding. Leave about twenty centimeters of bare twine at each end for hanging. Pick a limited palette of four colors so the garland looks planned, not random. Wool felt balls hold their shape better than craft-store polyester ones. Keep the garland away from candle flames. The finished piece looks soft, cheerful, and handmade, and you can restyle it next year with new colors.
Jar Light Lanterns
- Adds a warm glow to tables and porches
- Uses jars you already own
- Battery lights keep it safe around kids
- Takes only a few minutes per jar
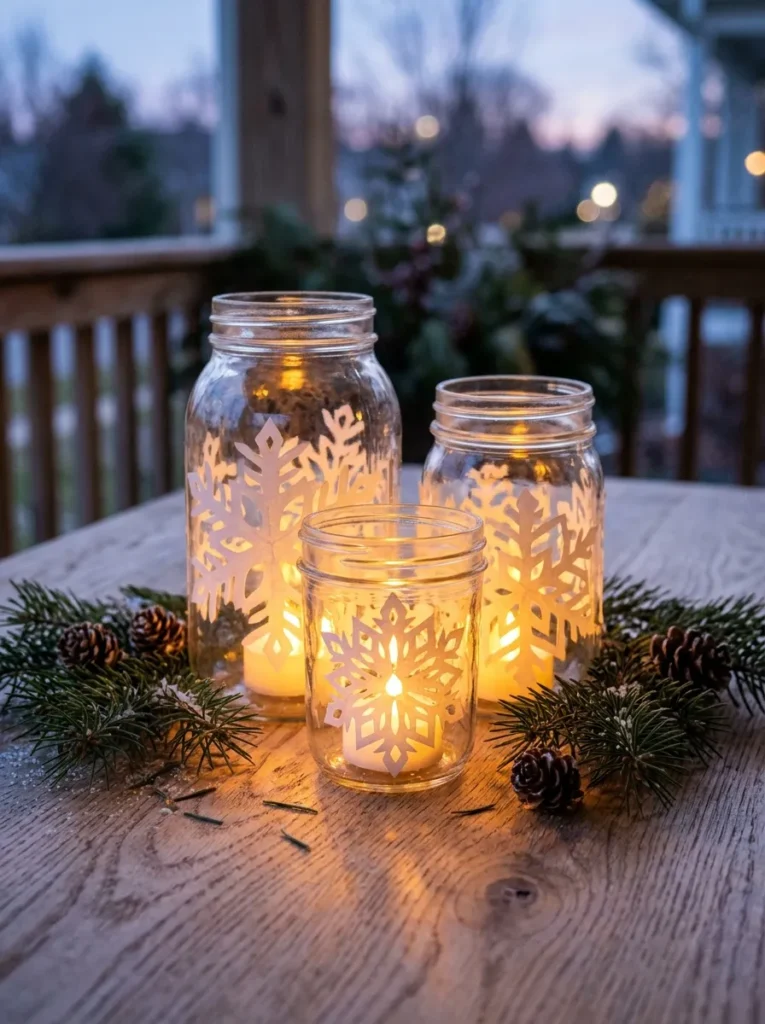
Warm light makes everything feel like Christmas. Wash a few clean jars, glue paper snowflakes or stars around the glass, and drop in a battery tea light. The cutouts glow softly, and the shadows dance on the table. I’ve seen these on porches and dinner tables, and they always draw attention. Use jars in different heights for a layered look. Warm white lights feel closer to candlelight than cool white ones. The glow turns an ordinary evening into something peaceful and bright. Best of all, the whole project costs only a few dollars. Use jars from your recycling.
Safety and neatness matter here. Always choose battery LED tea lights, since paper near a real flame is a fire risk. Cut snowflakes from thin paper, and attach them with a thin layer of clear glue or double-sided tape. For a frosted look, brush the jar with diluted white glue and press on salt. Tie twine or ribbon around the neck for a finishing touch. Place the jars on a stable surface away from curtains. The finished lanterns look glowing, rustic, and charming, and they work indoors or out on a covered porch.
Salt Dough Stars
- Uses flour, salt, and water from your pantry
- Lace or leaf prints add pretty texture
- Sturdy enough to keep for many Christmases
- Great for family craft afternoons
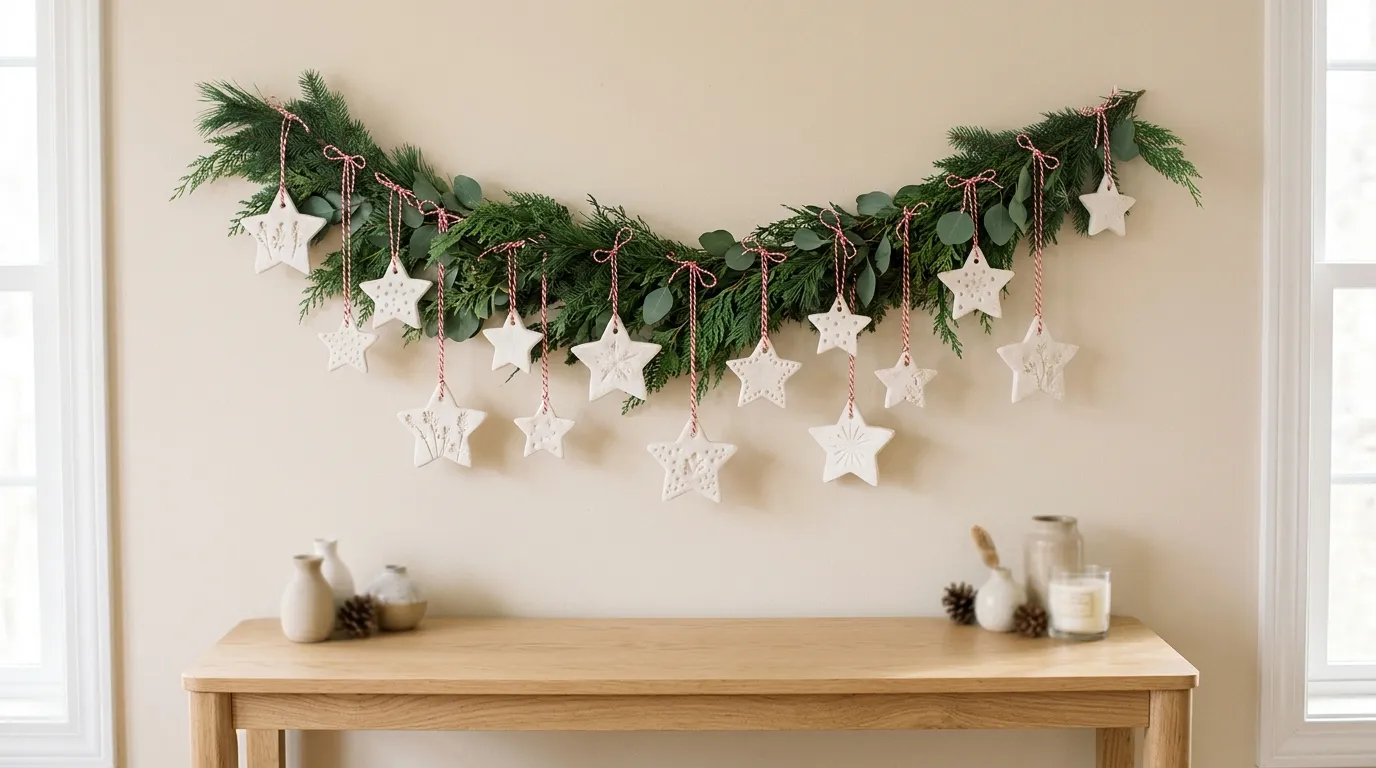
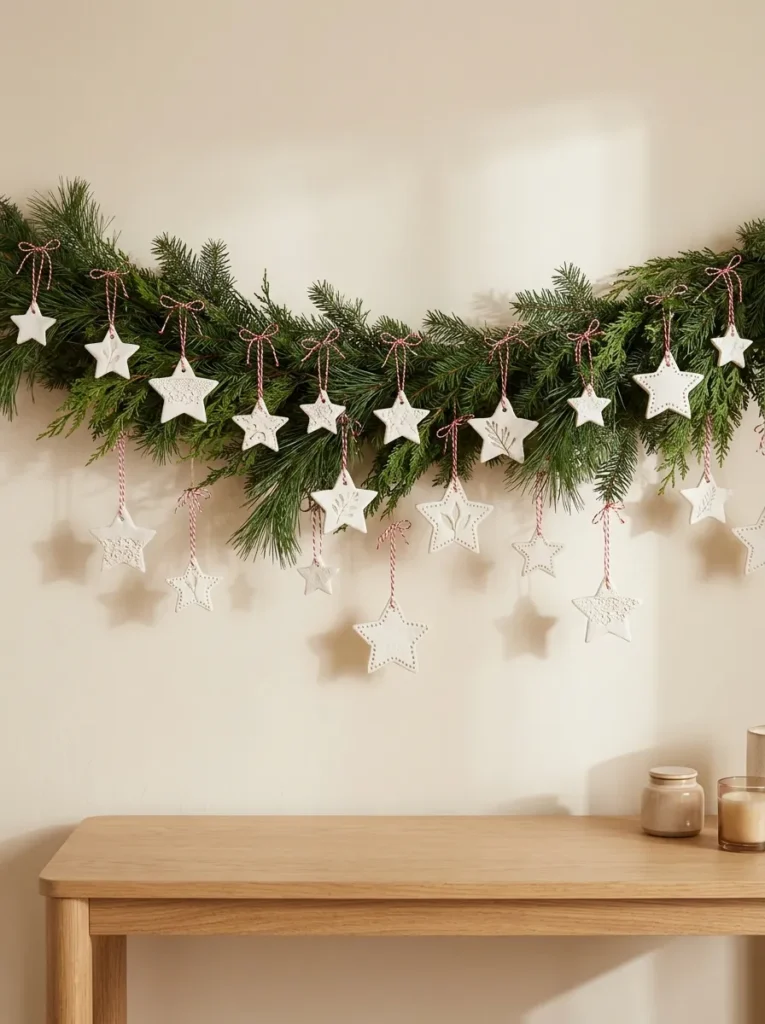
Here is a craft that has stayed popular for generations. Mix flour, salt, and water into a smooth dough, roll it flat, and cut out stars. Press a lace scrap or a leaf into the surface for a pretty pattern. I’ve made these with children, and every star came out with its own personality. Bake them low and slow until they are hard and pale. Then tie each one with twine, and hang them on a garland or tree. The matte white finish looks clean and modern. It also costs only pantry basics.
Good dough starts with the right ratio. Use two cups of flour, one cup of salt, and about one cup of water. Knead until it feels smooth, and add a spoonful of flour if it sticks. Roll it about six millimeters thick, and poke a hole for the twine before baking. Bake at about 100 degrees Celsius for two to three hours, flipping once. Seal with clear varnish to protect against moisture. Keep them away from pets, since salt is harmful if eaten. The finished stars look simple, sweet, and timeless, and they become keepsakes you reuse every Christmas.
Twig Star Wall
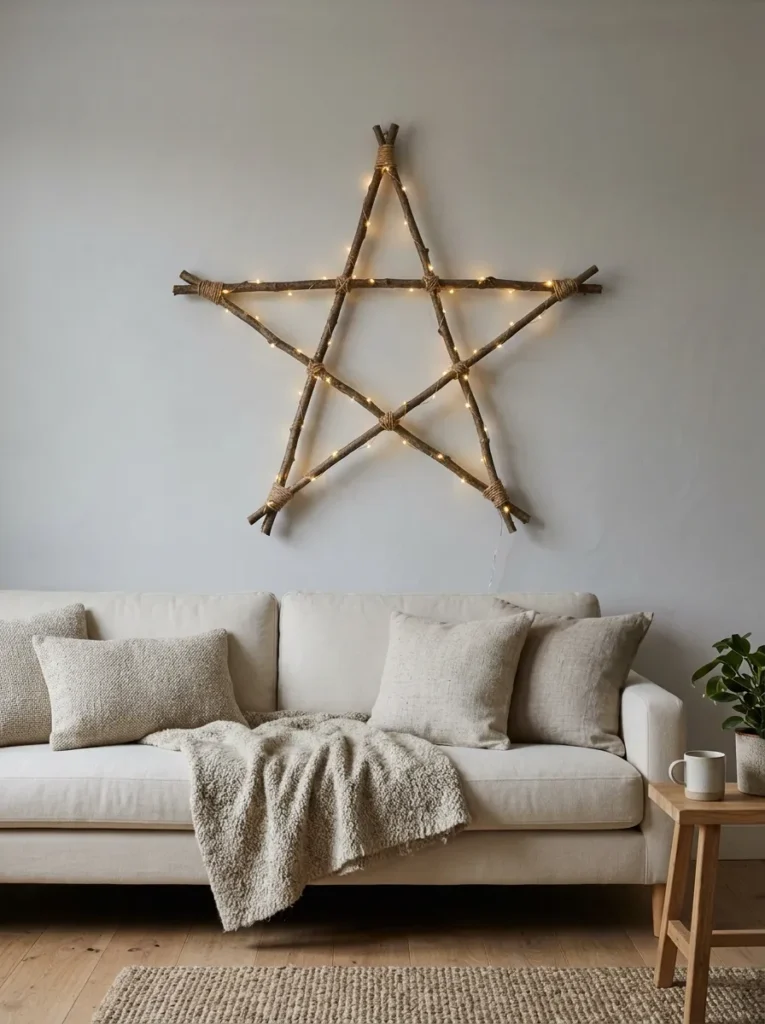
- Replaces a full tree in a small room
- Uses twigs collected from the garden
- Fairy lights give it a soft evening glow
- Hangs on the wall, so the floor stays clear
A star on the wall can replace a whole tree. Gather ten straight twigs from the garden, snap them to matching lengths, and lay them in a five-pointed shape. Tie the joints tightly with jute twine, then add a few fairy lights. I’ve seen this idea save small apartments, since nothing touches the floor. Hang it above a sofa, a bed, or a dining table. The natural wood looks calm and organic. At night, the lights make it glow. It looks sculptural, simple, and a little magical. It costs nothing but twine.
Build the star on a flat surface first. Cut twigs to the same length, about forty centimeters, using pruning shears. Dry them indoors for a few days so they do not shed bark on the wall. Lay two twigs to cross at each point, and wrap the joints in a figure-eight pattern. Finish each knot with a dab of glue for strength. Use a removable hook that matches the weight, since a twig star is light. Choose cool-running LED lights, since dry twigs burn easily. The finished star looks warm, rustic, and modern.
Dried Orange Garland
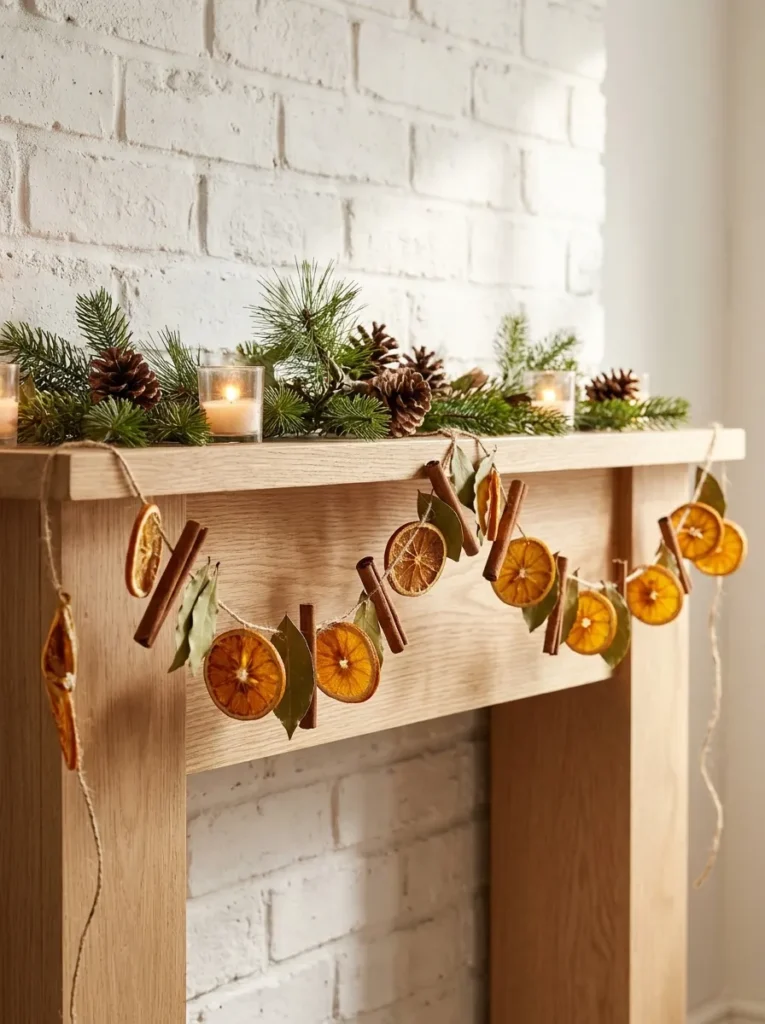
- Slices glow like stained glass in daylight
- Adds a fresh citrus and cinnamon scent
- Costs only a few oranges and some twine
- Looks lovely on mantels, shelves, and stair rails
Stained glass you can eat? Almost. Slice oranges thin, dry them in a low oven, and thread them on twine with cinnamon sticks and bay leaves. The slices glow amber when light shines through them. I’ve noticed that the scent greets guests before they even see the garland. Drape it along a mantel, a shelf, or a staircase rail. The warm colors look lovely against greenery and white walls. It costs only a few oranges and a little patience. The finished garland looks natural, fragrant, and a little old-fashioned. Make it in one weekend.
Slow drying keeps the color bright. Cut slices about six millimeters thick, and blot them with a towel. Bake at about 95 degrees Celsius for two to three hours, flipping each hour. Let them cool fully so they crisp up. Use a large needle to pass twine through the center of each slice. Add a cinnamon stick or bay leaf between every few slices. Hang it indoors in a dry spot, since damp air softens the fruit. Skip this craft if anyone at home has a citrus allergy. The finished garland looks earthy, bright, and festive.
Yarn Wrapped Wreath
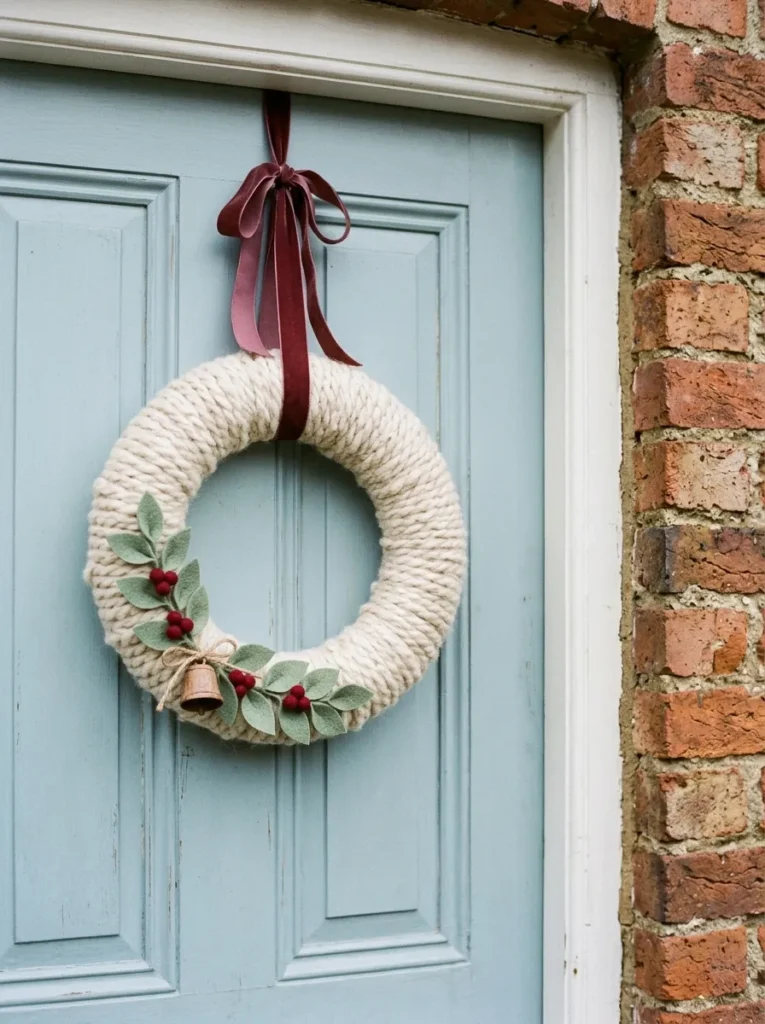
- Soft, plush texture that never sheds needles
- Uses leftover yarn from other projects
- Felt leaves and berries add easy color
- Hangs on doors, walls, or mirrors
A cozy door says welcome before anyone knocks. Wrap a foam ring or cardboard circle with thick yarn, covering every gap. Then glue on felt leaves and a few red berries. I’ve tried this with leftover yarn, and the wreath felt softer than any store-bought one. Cream, sage, and soft red look gentle and modern. Hang it with a velvet ribbon on a door, a mirror, or a wall. The texture adds warmth to flat surfaces. It looks inviting, handmade, and quietly festive. Best of all, it never sheds needles.
Wrapping neatly is the whole secret. Start by taping the yarn end to the back of the ring, then wind it tightly with each turn touching the last. Add a dab of glue every few rounds to stop slipping. Cut leaf shapes from felt, and attach them in clusters of three. Wool yarn handles weather better than acrylic, but keep the wreath under cover anyway. Make a hanging loop from twine, and sew it through the back. Tie a thick bow at the top. The finished wreath looks plush, charming, and welcoming, and it brightens any entrance.
Wooden Bead Tree
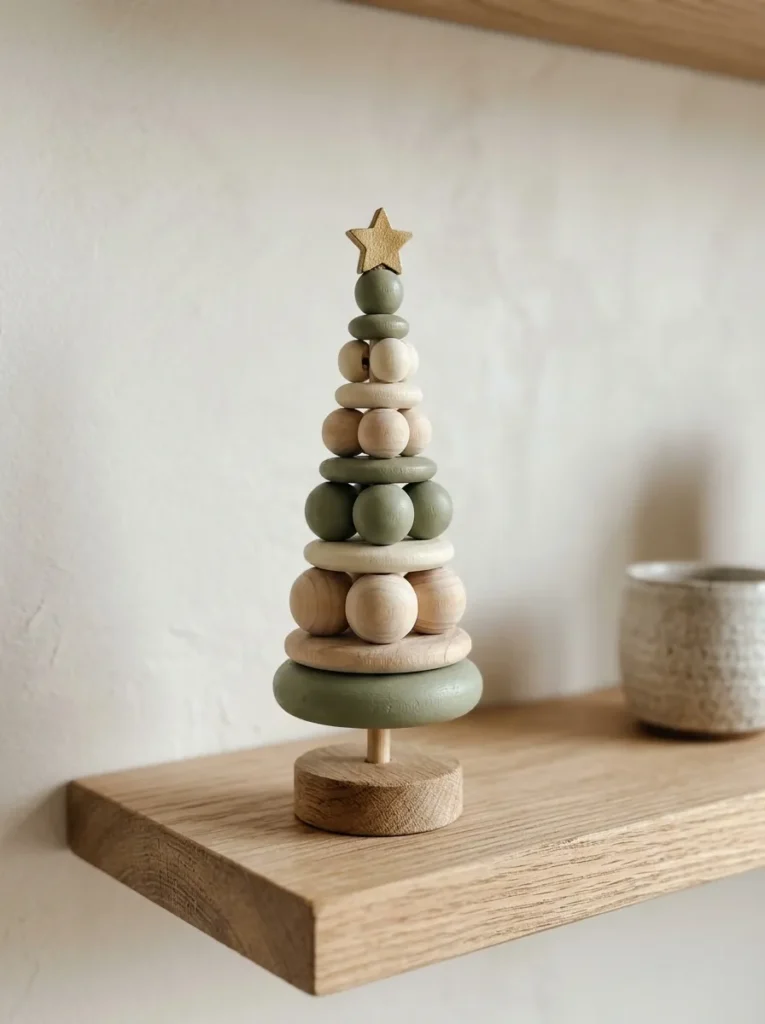
- Builds a tiny Scandinavian-style tree in minutes
- Painted and natural beads create a calm palette
- Looks best in a group of three
- Easy to store and reuse each year
Beads can build a tiny tree in minutes. Thread large beads onto a thin dowel, starting with the biggest at the bottom, and shrink the size as you climb. Paint some in sage and cream and leave others natural. I’ve seen this Scandinavian-style tree sell out at holiday markets, which tells me how popular the look is. Set it in a small wooden base or a lump of air-dry clay. Top it with a gold star or a single bead. It looks clean, modern, and calm. Three look wonderful grouped together.
Planning the sizes makes the shape work. Choose six to eight beads, from about four centimeters wide to one centimeter. Paint them with acrylic and let them dry on a skewer. Drill a small hole in the base, add glue, and press in the dowel firmly. Slide the beads over the dowel and glue the top bead in place. Sand rough spots on the wood so the finish feels smooth. Keep small beads away from young children, since they are a choking hazard. The finished tree looks soft, tidy, and stylish, and it fits on any shelf.
Snowy Branch Vase
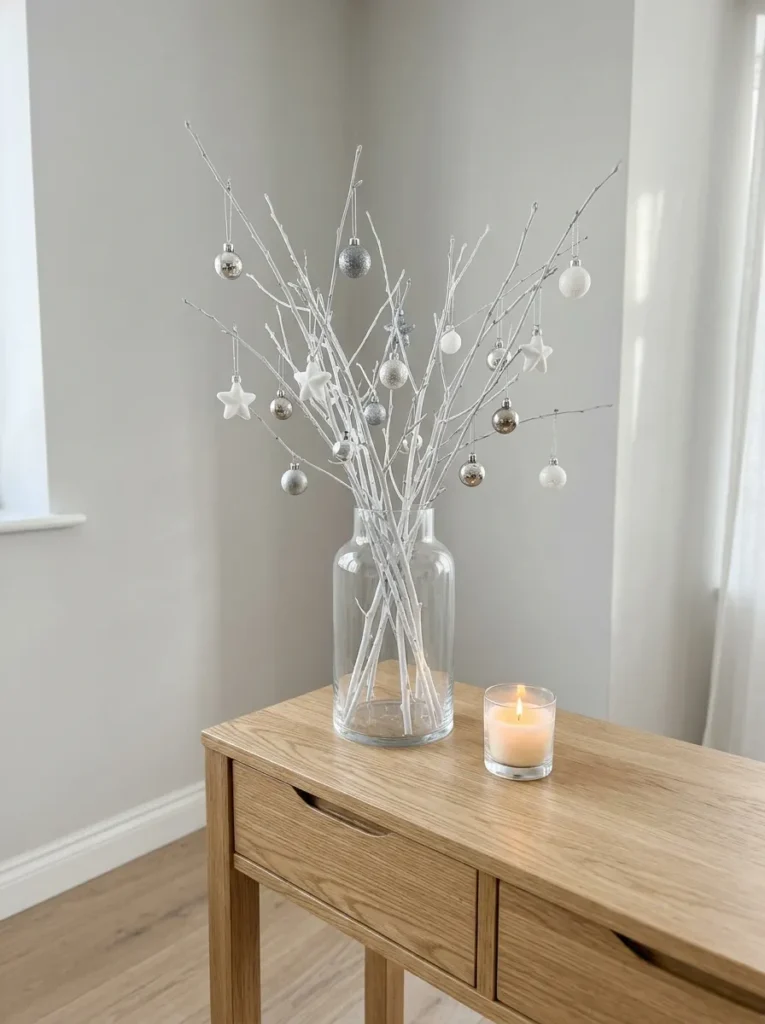
- Brings height and sculpture to a small surface
- Branches are free and easy to find
- Lightweight ornaments keep the look airy
- Setup takes only a few minutes
Winter branches already look like art. Collect bare branches from the yard, brush them with white paint, and set them in a tall vase. Hang a few small ornaments from the tips. I’ve tried this on a narrow console, and it brought height without taking space. Silver, white, and clear ornaments suit the frosty look. Add a few pebbles in the vase to hold the branches steady. The shape feels airy and modern. It costs very little, and the branches are free. Setup takes minutes. It also works well on a dining table.
Paint the branches lightly for a natural frost. Use a dry brush with white acrylic, and leave some wood showing. Let the paint dry fully before decorating. Choose lightweight ornaments, since thin tips bend under heavy ones. Many designers recommend limiting the palette to two colors, so the display stays calm. Cut the branches in different heights, and keep the tallest near the center. Add a thin string of battery lights for a soft glow at night. Pick a vase with a heavy base, so tall branches never tip. The finished arrangement looks frosty, elegant, and calm.
Paper Cone Forest
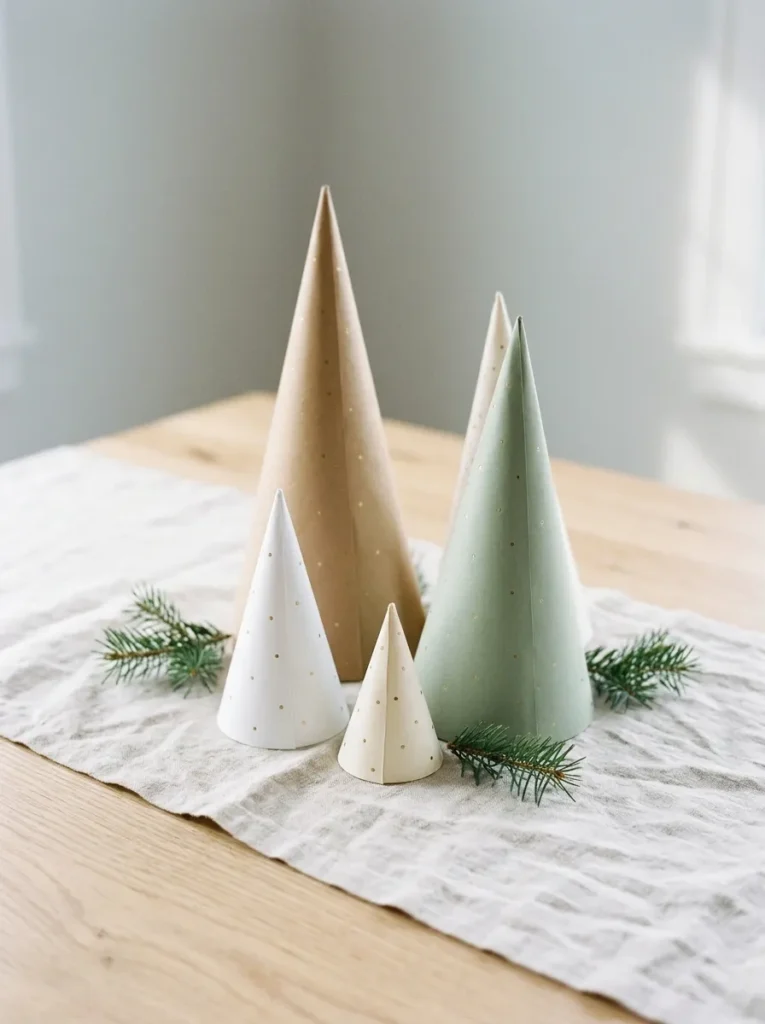
- Builds a whole forest from a few sheets of paper
- Odd-numbered groups look natural and styled
- Soft colors keep the scene calm
- A gentle craft for a quiet afternoon
A forest can fit on a single table. Roll sheets of heavy paper into cones, glue the seams, and trim the bottoms flat. Make them in different heights, from tiny to tall. I’ve noticed that odd numbers, such as three or five, always look more natural. Choose soft colors like cream, sage, and kraft for a calm scene. Add tiny gold dots with a paint pen. Set them on a linen runner with pine sprigs. The little forest looks gentle, simple, and storybook-like. It takes one quiet afternoon. Paper costs very little.
Heavy paper keeps its shape best. Cardstock or watercolor paper works well, while thin printer paper can sag. Cut a half circle, curl it into a cone, and secure it with glue. A bigger half circle makes a wider tree. Try sheet music or book pages for a vintage look. For a snowy finish, brush on diluted white glue and sprinkle fine glitter or salt. Let each tree dry upright on a baking sheet. Add a small gold star on top of the tallest one. The finished group looks light, handmade, and charming, and cones nest together for storage.
Button Tree Art
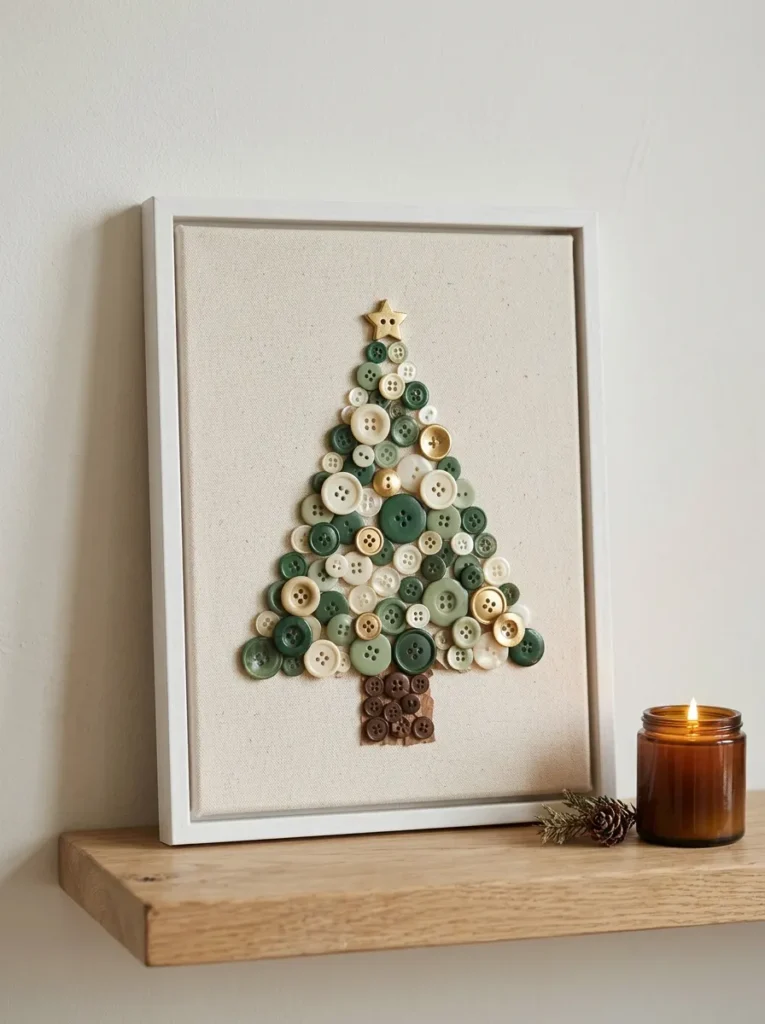
- Gives old buttons a new, colorful purpose
- Makes a sweet gift for family and teachers
- Mixed sizes add texture and depth
- Sits on a shelf or hangs on a wall
Old buttons can become a masterpiece. Glue green, cream, and gold buttons onto a small canvas in the shape of a tree. Add a brown trunk with a few brown buttons. I’ve seen this craft rescue a jar of mismatched buttons that sat in a drawer for years. The mix of sizes gives the tree texture and depth. Frame it, or lean the canvas on a shelf. It makes a sweet gift for grandparents or teachers. The art looks colorful, nostalgic, and thoughtful. Kids can help sort the colors. Thrift stores sell buttons cheaply.
Sketch the tree lightly in pencil first. Draw a simple triangle, then add a short trunk at the bottom. Start gluing from the bottom edge, using bigger buttons low and smaller ones near the top. Use strong craft glue, and let each row set before adding the next. Paint the canvas white or soft grey so the colors stand out. Add a star-shaped button at the top for a finishing touch. Keep the piece away from toddlers, since buttons can come loose. The finished artwork looks cheerful, personal, and handmade, and it adds charm to a shelf.
Kraft Paper Stars
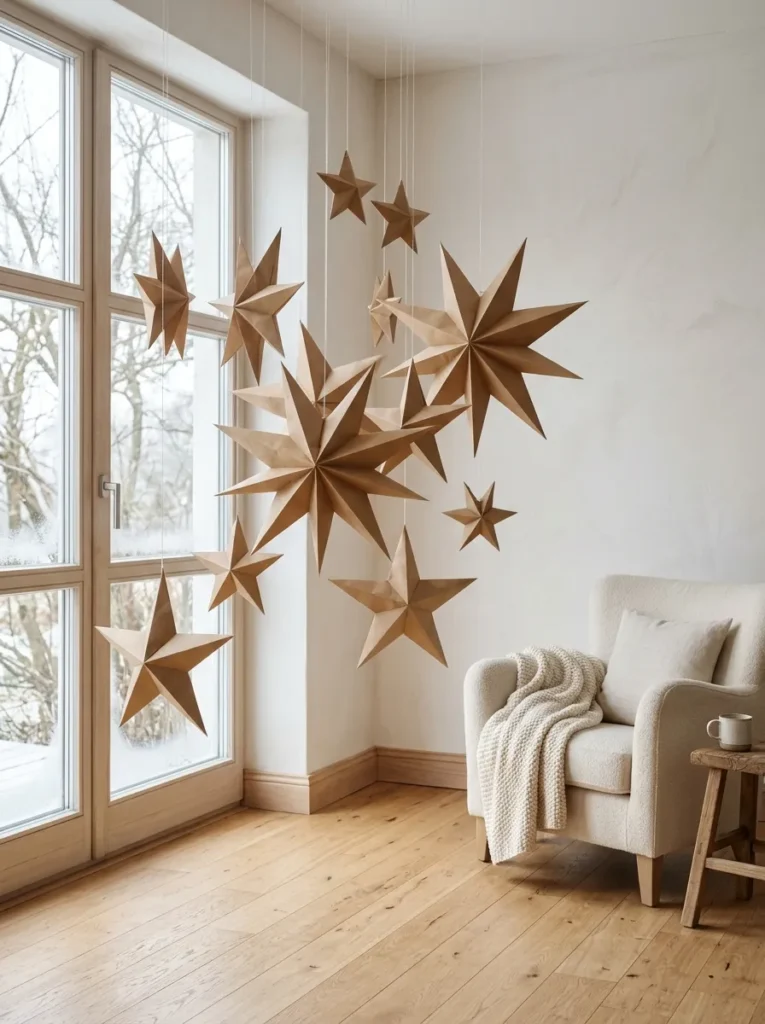
- Folds from simple paper strips with no glue
- Casts soft shadows when light shines through
- Looks best hung at different heights
- Learned in minutes, even by beginners
Stars make the sky come indoors. Fold strips of kraft paper into a woven star, and pull the ends into points. I’ve tried several versions, and the folded Froebel star is the one I keep making. It looks like a tiny paper sculpture. Hang stars at different heights near a window. The kraft color brings warmth and a natural feel. Light shines through the folds and casts soft shadows. The look is simple, calm, and modern. Each star takes about ten minutes. Paper strips cost almost nothing. Kids can learn it quickly.
Start with long strips for easier folding. Cut strips about two centimeters wide and fifty centimeters long. Tie a loose knot at one end, flatten it into a pentagon, and wrap the long end around the shape. Tuck the final tail inside, then pinch each side to puff the star. Practice with a scrap first, since the folding feels tricky at the start. Thread white thread through one point and hang the stars with small tape loops. Use different sizes by changing the strip length. The finished stars look light, handmade, and festive, and they fill a window beautifully.
Greenery Candle Tray
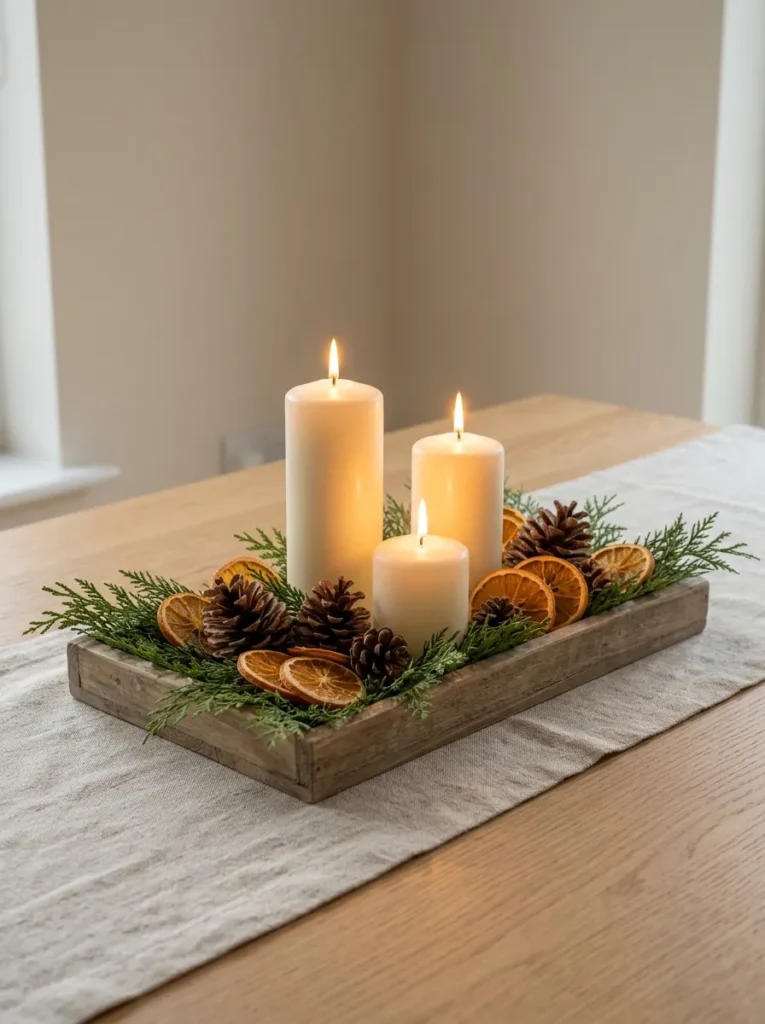
- Turns loose items into one styled centerpiece
- Fresh greenery adds a natural pine scent
- Ivory candles keep the look calm and classic
- Takes about ten minutes to assemble
A tray turns loose decor into a centerpiece. Set three candles of different heights on a wooden tray, then tuck greenery and pinecones around the base. I’ve seen this arrangement make a plain dining table look styled in ten minutes. Cedar, pine, and eucalyptus smell lovely and last well. Add a few dried orange slices for color. Ivory candles keep the look calm and classic. The glow feels warm and welcoming at dinner. The look is natural, simple, and seasonal. Fresh clippings from the yard cost nothing. A tray keeps everything together.
Safety comes first when candles meet greenery. Use flameless LED candles, since dry greenery and open flames do not mix. If you prefer real candles, keep the greens well away from the wicks, and never leave a flame unattended. Place the tray on a heat-safe, stable surface. Cut greenery into short sprigs of different lengths, and tuck stems into small water vials for freshness. Group candles in odd numbers, with the tallest slightly off center. Add a linen runner beneath for softness. The finished tray looks fresh, fragrant, and elegant, and it makes every meal feel special.
Felt Mini Stockings
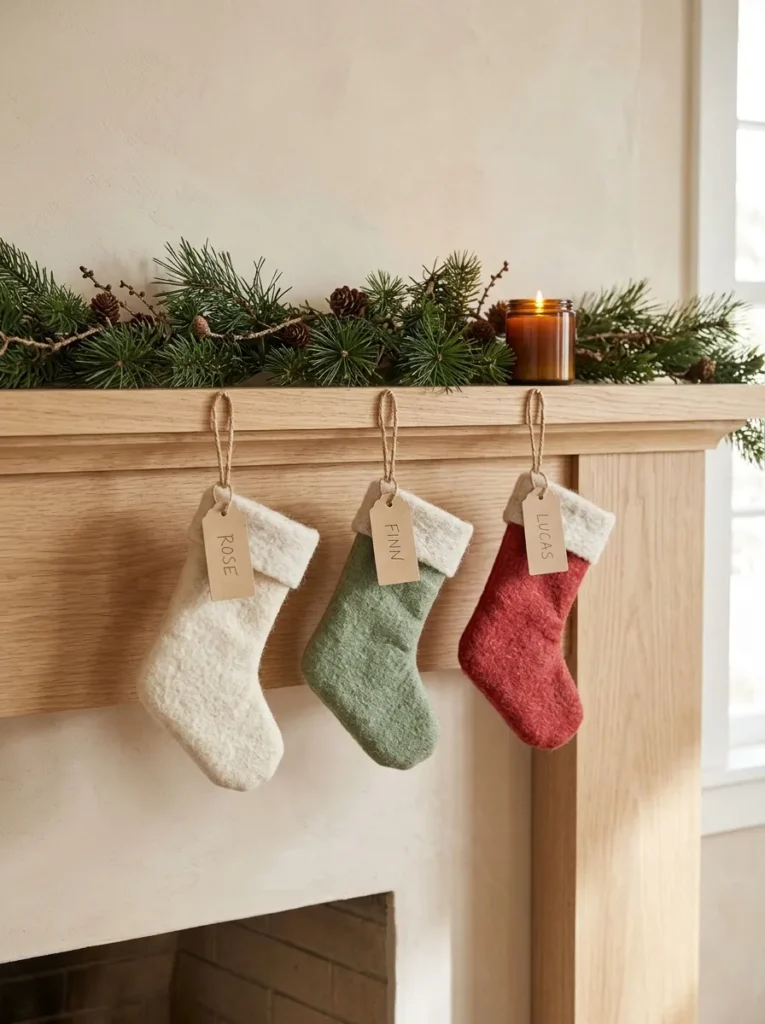
- Felt never frays, so it suits beginners
- Name tags make each stocking personal
- Small sizes work as pure decor or tiny gift holders
- Hangs on mantels, shelves, or stair rails
Every mantel needs a little stocking charm. Cut two felt shapes, stitch them together with a simple blanket stitch, and add a soft cuff. Felt does not fray, which makes it ideal for beginners. I’ve noticed that handmade stockings become family traditions, because people keep them for years. Choose cream, sage, and red for a classic yet gentle look. Add a name tag with a fine marker or embroidery. Hang them with jute loops on a mantel, a shelf, or a staircase. The set feels sweet, cozy, and personal. Small sizes work beautifully as decor.
Use a paper template to keep the shape neat. Draw a stocking on cardboard, cut it out, and trace it twice onto felt. Stitch the edges with sturdy thread, leaving the top open. Cut a cuff from white felt and glue or sew it around the top. Attach a loop of twine inside the back edge for hanging. Wool-blend felt looks richer than thin craft felt. Add small pom-poms or buttons for extra charm. Use sturdy hooks, since fuller stockings weigh more. The finished stockings look warm, charming, and festive, and they make lovely gifts.
Conclusion
A beautiful Christmas home doesn’t need a big budget or fancy skills. It needs a little time, a few simple supplies, and ideas that feel like you. Whether you bake cinnamon ornaments, cut paper snowflakes, or build a tiny pinecone forest, these easy Christmas DIY crafts bring warmth and handmade charm to every corner. I’ve seen how small changes like these can completely shift the way a space feels. Save this post on Pinterest, try one idea this weekend, and share it with a friend who loves cozy holiday decor. Your coziest Christmas may start at one craft table.