12 Garden Decor Crafts That Make a Yard Look Finished
Garden decor crafts are handmade pieces that spend their lives outdoors, which means they get rained on, baked, and frozen long before anyone admires them. These 12 projects follow one rule: choose the material for the weather first, then choose the look, so what you make in a weekend is still holding up when the leaves turn.
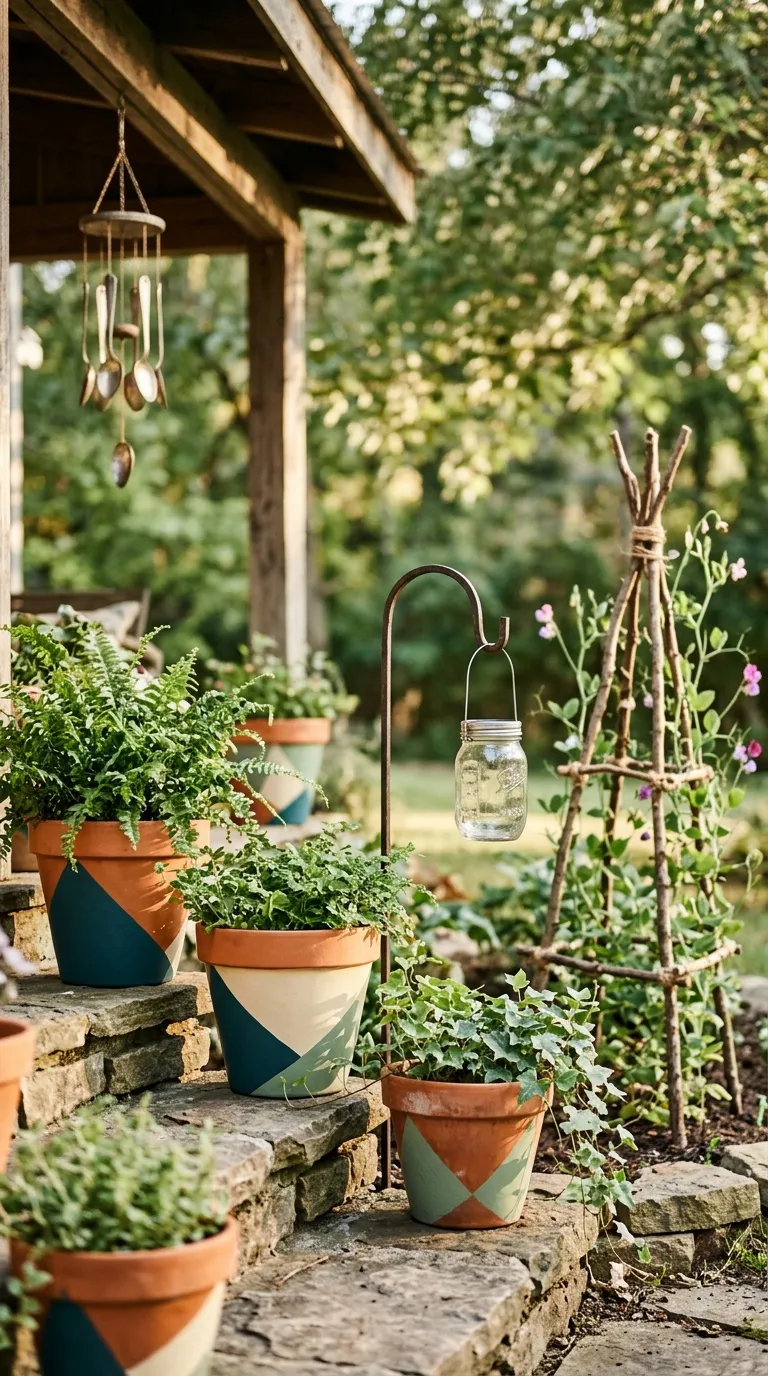
Terracotta keeps the afternoon’s warmth after the sun moves on. A jar lantern glows amber at dusk, and spoons clink somewhere near the porch. Everything reads as handled, not bought. A garden feels finished once its small details look chosen on purpose, and sturdy materials let them stay that way.
Jump To
- Why Garden Decor Crafts Make Such a Difference
- The Projects, Built to Last Outdoors
- Color-Blocked Terracotta Pots
- Mason Jar Solar Lanterns
- Tin-Can Herb Wall
- Wine-Bottle Edging
- Reclaimed Wood Plant Markers
- Spoon Wind Chimes
- Branch Obelisk
- Macramé Plant Hangers
- Pebble-Mosaic Stepping Stones
- Stacked-Pot Bird Bath
- Fairy Garden Vignette
- Outdoor-Fabric Bunting
- How to Start Your Garden Decor Transformation
- Frequently Asked Questions
- Ready to Create Your Dream Garden?
Why Garden Decor Crafts Make Such a Difference
Garden decor crafts are handmade pieces such as painted pots, jar lanterns, cast stones, and hanging planters, built from materials that tolerate rain, sun, and frost. Terracotta, glass, galvanized wire, cement, and outdoor-rated cord do the heavy lifting; indoor craft glue and paper do not.
A few handmade accents can make a patio or balcony feel finished without buying furniture. Small spaces suit them well: start with one vertical piece, like a hanging planter or fence-mounted cans.
Quick Reference
| Factor | Answer |
|---|---|
| Best starting point | Painted terracotta pots beside your seating |
| Biggest impact area | Eye level near seating, steps, or an entry |
| Budget to start | Roughly $10–$40 (approximate) |
| Time to complete | An afternoon per project; cast concrete needs several extra days to cure |
The Projects, Built to Last Outdoors
1. Color-Blocked Terracotta Pots Dipped in One Bold Shade
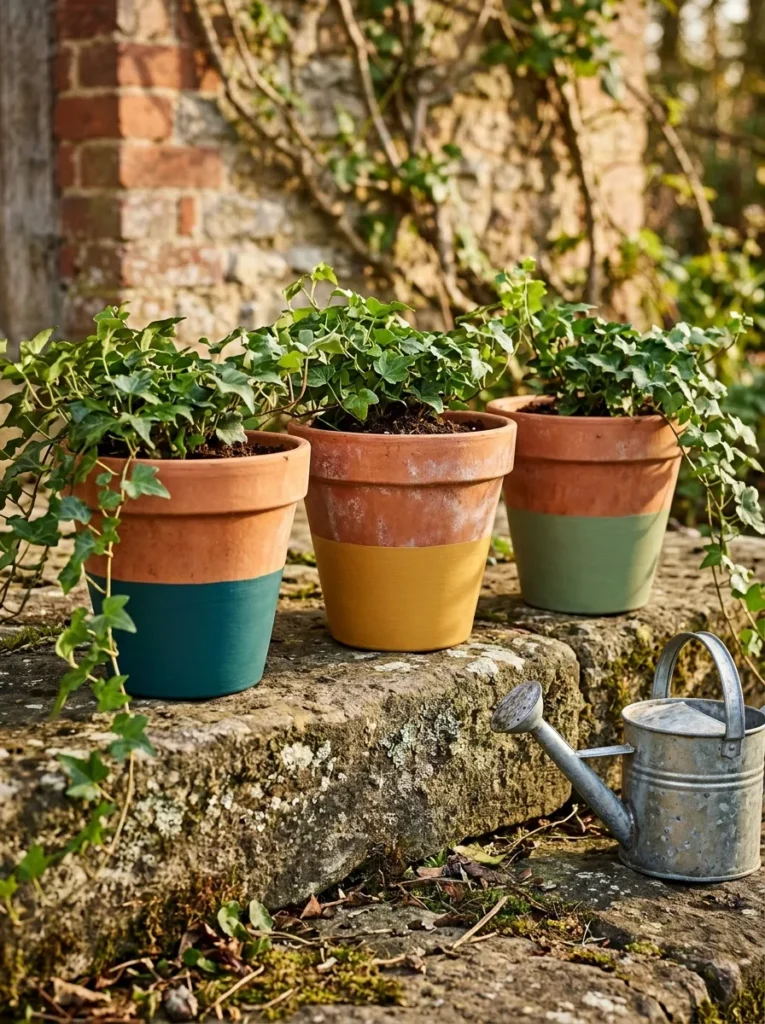
Raw terracotta dipped halfway into one saturated color looks sun-warmed and deliberate, like pottery from a market stall. Paint only the lower half, or just the rim, and the clay’s own orange becomes a second color, so one jar of paint does the work of two.
Terracotta is porous and breathes, which is why you paint the outside only and leave the inside and the drainage hole bare; a sealed interior holds water against the roots. Finish with a clear exterior-rated sealer. Most people skip that step and regret it when the paint flakes. Best for steps, patios, and anyone who wants a first project done in an afternoon.
Quick Win: Apply sealer in two light coats rather than one heavy one; thick coats on porous clay tend to run and cloud.
2. Mason Jar Solar Lanterns Hung at Mixed Heights
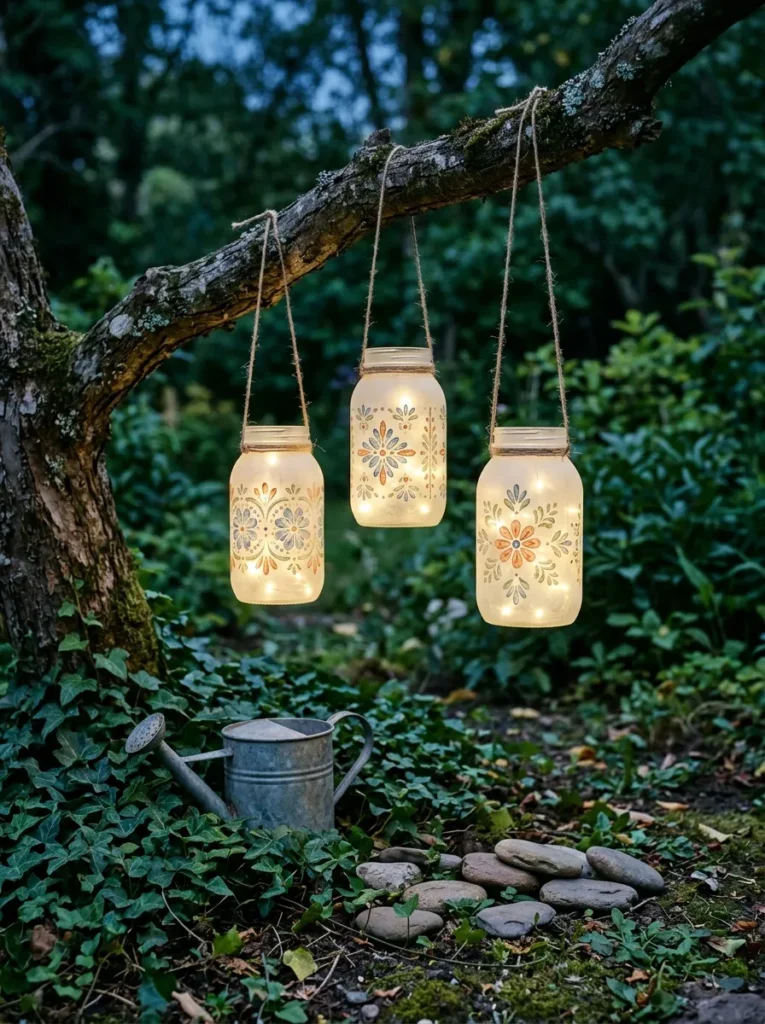
Begin with a wide-mouth glass jar and a solar lid that has the LED and panel built in, so there is no wiring to do. Twist galvanized wire around the neck, leave a long loop for a handle, and hang the jar from a shepherd’s hook or a sturdy branch. Glass spreads a single LED into a soft glow, and frosted or tinted jars hide the bare bulb in daylight.
Solar lids charge only where the panel sees direct sun, so a jar under a thick canopy will stay dim. Stay with LED lids and skip live candles in hanging jars; flame, wire, and dry branches make a poor combination. Test the loop with the jar’s full weight before trusting a branch. More jar projects live in this mason jar crafts roundup.
Pro Tip: Set a jar on the ground at midday where you plan to hang it. If the lid’s panel is shaded then, it will be shaded every day.
What You’ll Need
| Product | What to look for |
|---|---|
| Wide-mouth glass jars | Clear or frosted glass with a thread size that matches the solar lids; frosted hides the bulb by day |
| Solar jar lid lights | LED type, a panel that faces upward, an on/off switch, and a weather-resistant build |
| Shepherd’s hook | Tall enough to hang jars above nearby plants, powder-coated so it resists rust, with a ground spike that stays upright in loose soil |
3. A Tin-Can Herb Wall for Walls Without Soil
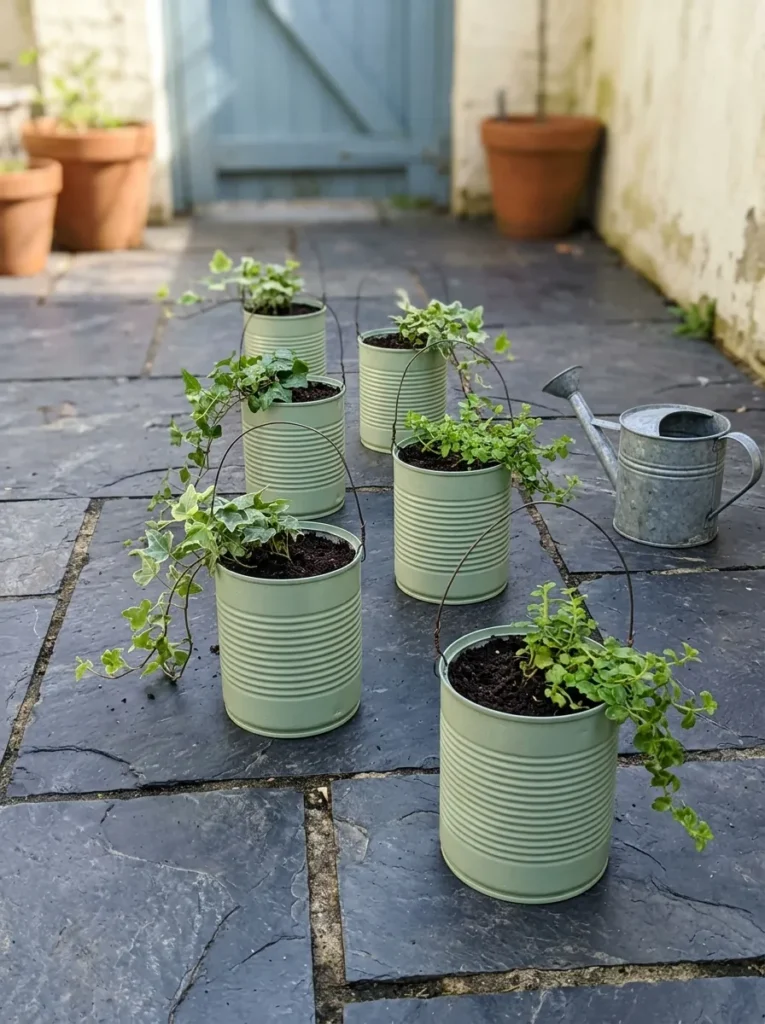
Balconies, fence lines, and rental patios have wall but no ground, and empty food cans turn that wall into growing space. Wash each can, crimp or file the cut rim smooth (gloves on), punch several drainage holes in the base, and paint the outside with exterior paint.
Hang them from a rail or hooks fixed into a fence post or stud, never a single screw in thin trim, because damp potting mix plus a herb plant is heavier than it looks. Basil, chives, and thyme all manage in a can’s small volume of soil, though they dry out quickly in full afternoon sun.
Small-Space Tip: Zigzag the cans instead of stacking them in a straight column, so drainage from higher cans drips past the lower ones instead of into them.
The next border costs almost nothing but a trench and a row of empty bottles, and it holds a curved bed’s line better than store-bought plastic.
4. Wine-Bottle Edging That Stays Put
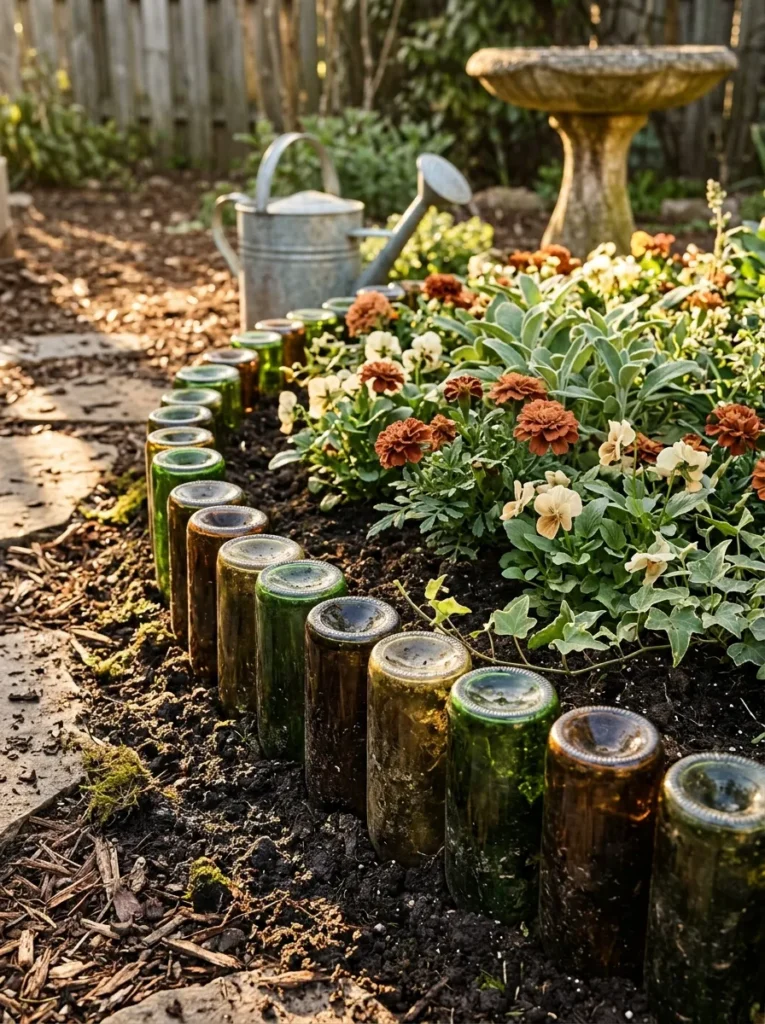
Plastic edging bends, heaves, and pops loose, and a row of bottles buried neck-down does none of those. Dig a narrow trench along the bed line, set the bottles base-up so the glass catches low sun, and firm the soil around each one so they lock into a line.
Bury roughly a third to a half of each bottle (a practical recommendation, not a rule) so a brush of a boot won’t tip them. Stick to one color family; green and blue glow when sun passes through, and clear reads quieter. Mixed colors look like a recycling bin. Best for curved beds beside paths and fences. Wear gloves while digging and setting.
Warning: Keep bottle edging off the lawn line. A mower can strike a bottle and throw glass across the yard, so leave a strip of mulch or gravel between the glass and the grass.
5. Reclaimed Wood Plant Markers Sealed End to End
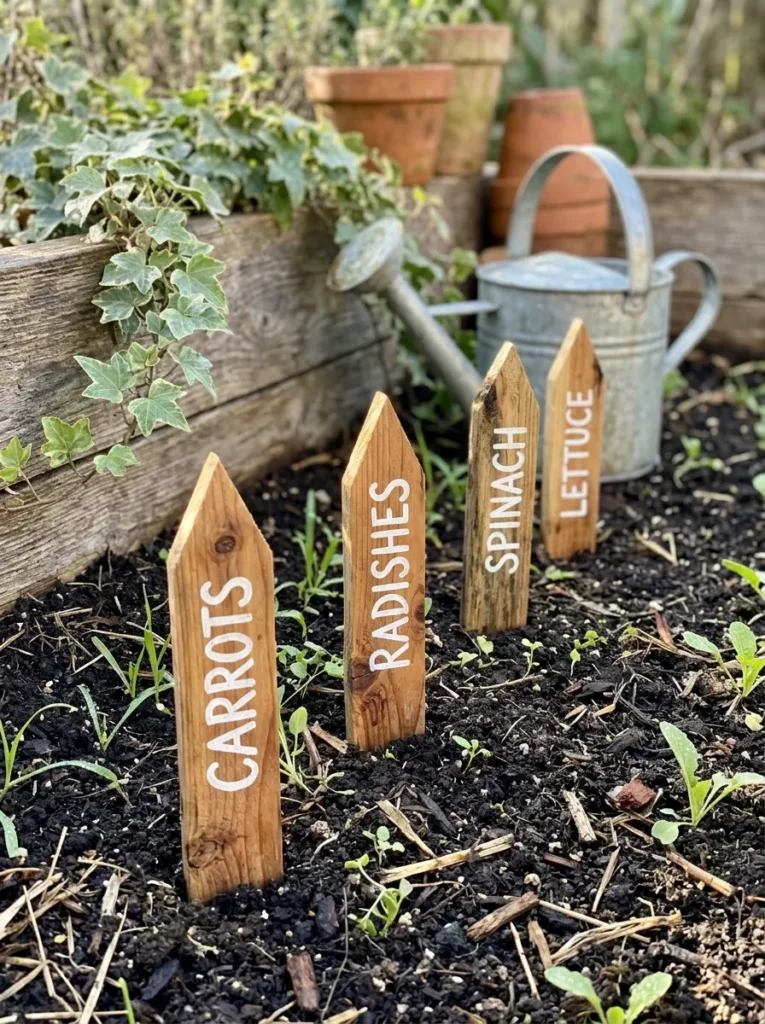
Water enters wood through its cut faces, so the rule is to seal the end grain and every cut edge, not just the painted front. Cut markers from reclaimed cedar or fence board (cedar resists rot better than pine), sand them smooth, paint the letters in a single outdoor paint color, and seal all sides, including the point that goes into the soil. Skip the soil end and the stake wicks moisture up and rots from below.
Plain block capitals stay readable from standing height. Best for vegetable beds and herb borders where labels earn their keep. Anyone who enjoys this kind of cutting and sanding will find more in these handmade wooden gifts.
Styling Note: Letter every marker in one color and one weight; mixed handwriting between plants looks like clutter from the path.
6. Spoon Wind Chimes With a Wind Sail
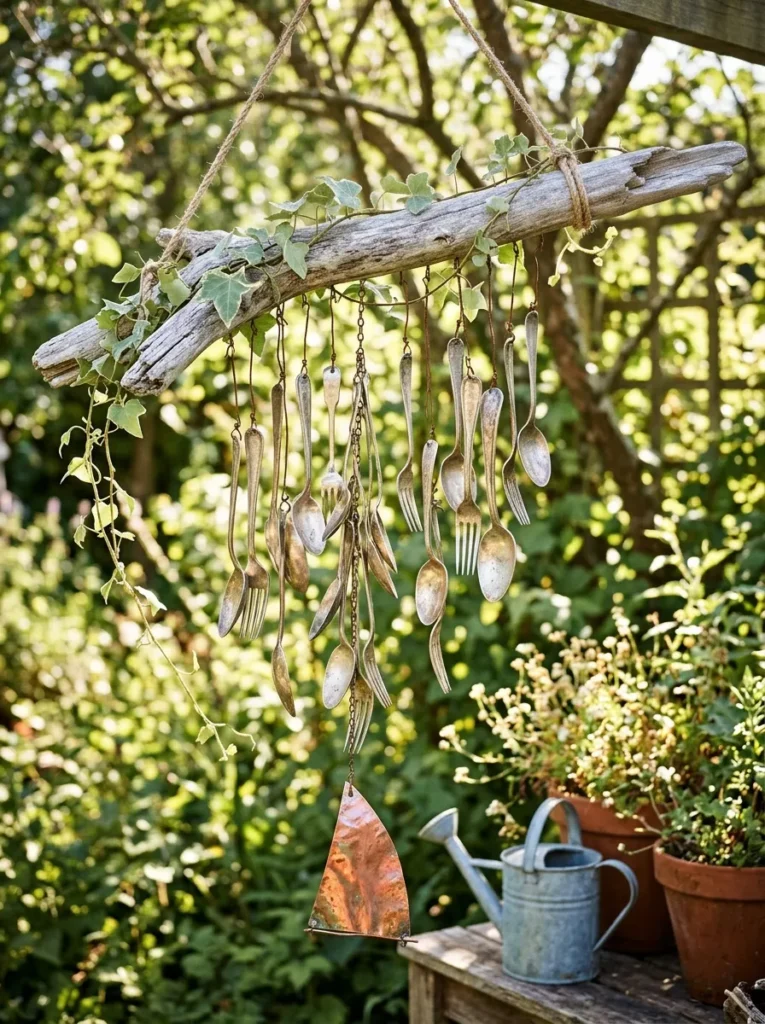
Old silver-plated spoons hung at staggered lengths clink softly rather than ringing like a bell, which suits a porch better than a loud tubular chime. Bend each handle into a hook or wrap the neck with stainless wire, then hang six to eight from a wooden ring so they swing into a central striker.
Mixed metals, glass beads, and bits of old hardware work as well, so long as each piece is light enough to move in a breeze. Hang them where wind actually moves, such as a house corner or fence line; tucked against a wall they rarely stir. Use a screw hook driven into a beam or fascia, not a nail in trim, and keep the lowest strand above head height so nobody walks into metal edges.
Important: A chime needs a sail, a small flat disc hanging below the striker, to catch air. Without one, the spoons hang still on all but the windiest days.
A free armful of pruned branches can hold up a pea plant for a whole season, but only if the frame is built the way climbers actually grip.
7. A Branch Obelisk for Climbing Plants
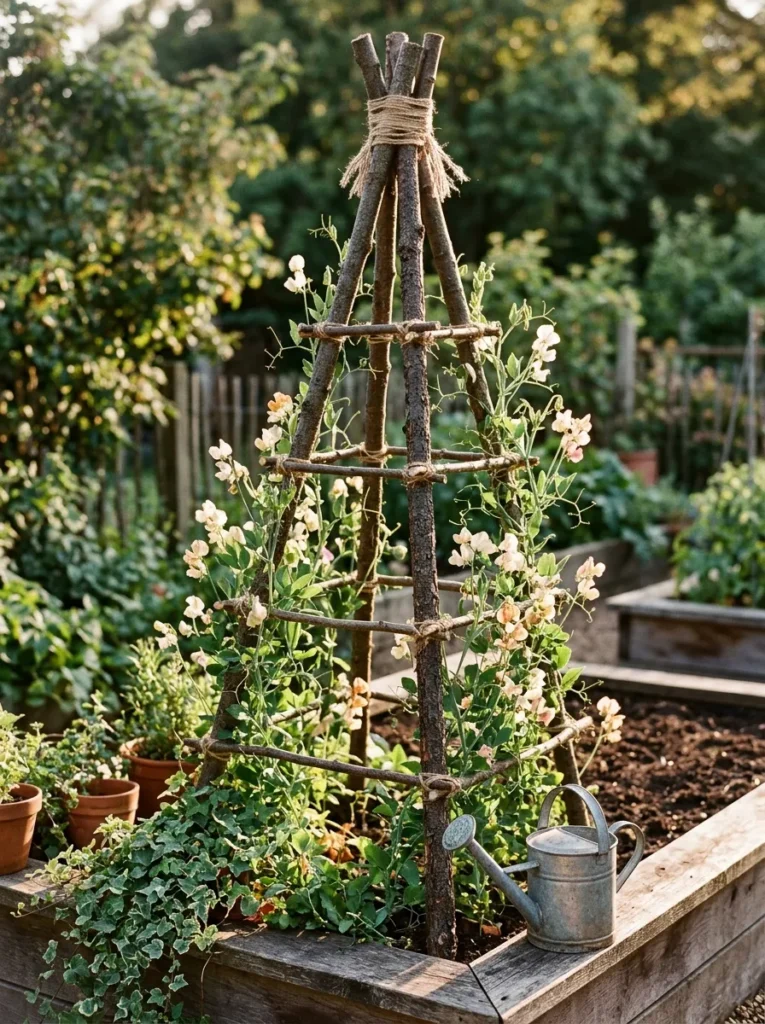
Cut three or four straight branches as tall as the climber will grow, lash them near the top with galvanized wire, and spread the legs into a cone. Add crosspieces of thin twig every foot or so and wire them in; tendrils grip thin, rough supports more easily than wide, smooth poles.
Wire beats natural twine here, since twine softens and slackens in wet soil by midsummer. Best for vegetable gardens growing peas, beans, or sweet peas, and for anyone with a pile of pruning. Once the plants fill in, the frame mostly vanishes under leaves, so choose a shape you like for the months it stands bare.
Mistake to Avoid: Pushing the legs only an inch or two into soil. A leafy plant catches wind like a sail, so set each leg about 8 inches deep and firm the soil around it.
8. Macramé Plant Hangers in Outdoor-Rated Cord
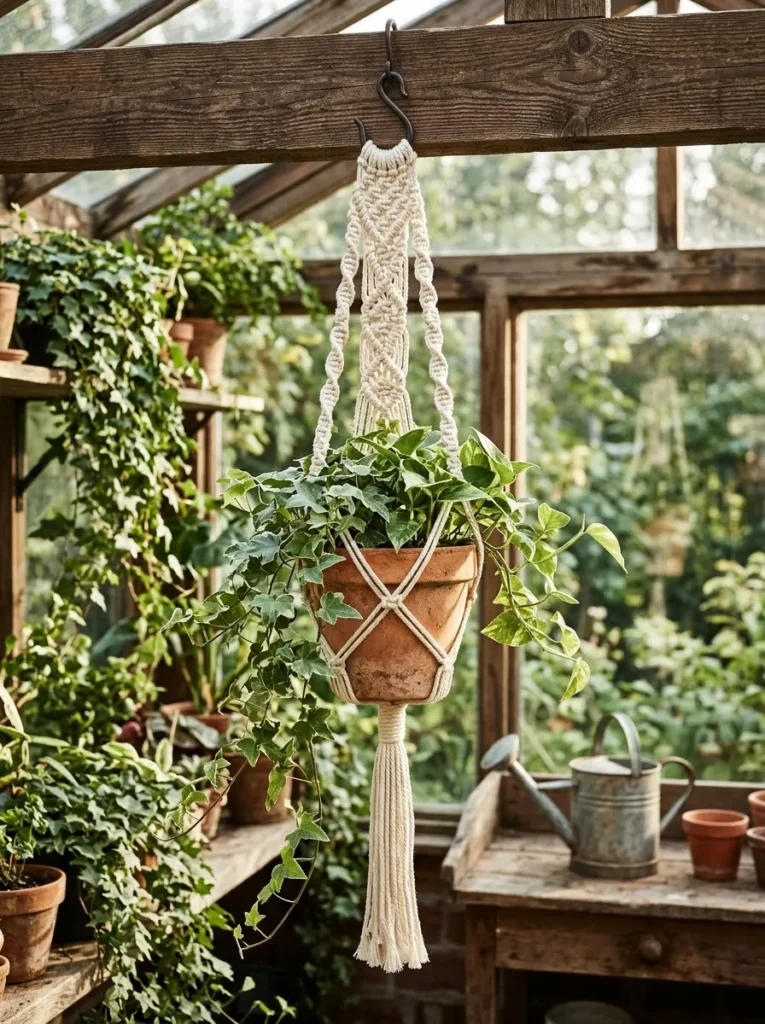
Porches and balconies with a ceiling beam or pergola but no floor space are made for hanging planters. Cotton cord looks soft but absorbs water and rots outdoors, so make the hanger from outdoor-rated polyester or polypropylene cord, which still reads as natural in a neutral shade.
Four long cords through a ring, a run of square knots, and a gathering knot at the base are all the technique this needs. A watered pot weighs much more than a dry one, so check the hook and beam against the fully wet weight, and screw the hook into a joist or beam, not a drywall anchor or an adhesive hook. Best for trailing plants that want air around them.
Pro Tip: Hang the planter from a low hook for a day, full of wet soil, before it goes overhead. Slipping knots show themselves while the pot is still within reach.
What You’ll Need
| Product | What to look for |
|---|---|
| Outdoor-rated polyester or polypropylene cord | A UV-resistant label, a thickness that holds a knot without slipping, a neutral shade that hides weathering |
| Metal ring | Seamless or welded and powder-coated so it won’t rust, large enough to gather four cords without crowding |
| Screw-in ceiling hook | A rated load comfortably above a fully watered pot, a threaded shank long enough to bite into a beam or joist |
9. Pebble-Mosaic Stepping Stones
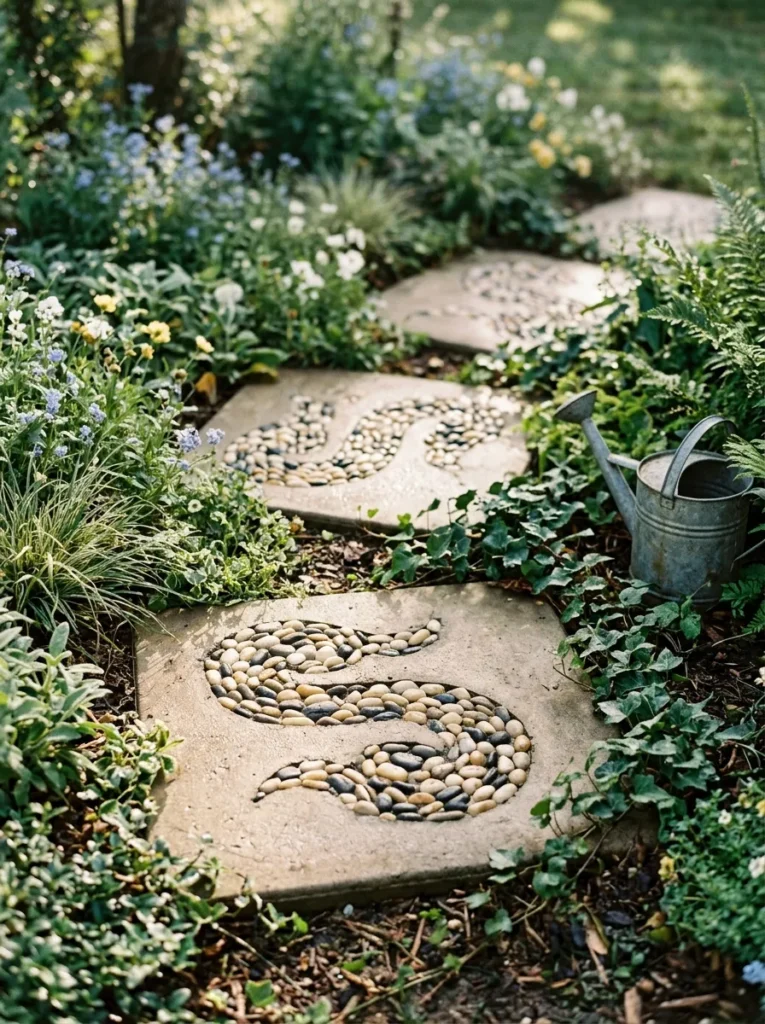
Store-bought pavers are plain gray and uniform; a cast stone pressed with glass gems or pebbles turns a walkway into something people notice. Pour concrete into a mold about 2 inches deep (a practical recommendation for a stone that will take footsteps), press the decoration in while the surface is soft, and set pieces on their narrow ends so they lock in.
Cure slowly, covered and kept damp, because rushing invites cracks. Wet cement is caustic: wear gloves, eye protection, and a dust mask, and get a helper for lifting, since finished stones are heavy. Best for weekend crafters who like a project with a lasting payoff.
✅ CHECKLIST Casting Day Checklist:
- [ ] Wipe the mold with a thin coat of cooking oil or release spray
- [ ] Mix to the ratio printed on the bag and fill the mold about 2 inches deep
- [ ] Press gems or pebbles in on their narrow ends while the surface is soft
- [ ] Cover with plastic and keep the stone damp as it cures
- [ ] Wait the number of days the bag recommends before unmolding and moving
Stacked pots become a water feature in an afternoon, and the single detail that decides whether it lasts is what holds the stack together.
10. A Stacked-Pot Bird Bath
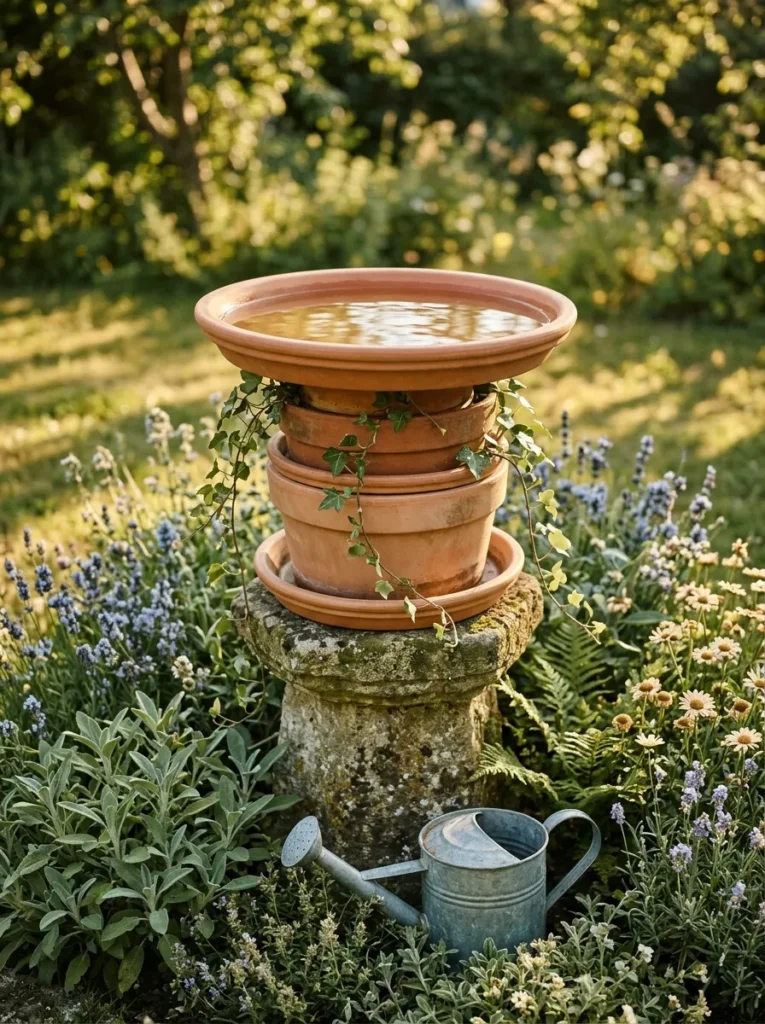
Birds judge a bath by depth and footing, not looks, so shallow and stable beat ornate. Invert a large frost-rated pot as the base, set a wide shallow saucer on top, and bond the pieces with exterior-rated adhesive, following its cure time.
Keep water about an inch or two at the deepest and drop a flat stone in the middle for perching. Place the bath near a shrub where birds can retreat, and set it on level ground so a landing bird doesn’t wobble it. Empty and refill every few days so mosquitoes don’t use it as a nursery. Best for gardens that already see regular birds.
Important: A deeper basin isn’t better. Most small garden birds prefer shallow water, so add footing with a flat stone rather than more depth.
What You’ll Need
| Product | What to look for |
|---|---|
| Wide shallow saucer | A matte or lightly textured surface for grip, a rim that holds water (no drainage hole, or one you can plug), wide enough to sit securely on the base |
| Large frost-rated pot for the base | Thick walls, a wide rim the saucer rests on without tipping, enough weight that a landing bird can’t move it |
| Smooth flat stone | Rounded edges, wide and flat enough to stand on, small enough to leave most of the basin open |
The assumption worth testing: Spreading handmade pieces evenly around the yard feels fair, but it reads as scattered. Gather them in groups of three at different heights, such as a low painted pot, a mid-height jar lantern, and a tall shepherd’s hook, then leave the stretches between groups quiet. One tight cluster at the patio edge does more than twelve pieces spaced a foot apart.
11. A Fairy Garden Vignette in a Tipped Pot
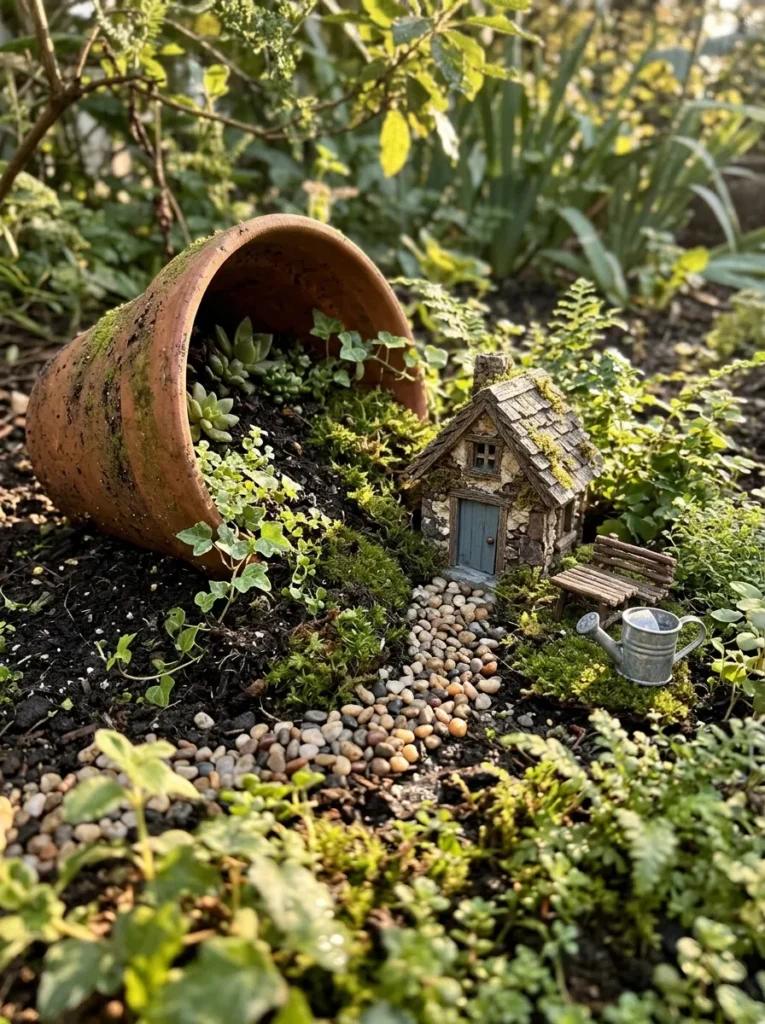
A tipped terracotta pot spilling moss and a tiny stone path into a bed reads as a hushed little scene that rewards close looking. Scale does the work: pick one miniature door, about thumb height, and size everything else to match, since mixed scales read as clutter.
Set the pot on its side in a shaded corner, pack it with soil, and plant low growers such as creeping thyme around the doorstep. Shade keeps moss from crisping and painted miniatures from fading, and a seam of pebbles makes a path without adding bulk. Best for small corners and anyone who wants an evening project. For more miniature ideas, browse these fairy crafts for adults.
Budget Version: Resin miniatures from craft and discount aisles, a bag of aquarium gravel for the path, and one nursery pot of creeping thyme keep a first scene well under $100.
12. Outdoor-Fabric Bunting for Pergolas and Fences
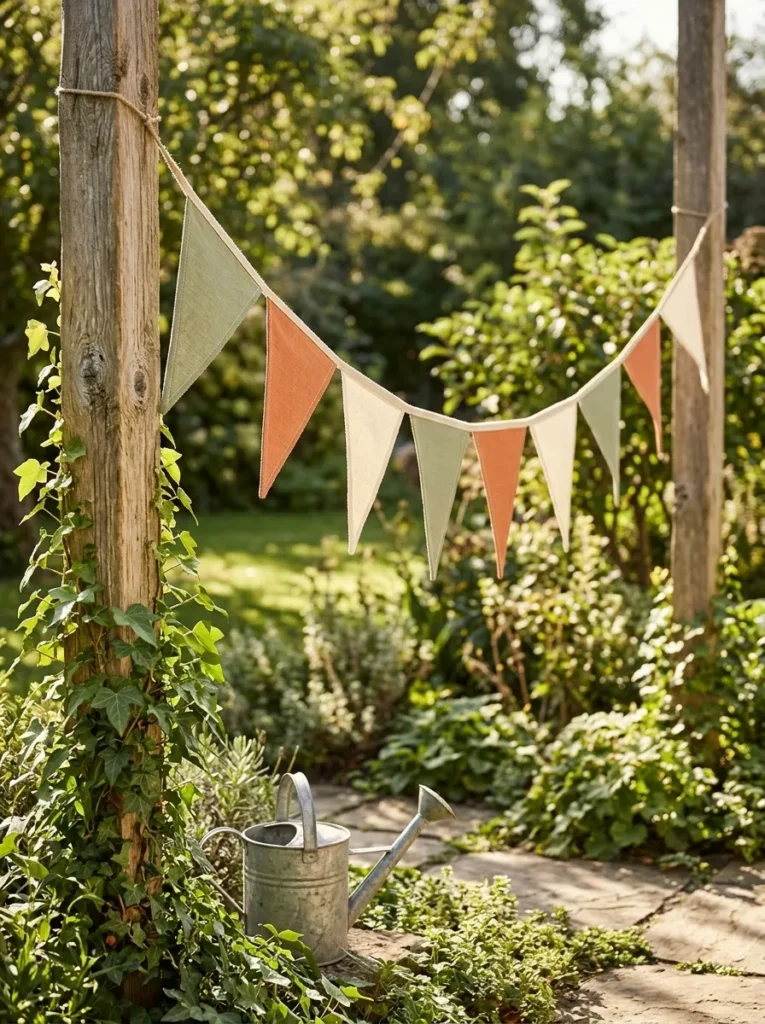
Pergolas, porches, and fence lines that need a festive line overhead but have no room for furniture are the natural home for bunting. Cut triangles from outdoor-rated fabric labeled UV-resistant (solution-dyed acrylic and polyester are common), pink the edges with pinking shears to slow fraying, and sew them onto cord or ribbon with a few inches between each flag.
Hang between two posts or hooks you trust, keep the line slightly slack so a gust doesn’t pull the screws out, and take it down before storms. Best for entertaining spaces. Beginners can find more simple patterns in these sewing crafts.
Warning: Standard cotton thread tends to break down in sun and rain faster than outdoor fabric does. Sew with UV-resistant polyester or bonded thread, or the flags will drop off the line mid-season.
How to Start Your Garden Decor Transformation
The right first move is almost always the cheapest piece closest to where you sit: one color-blocked pot beside the patio chair. It anchors the palette, so choose one saturated color and one soft neutral now and repeat them across jar lids, markers, and bunting. Before painting anything, decide what the weather will do to a piece, since that answer picks the material and the finish.
The most common beginner error is finishing outdoor pieces with indoor products such as craft glue, water-based paint, and unsealed wood. Rain softens all three. Check the label for exterior or outdoor use, test on a scrap, and reseal each spring if the surface looks dull.
Three items under $50 serve nearly every project here: a can of clear exterior-rated spray sealer, a multipack of outdoor-rated acrylic paint, and a pair of leather-palm work gloves. Each typically sits in the low-to-mid price range.
A first project takes an afternoon, and the pots, markers, and bunting each fit one. Cast stones and the bird bath want a weekend because of curing and adhesive time. Expect roughly $10–$40 (approximate) for a starter piece and about $100–$250 (approximate) to build a full set across a month of weekends.
Frequently Asked Questions
What paint works for outdoor craft projects?
Choose paint labeled for outdoor or exterior use, then seal it with a clear exterior-rated sealer. Craft paint alone usually fades or flakes faster in rain and sun, so the sealer extends its life. Test on a scrap first, because porous clay and glass take paint differently.
Can renters make garden decor crafts without damaging walls?
Yes, most of them stand, sit, or hang from freestanding hooks. Painted pots, jar lanterns on shepherd’s hooks, bird baths, and bottle edging need no drilling at all. For walls and railings, use clamps or over-the-rail hangers, and check your lease before putting a hole in anything.
How do I keep handmade garden pieces from fading?
Start with UV-resistant materials, then finish with an exterior-rated sealer. Part shade slows fading on painted surfaces and fabric. Reseal each spring if a surface looks dull, and bring bunting and other fabric pieces inside during storms and the off-season.
Are bottle edging and concrete projects safe around kids and pets?
Cured concrete stones are fine underfoot, but glass edging is the riskier project where children or dogs play. Wet cement is caustic, so keep everyone away until it has set. In play areas, stick with stone or plastic edging and save glass for beds beside fences.
Ready to Create Your Dream Garden?
Twelve garden decor crafts, from a painted pot to a stone path, come down to one habit: let the weather choose the materials, and the look takes care of itself. Nothing here demands a full weekend or a full yard, and a single hung lantern or painted pot is a legitimate start. Pick one pot today and paint its lower half.
By evening you’ll have an outdoor corner that feels lived in and lit, with a faint chime somewhere behind it. Save the projects that caught your eye to a Pinterest board and build them in whatever order your weekends allow.
Keep Exploring
- 10 Garden Container Ideas for Small Patios
- 11 Balcony Decor Ideas for Tiny Outdoor Spaces
- 8 DIY Garden Lighting Ideas for Long Summer Evenings