15 Charming Fall Wood Crafts for Festive Decorations
Fall wood crafts are handmade decorations built from raw slices, beads, posts and branches, and they work in autumn because wood’s own tone matches the season better than any paint color. Here are 15 charming fall wood crafts for festive decorations, all built around one rule: choose the wood first, then the craft.
Picture a mantel strung with honey-colored beads, a table where every place card is a slice of birch, and a porch box of mums in cedar that has started to silver. Raw grain catches lamplight differently than paint does, so a house with a few of these pieces glows a little warmer after dark. Sanded edges feel smooth under a palm, bark edges stay rough, and both belong in the same room. Autumn decorating looks best when someone clearly made it on a Saturday, and every project here qualifies.
Jump To
- Why Fall Wood Crafts Make Such a Difference
- Fifteen Projects, Quickest Wins First
- Graduated wood bead garland
- Wooden spoon turkeys
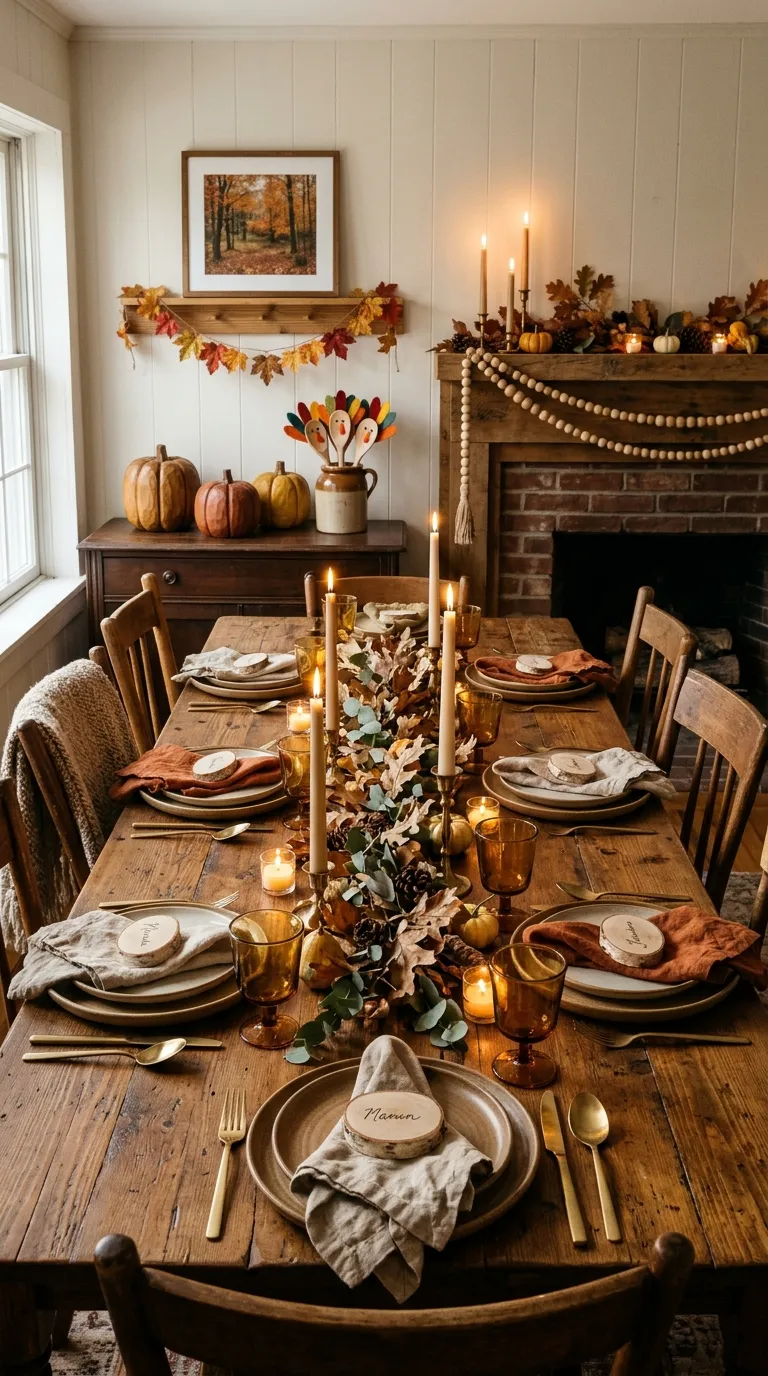
- Birch slice place cards
- Three-height 4×4 post pumpkins
- Stair-step crate risers
- Whitewashed pine sign
- Drilled birch log tealight holders
- Embroidery-hoop wreath
- Wood-burned leaf coasters
- Gratitude branch with wood tags
- Cedar picket planter box
- Plywood leaf cutouts on a branch
- Pine picture ledge
- Graduated-stain GATHER letters
- Leaning dowel ladder
- How to Start Your Fall Wood Crafts Transformation
- Frequently Asked Questions
- Ready to Fill Your Home With Fall Wood Crafts?
Why Fall Wood Crafts Make Such a Difference
Raw wood already sits inside the autumn palette: birch in cream, oak in honey, cedar in reddish brown, so a thin wash or a light stain goes a long way. Most of these projects live on a mantel, console or table, and a small space only needs two or three of them, since a crowded surface reads as clutter. Begin with the no-saw projects (beads, slices, spoons) and add cut pieces once sanding feels familiar.
Quick Reference
| Factor | Answer |
|---|---|
| Best starting point | Bead garland or slice place cards (no saw needed) |
| Biggest impact area | Mantel and dining table |
| Budget to start | About $15–$40 for a first set (approximate) |
| Time to complete | One weekend for a first set of three or four projects |
Fifteen Projects, Quickest Wins First
1. Graduated Wood Bead Garland, Small Beads Swelling to Large
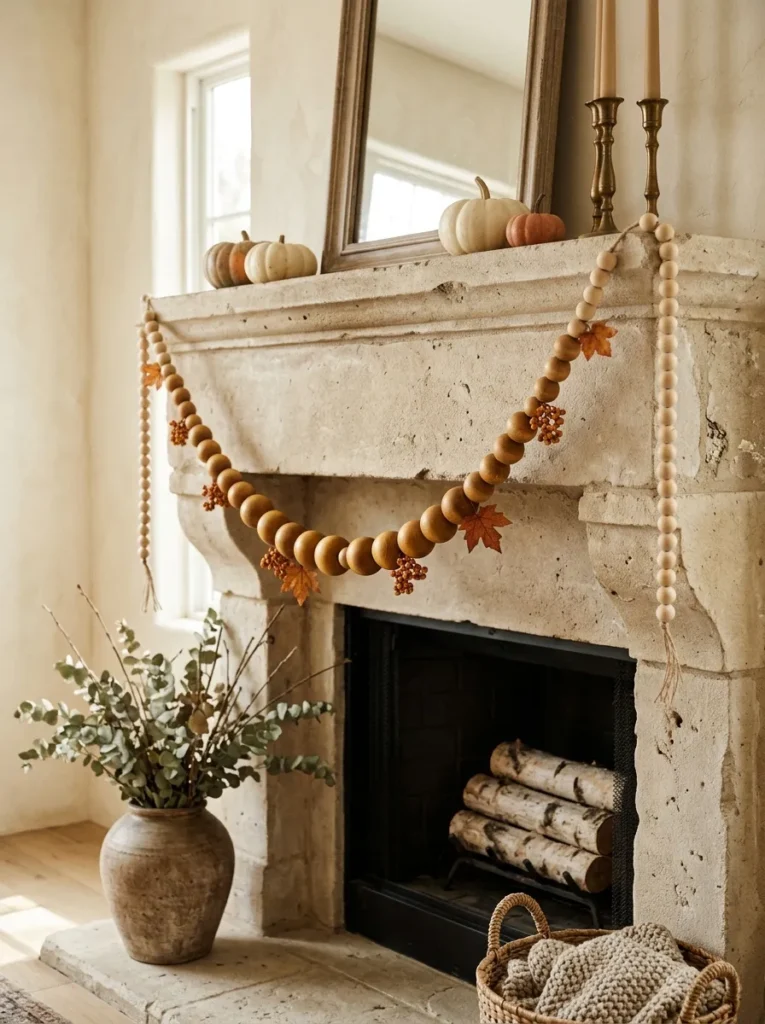
Picture a mantel garland that moves from small pale beads at each end to chunky honey-brown ones in the center, with short stretches of cord showing between them. Graduated size gives the eye a place to land, which a strand of identical beads never does.
Large wooden beads are among the cheapest supplies in inexpensive home decor crafts. String them from roughly 10 mm at the ends to roughly 25 mm in the middle, knotting after every bead so nothing slides, and cut the cord about 12 inches longer than the span so it can sag in a curve. Tint half the beads with watered-down rust or mustard craft paint. Weigh the finished garland on a kitchen scale and match it to your hook’s stated weight limit. With no saw or drilling involved, it suits first-timers and renters.
Budget Version: Buy one bag of mixed unfinished beads and one spool of jute cord, tint the beads yourself, and the garland stays well under $100 (approximate).
What You’ll Need
| Product | What to look for |
|---|---|
| Unfinished wooden beads in mixed sizes | Sizes from about 10 mm to 25 mm, smooth surfaces, holes wide enough for your cord |
| Jute or cotton cord | Thin enough for the smallest bead, thick enough to hold a knot |
| Faux berry sprigs | Short, light stems that tuck under the cord without adding weight |
2. Wooden Spoon Turkeys With Felt Feather Fans
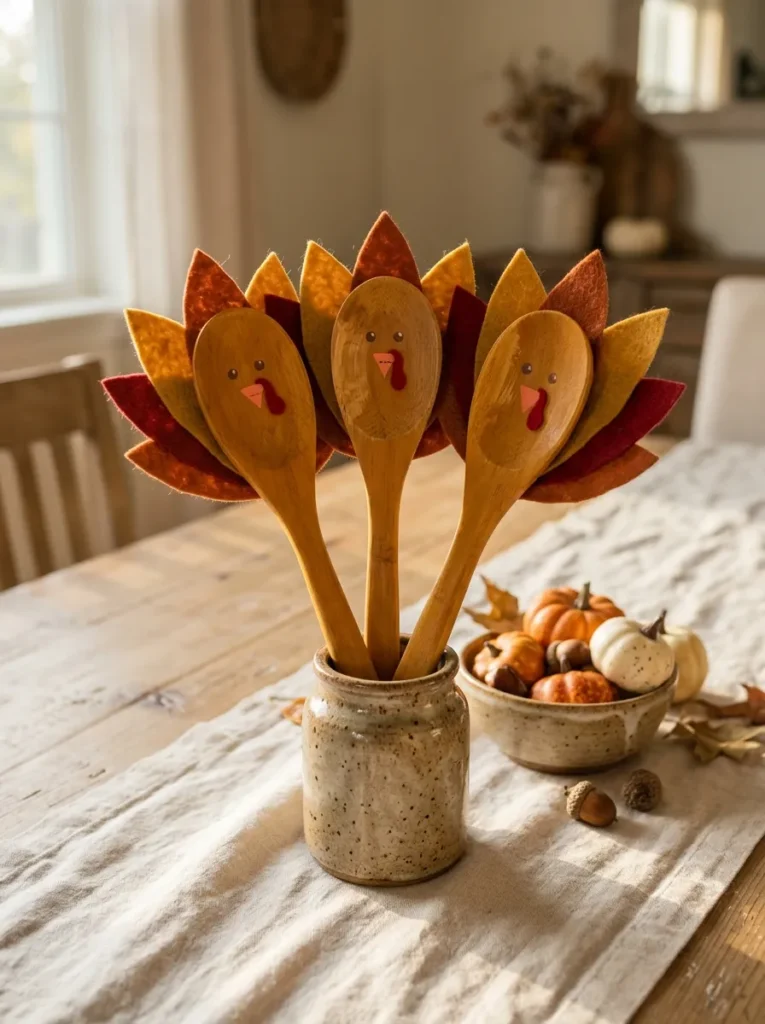
Kids who can paint but shouldn’t be near a saw will like this one, and so will anyone who wants a festive piece finished in an hour. A plain wooden cooking spoon becomes the turkey: paint the bowl as face and chest, then glue a felt or craft-foam feather fan behind it, or trace small hands onto cardstock as in these handprint crafts for kids.
Choose a shallow, rounded bowl, because deep ones tilt backward and leave the turkey staring at the ceiling. Paint the face while the spoon still lies flat. Use a low-temperature glue gun, and let an adult handle it when children are helping.
Pro Tip: Seat the handles in a small jar filled with dried lentils or rice. The filler grips each handle at a fixed angle, so the group can face different directions.
3. Birch Slice Place Cards for the Thanksgiving Table
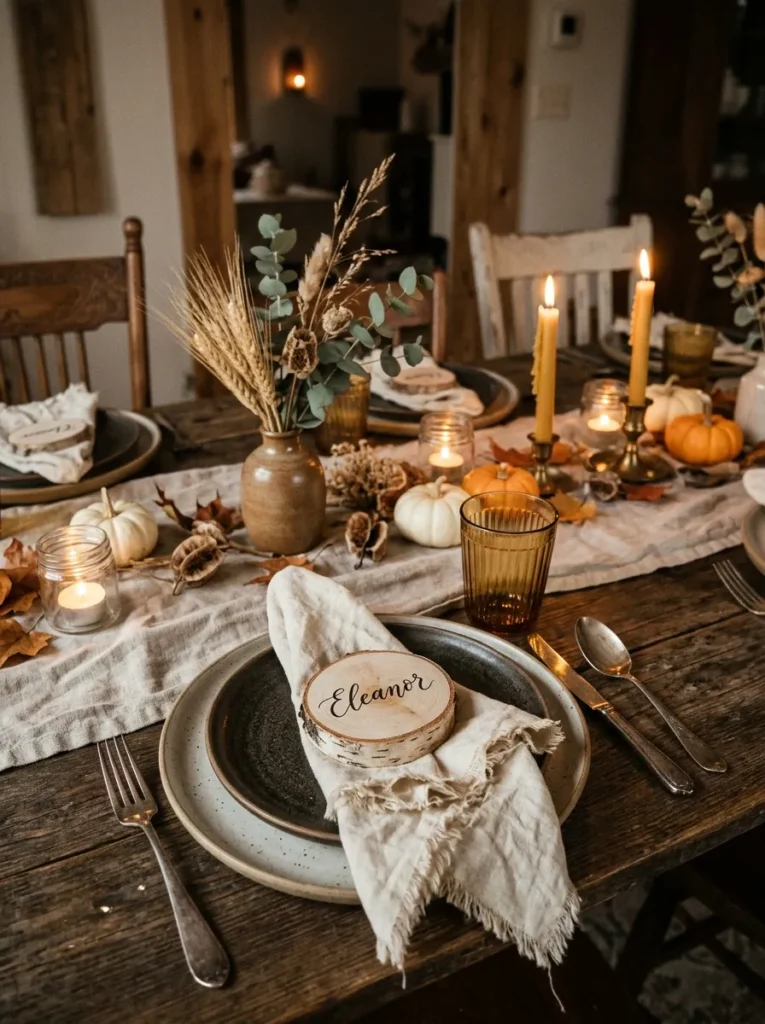
Start by sanding each slice, because ink and paint pens skip across fuzzy grain. Slices about 3 to 4 inches across and ½ inch thick sit comfortably on a dinner plate or lean against a glass. Write each name with a fine-tip paint pen, testing on the back of one slice first, since some grains bleed along the rings.
Buy kiln-dried slices; fresh-cut rounds crack as they dry, and a cheap bag of green ones is false economy. Against a white plate, a dark-edged slice is the one point of contrast on the table, so the setting looks planned even with plain napkins. Hosts who want a styled table without a florist will get the most from it.
What You’ll Need
| Product | What to look for |
|---|---|
| Kiln-dried birch or basswood slices | About 3 to 4 inches across and ½ inch thick, smooth cut face |
| Cotton or linen napkins | A solid autumn tone that won’t compete with the lettering |
| Matte stoneware dinner plates | A pale, plain glaze so the dark slice edge stands out |
Next up: one ordinary length of 4×4 lumber turns into a trio of pumpkins, provided you check a single stamp on the wood before you buy.
4. Three-Height Pumpkins Cut From a Single 4×4 Post
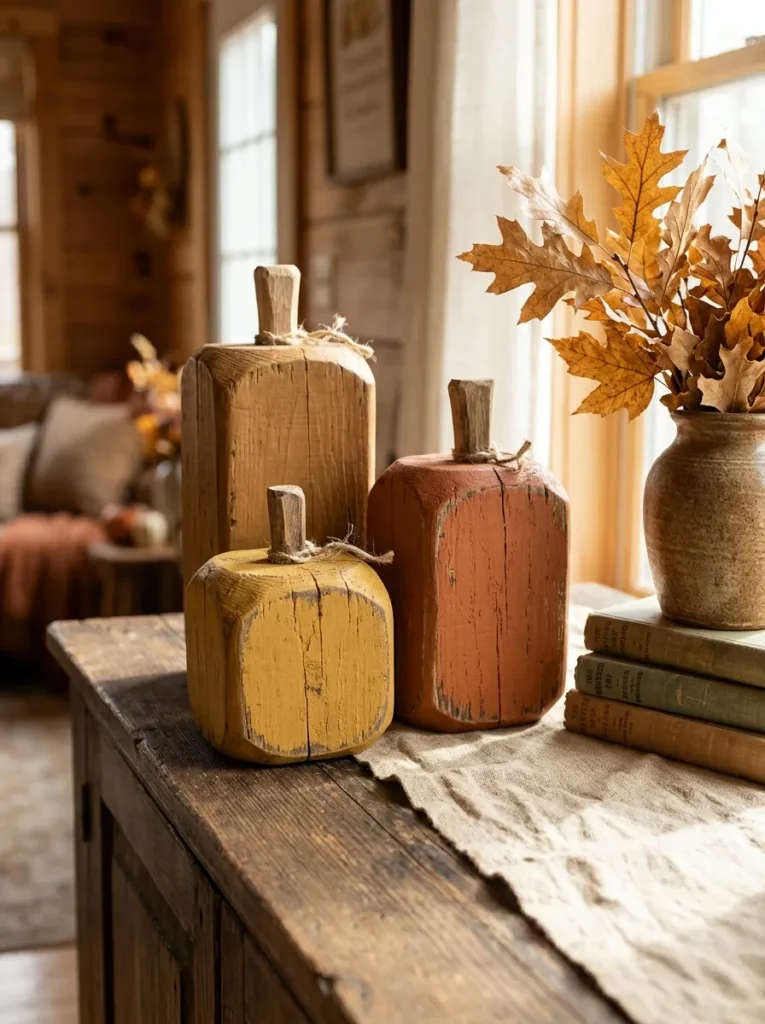
Turned wooden pumpkins from a store are smooth, round and identical, which is exactly why they feel generic. A pumpkin cut from a 4×4 post (actually about 3½ inches square) keeps flat sides and eased corners, and the faceted shape reads as hand-built. Cut three lengths, one tall, one medium and one short, then round over the top edges with a sanding block until the square softens into a squat pumpkin.
Drill a shallow hole the width of a dried twig, glue in the stem, and finish with a rust-orange wash so the grain shows. Painted warm, they hold their own beside larger fall decor DIY crafts. Anyone with a hand saw and a patient hour will get a centerpiece that doesn’t look like craft-store stock.
Warning: Check the end tag before you buy. Pressure-treated posts are made for outdoor use and are the wrong choice for indoor pieces people handle, so buy untreated pine or fir, and clamp the post before each cut so it can’t roll.
5. Stair-Step Crate Risers for a Sideboard Display
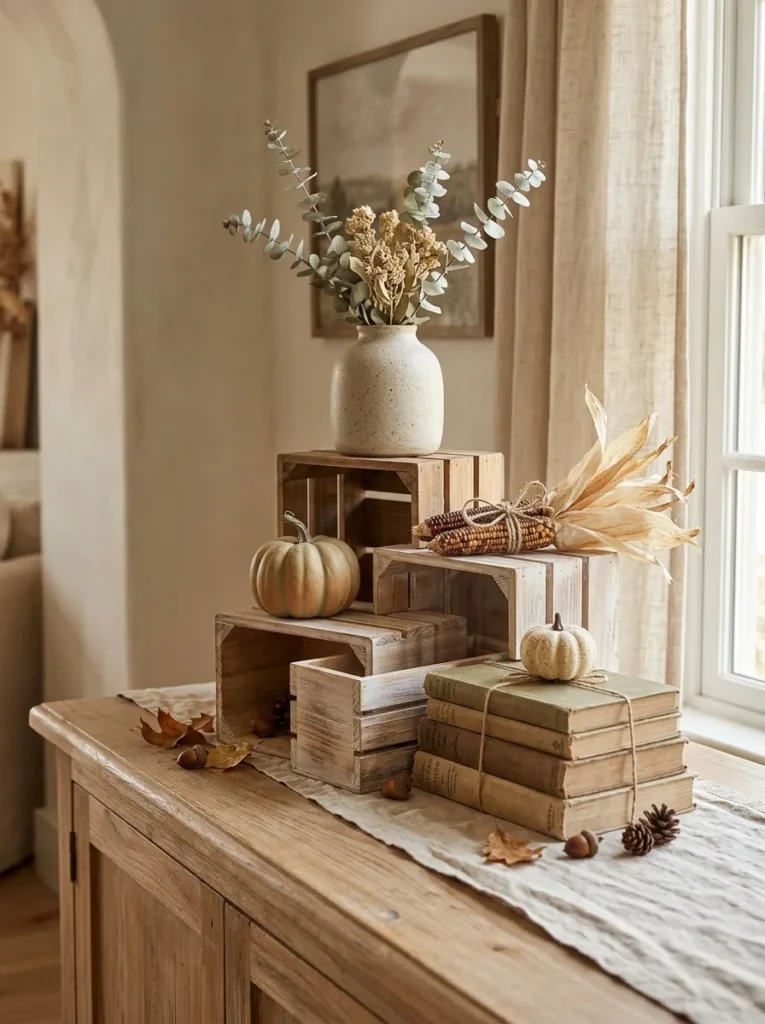
Height variation does more for a display than any prop: three levels read as an arrangement, while three items at one height read as a row. Turn one small crate on its side so the open face becomes a niche, stand a second upright beside it, and lay a plank across both for a middle shelf.
Put the widest crate at the bottom, keep the heaviest items low, and press down on every surface with your palm before setting anything breakable on top. Resist filling every crate, because one empty niche gives the eye somewhere to rest. A sideboard or dining table that needs a skyline is the right home for this idea.
Small-Space Tip: On a narrow console, use two crates instead of three and push the taller one to a back corner, so the arrangement forms a single diagonal line rather than a row.
What You’ll Need
| Product | What to look for |
|---|---|
| Small wooden crates | Slats that don’t flex under pressure, in at least two sizes |
| Wooden plank board | Long enough to span two crates with a small overhang, thick enough not to bow |
| Small faux pumpkins | Matte finish, muted tones, a few sizes |
6. Whitewashed Pine Sign With Dry-Brushed Lettering
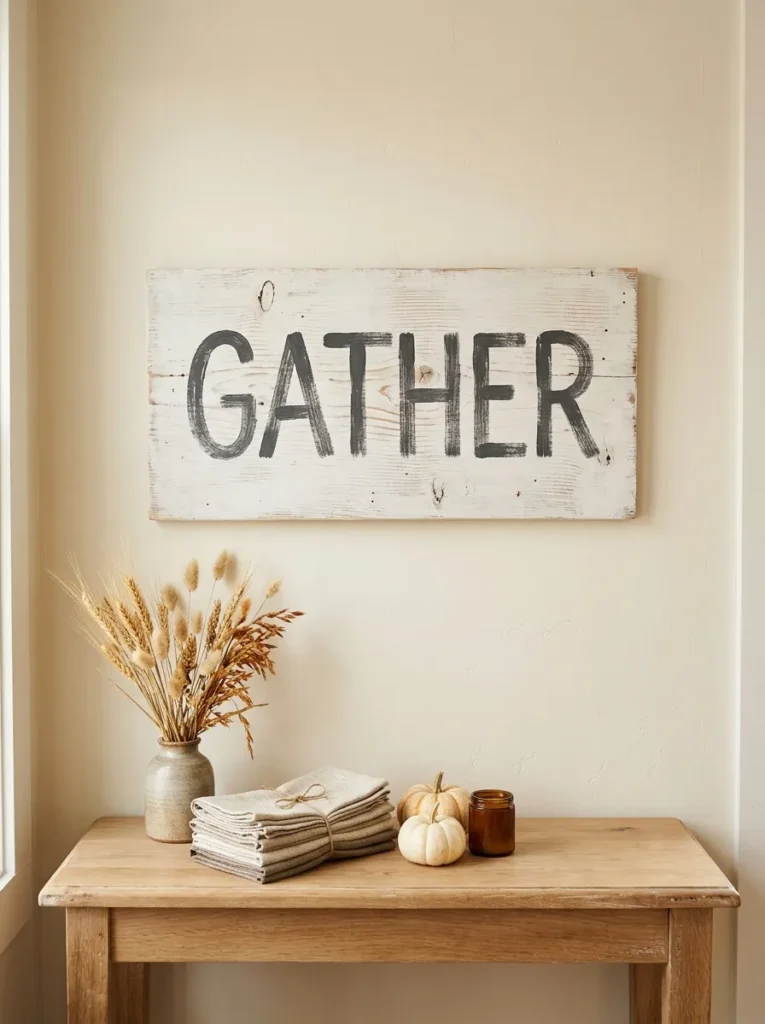
Brush a thinned coat of white or cream paint across a 1×6 pine board (about 5½ inches wide), then wipe it back with a rag, moving with the grain, until knots and growth rings show. Let it dry completely before stenciling, or paint wicks into the grain and the letters blur. Stencil a word like “Harvest” in deep rust with a nearly dry brush, dabbing straight down rather than stroking.
Pine’s soft early wood absorbs more wash than its harder late wood, which is largely why the grain shows so clearly. Anyone who likes a rustic look without a polished finish will enjoy this one, and the finished sign belongs on any list of handmade wooden gifts too.
Important: A wash is not a protective finish. Thinned paint leaves the wood nearly bare, so a sign that hangs in a busy entryway needs a clear water-based topcoat if you want the color to survive handling.
Next, a log with a hole drilled into it, and the one measurement that decides whether the holder is safe or just snug.
7. Drilled Birch Log Tealight Holders
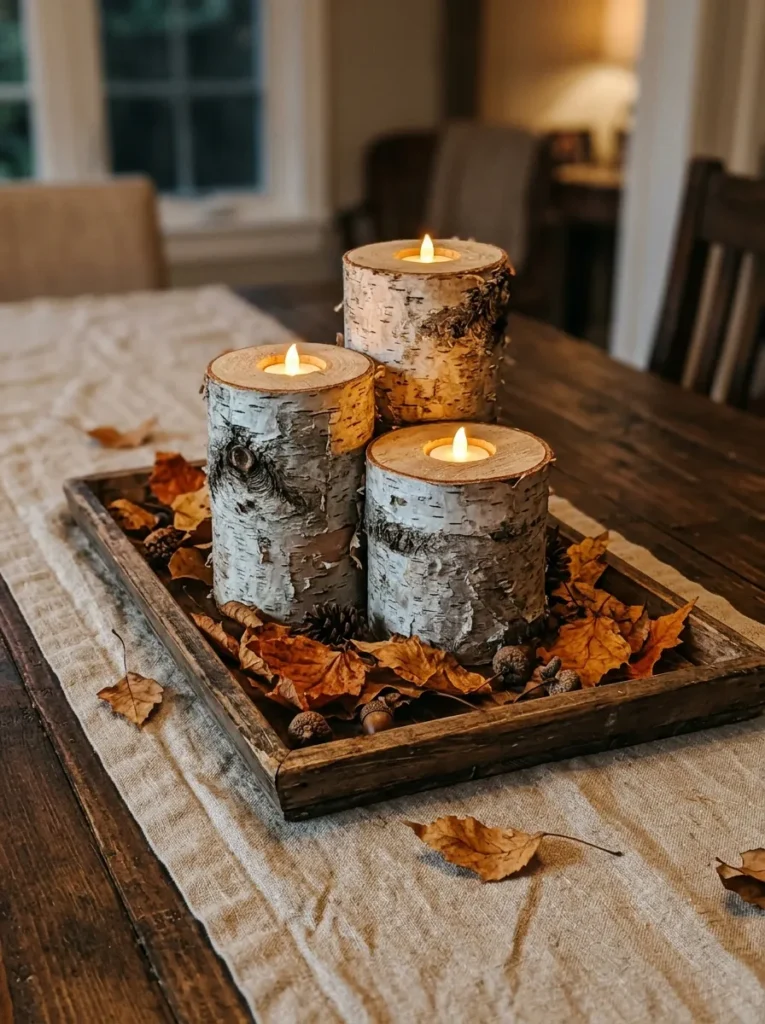
Anyone who wants candlelight on the table without hunting for candlesticks can use a short birch log instead. Pick a dry, seasoned log about 3 to 4 inches across, since green logs crack as they dry and the crack can run through the hole.
Measure your tealight (most are about 1½ inches across), then drill with a Forstner bit about ⅛ inch wider, to a depth just over the tealight’s height. That small gap keeps the cup from wedging and leaves room for air to move around it. Swap the autumn leaves for evergreen sprigs to carry the same holders into Christmas DIY crafts.
Warning: Real flame and dry wood do not mix casually. Use flameless LED tealights wherever the holder sits near dried leaves, fabric or a garland, and never leave a lit tealight unattended; a drilled hole does not make a log fireproof.
8. Embroidery-Hoop Wreath Dressed on One Third
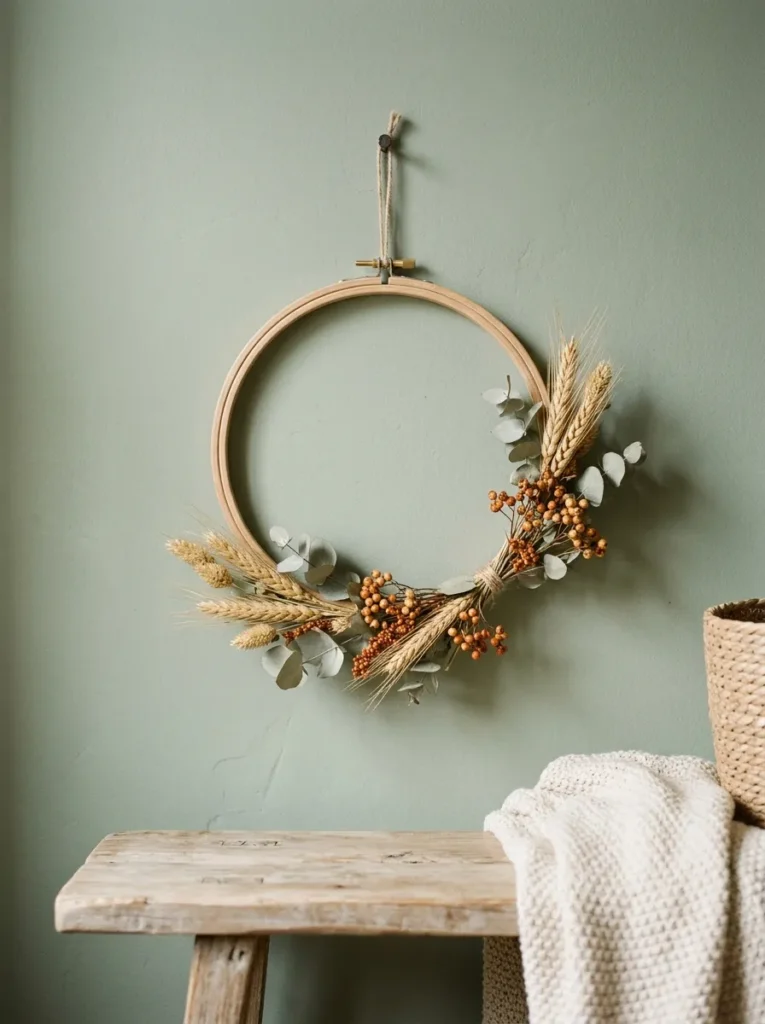
Negative space makes a wreath look designed: dress only about a third of a wooden hoop and let the bare wood carry the rest. A 10 to 12 inch embroidery hoop gives a clean ring with no wreath form, either as the outer ring alone for a fine line or nested with the inner ring for a heavier look held by a few turns of floral wire.
Wire stems of dried wheat and preserved eucalyptus to the lower left, angled in one direction so they follow the curve. A full wreath is heavier than a hoop needs, and fewer stems read cleaner. It hangs from a single nail, so interior doors and bare walls both work.
Styling Note: Let a few wheat tips overshoot the edge of the hoop by about an inch. The overlap makes the wood look as if it is growing something rather than just holding it.
What You’ll Need
| Product | What to look for |
|---|---|
| Wooden embroidery hoop | Smooth, splinter-free rings in the 10 to 12 inch range |
| Dried wheat or oat stems | Fully dried, in varied lengths, not heavily shedding |
| Preserved eucalyptus | Preserved rather than fresh, with stems that wire without snapping |
9. Wood-Burned Leaf Coasters
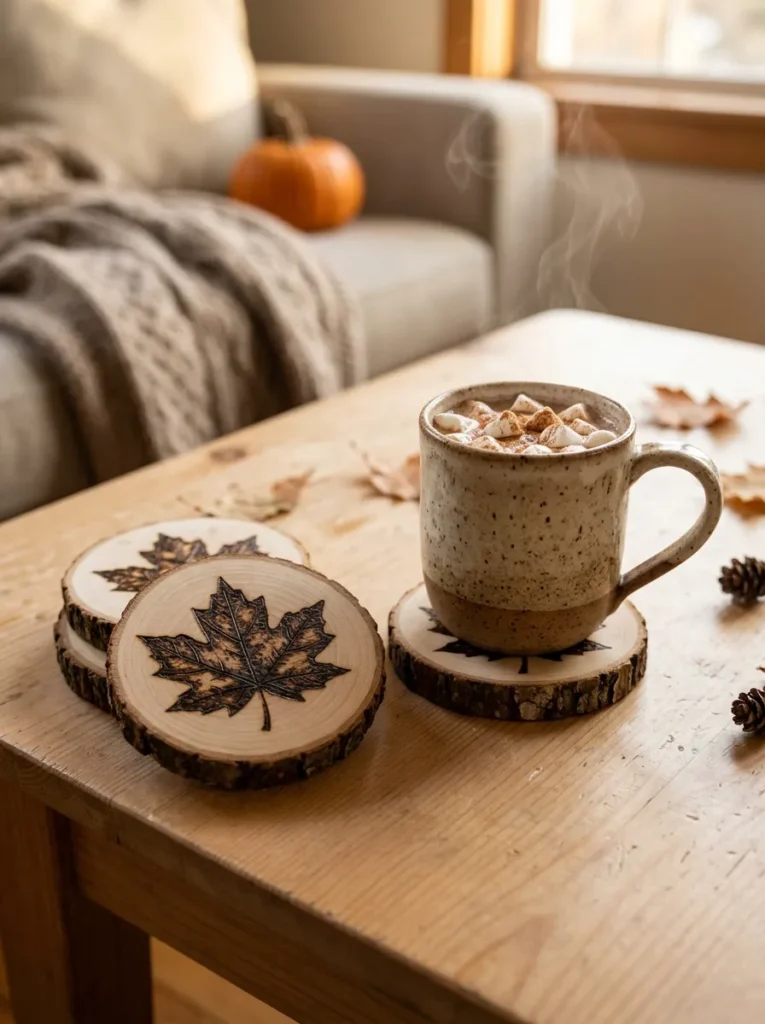
Painted coasters chip where a hot mug sits and condensation pools. A burned design is part of the wood itself, so there is no paint layer to lift. Basswood is a popular choice for burning because its grain is fine and even. Stick to untreated wood, since burning plywood or painted and varnished surfaces releases unpleasant fumes.
Because the tool runs hot, work on a heatproof surface in a ventilated room and rest the pen in its stand between strokes. A set of four tied with cord slips easily into a pile of handmade Christmas gifts.
✅ Wood-Burned Coaster Checklist:
- [ ] Sand the slice to a smooth face and wipe off the dust
- [ ] Trace the leaf outline lightly in soft pencil
- [ ] Practice on scrap wood, then burn the outline first and the veins second
- [ ] Rest the pen in its stand and let the tool cool completely before storing it
- [ ] Seal with a finish labeled for water and heat resistance once the wood is cool
Next, a bare branch and a bag of wood tags, and the detail that keeps everything upright once the tags go on.
10. Gratitude Branch With Staggered Wood Tags
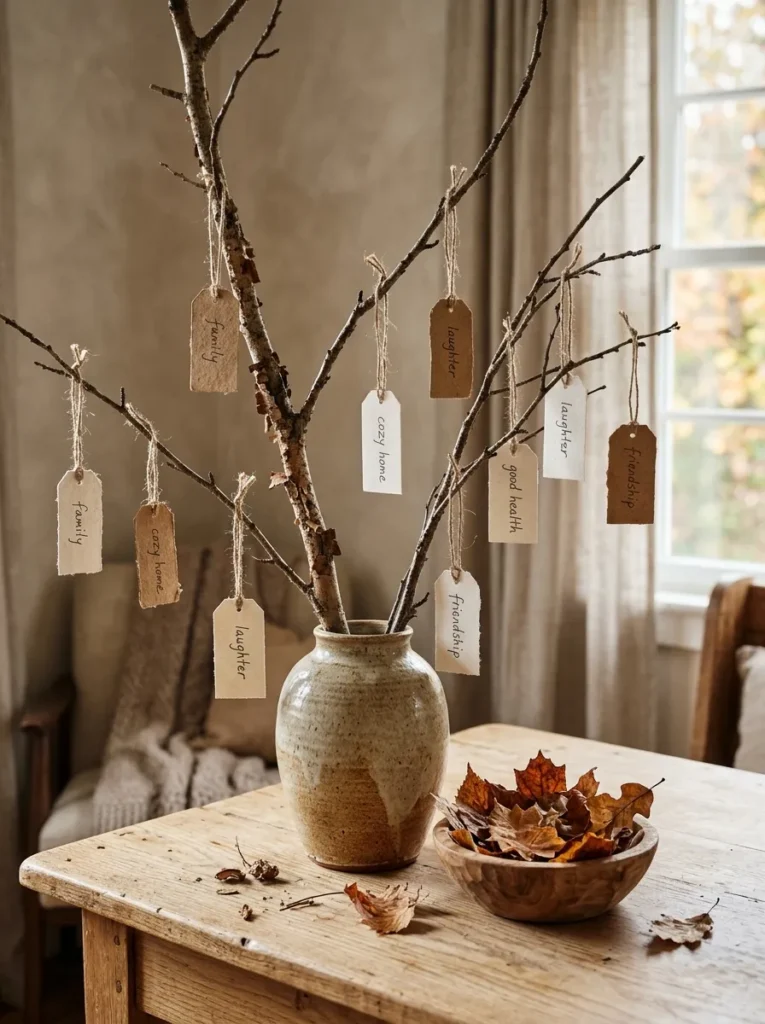
Picture a bare branch standing in a heavy jar, hung with wooden tags that each carry a handwritten line of thanks. By the end of a Thanksgiving dinner the decoration has changed, because the guests wrote it. Choose a forked branch about two feet tall, since forks give tags room to hang without crowding.
Fill the jar with river stones or sand so the branch doesn’t tip once the tags go on. Use thin craft wood tags with pre-drilled holes and cotton cord. Gatherings of any size benefit, and children can write their own tags.
Pro Tip: Cut the cord loops in three lengths and alternate them, so tags hang at staggered heights and don’t spin into each other.
11. Cedar Picket Planter Box for Porch Mums
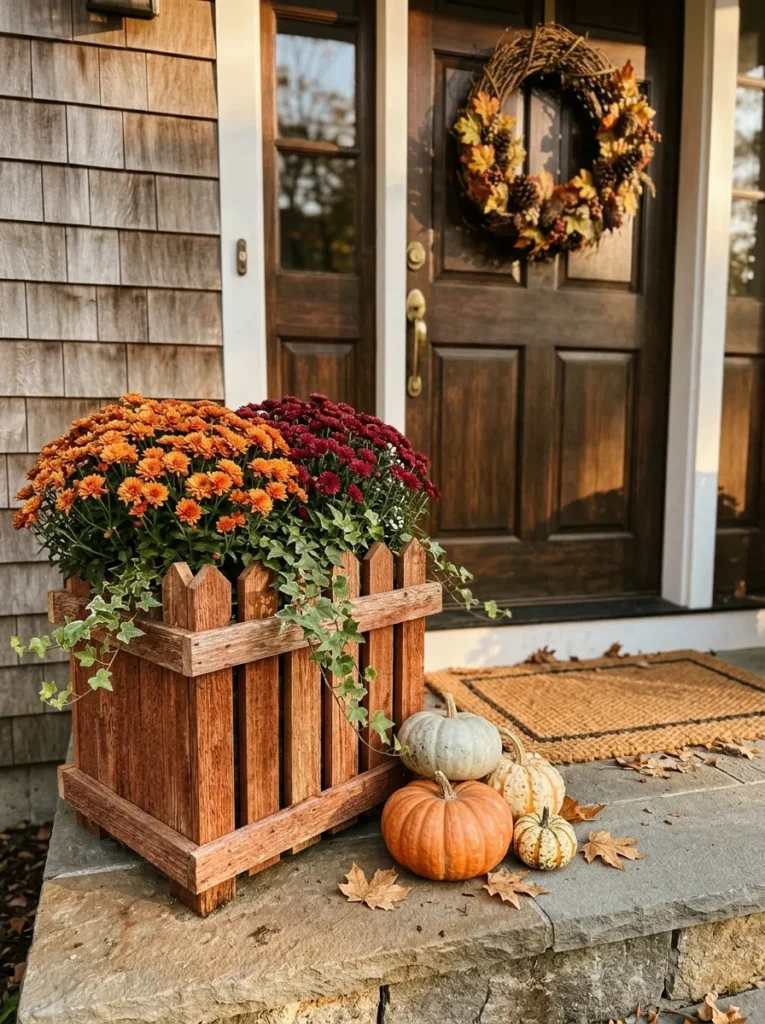
Anyone with porch steps and a few potted mums can build a cedar picket planter in an afternoon. Cedar is naturally resistant to decay outdoors, which makes it a sensible choice for anything that will see water. Screw four sides together, add bottom slats with gaps of about ½ inch for drainage, and raise the box on small feet so water can’t pool underneath. Stain the outside only, or let it silver.
Mistake to Avoid: Planting directly into the box. Constantly wet soil will eventually break down even rot-resistant wood, so keep the nursery pot as a liner and lift it out to water.
12. Oversized Plywood Leaf Cutouts on a Bare Branch
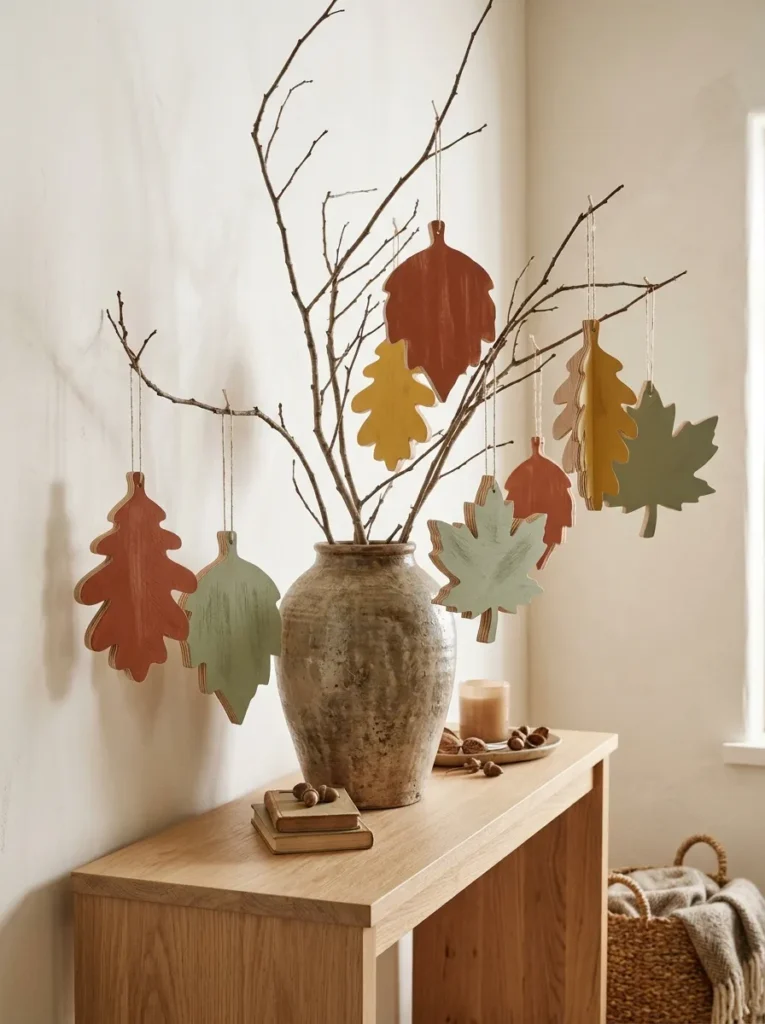
Silhouette and scale matter more than detail here: single leaves cut 8 to 10 inches across read from across a room, while small ones disappear. Trace real maple or oak leaves, enlarge them on a photocopier, and cut the outlines from ¼-inch plywood with a jigsaw or a coping saw.
Clamp the board before every cut. Sand the edges, drill a small hole at each leaf’s top, and hang them at varied heights. If a saw isn’t in the garage, the same silhouettes work in fall paper crafts, and you can swap in wood later.
Important: Paint does not cover a cut plywood edge the way it covers the face. The exposed layers soak it up and turn darker, so sand the edge and brush on a base coat first or each leaf will look outlined.
Next, a shelf that holds the whole display, and what holds the shelf matters more than how it looks.
13. Pine Picture Ledge With a Layered Fall Vignette
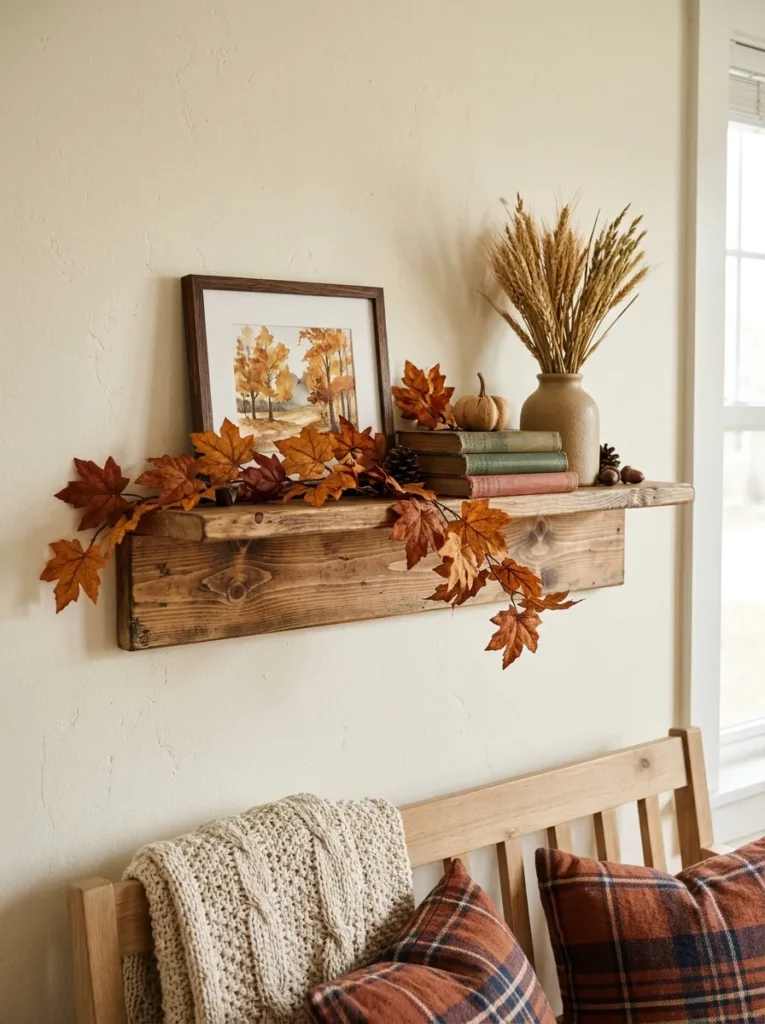
Nail or glue a 1×2 lip to the front edge of a 1×4 pine board (about ¾ inch thick and 3½ inches wide) so frames and small pumpkins can’t slide off, then round every edge and paint or wash to match the room. Mount into studs whenever possible, or use wall anchors rated for more than the load, and keep the ledge for light things like framed prints and mini pumpkins.
Lean the largest frame at the back and overlap two smaller items in front so the group reads as one composition. Above a sofa or desk, where a table wouldn’t fit, a ledge earns its place.
Pro Tip: Mark stud positions with a stud finder and a pencil, then drill pilot holes before driving screws. A pilot hole stops a 1×4 from splitting near its end.
Observation
A detail that changes the result more than it should: the edges, not the faces. Beginners sand the flat surface and stop, yet sharp corners are where paint pools thick, stain runs darker and finish chips first. One light pass at roughly 45 degrees along every edge with 120-grit, then 220-grit, is what separates a piece that looks handmade from one that looks unfinished.
14. Graduated-Stain GATHER Letters for the Mantel

Six wooden letters spelling GATHER stand along a mantel, and the word deepens as you read it: one coat of stain on the first two letters, two on the next two, three on the last two. That gradation adds movement to a static word while the grain keeps it from looking printed.
Choose letters 6 to 8 inches tall so it reads across a room, spaced about half a letter’s width apart. Wind a battery-powered LED string behind them, which avoids running a cord across the hearth; for a plug-in set, look for one marked as listed by a recognized testing laboratory, and keep every string away from open flame.
Quick Win: Dry-fit the letters on the mantel and take a photo before staining anything. You’ll catch spacing problems while they’re still free to fix.
What You’ll Need
| Product | What to look for |
|---|---|
| Unfinished wooden letters | A flat face that takes stain evenly, 6 to 8 inches tall |
| Battery-powered LED fairy lights | Warm white, thin wire, a battery pack that hides easily |
| Faux fall leaf garland | Muted tones and a bendable stem |
15. Leaning Dowel Ladder for Hanging Baskets and Garland
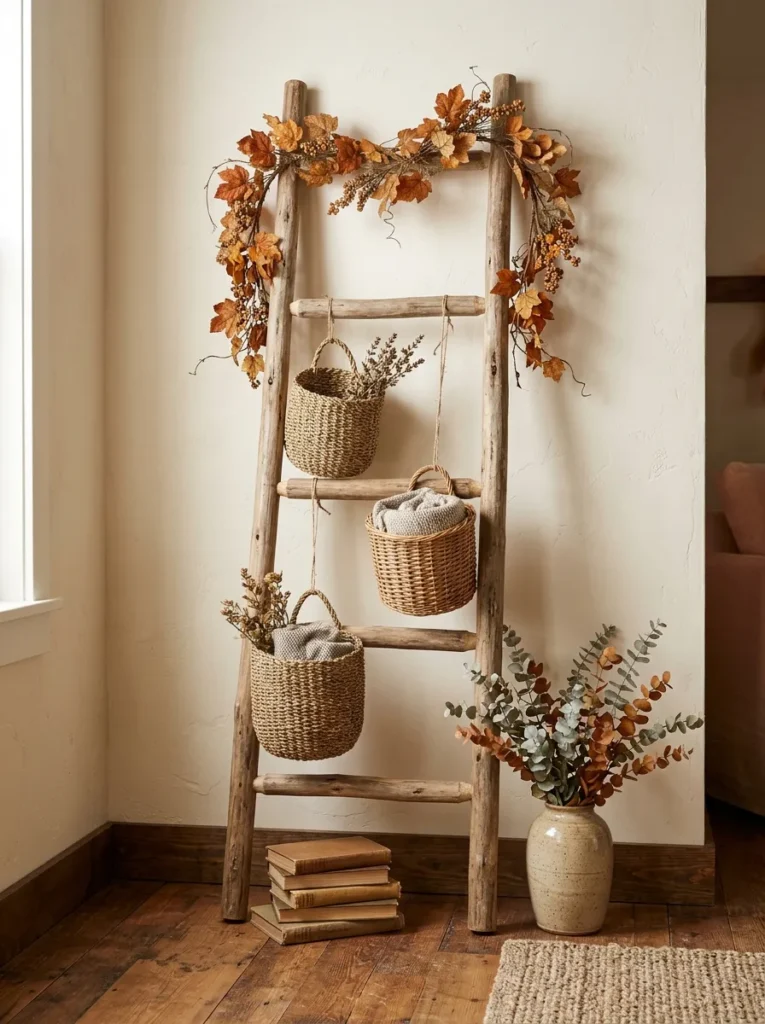
A shelf stacks things horizontally, while a leaning ladder pulls the eye upward and fills a wall corner that would otherwise sit empty. Cut two 2×2 rails (about 1½ inches square) to 48 inches and drill holes for ¾-inch dowel rungs, starting 4 inches from the bottom and spacing them 10 inches apart, which puts the rungs at 4, 14, 24, 34 and 44 inches with 4 inches clear at the top.
Glue and clamp each rung, sand the edges, and lean the ladder with its base roughly a foot from the wall. Hang small baskets or a leaf garland from S-hooks, keeping the load light.
Warning: A decorative ladder is not a climbing ladder, and these dowel joints are not rated to carry a person’s weight. Keep what you hang light, lean it at a stable angle, and tie the top to the wall with a small screw eye and loop wherever kids or pets pass.
How to Start Your Fall Wood Crafts Transformation
Before anything else, order one bag of kiln-dried wood slices in the 3- to 4-inch range. That is the choose-the-wood-first rule in practice: once the slices are in hand, place cards and burned coasters both become easy weekend projects.
The most common beginner error is buying stain before testing it. Pine absorbs stain unevenly and blotches. Test every finish on an offcut of the same wood first, and if it blotches, switch to a thinned paint wash.
Three useful items stay under $50 combined: a dual-grit sanding block (120 and 220), a small can of matte clear water-based sealer, and a pack of unfinished wooden clothespins for clipping leaf cutouts or tags to a length of cord.
A first set of three or four projects takes one weekend and about $15–$40 in supplies (approximate). All 15 take several weekends, and a full set including the ladder, ledge and planter runs roughly $100–$200 (approximate), mostly lumber and hardware.
Frequently Asked Questions
What kind of wood works best for beginners?
Pine is the most forgiving starting wood because it is soft, inexpensive and easy to cut and sand. It takes stain unevenly, though, so use paint or a thinned wash instead of a dark stain. Birch and basswood are good choices for slices and burned designs because their pale, even grain shows detail clearly.
Can I make these projects without power tools?
Yes, several of them need only sandpaper and glue. The bead garland, spoon turkeys, place cards, hoop wreath, gratitude branch and lettered mantel set all use pre-cut or ready-made wood. For straight cuts elsewhere, a hand saw with a miter box works, just more slowly, so clamp the wood firmly and take your time.
How do I store fall wood crafts until next year?
Wrap each piece in plain paper or cloth and keep it somewhere dry with steady temperatures. Damp basements invite mildew, and hot attics can warp or crack wood, so a closet shelf is usually safer. Take batteries out of any lights or LED tealights first, since leaking batteries can stain and corrode.
Can I put candles on any of these projects?
Only the drilled log holders are designed to hold a flame, and flameless LED tealights are the safer default. Keep open flames away from dried wheat, leaf garlands, fabric and bare wood pieces, and never leave a lit candle unattended. Every other project here is meant for display, not for burning.
Ready to Fill Your Home With Fall Wood Crafts?
These 15 fall wood crafts cover quick strings and slices, sanded and cut pieces, and a few weekend builds, so there is an entry point whatever tools you own. Let the piece of wood on your bench choose the project, whether that is a bag of beads, a leftover post or a handful of birch rounds.
One garland on a bare mantel already changes how the room feels. Tonight, knot the first ten beads onto a length of cord and drape it over the mantel to see how it sits. By Thanksgiving the house can hold hand-lettered slices at every seat and a glow that feels warmer after dark. Pin your favorites to a fall DIY board, so the supply list is waiting when you reach the lumber aisle.
Keep Exploring
- 12 Handmade Wooden Gifts Worth Giving This Season
- 15 Easy Fall Crafts for Adults to Finish in One Evening
- 14 Christmas DIY Crafts to Start Before the Rush