17 Thanksgiving Crafts for Adults to Make This Holiday
The best Thanksgiving crafts for adults are the ones that end up on the table instead of in a drawer. These are 17 Thanksgiving crafts for adults to make this holiday, ordered so you start whatever needs to press, dry, or cure first and save the quick assembly for the last weekend. Plan backward from the table and the whole thing stays calm.
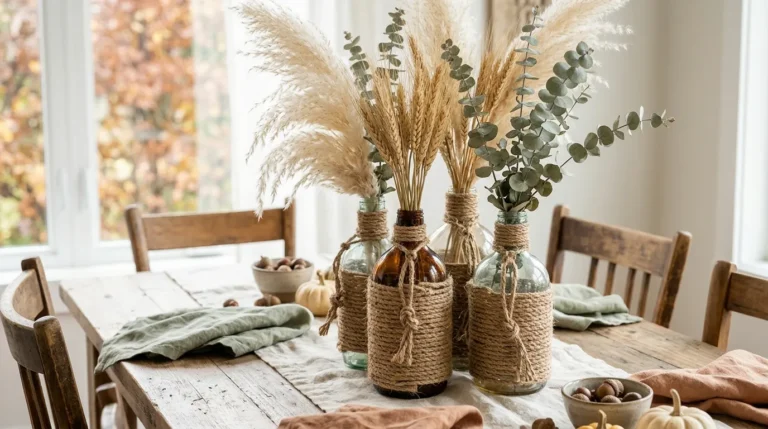
Picture amber light on a linen runner, a taper burning beside a gilded pumpkin, and the faint smell of orange peel and cinnamon from the kitchen. Every place setting carries something a guest can ask about. A handmade table does not need to match; it needs to look decided.
Why Thanksgiving Crafts for Adults Make Such a Difference
Adult crafting works best with real materials: oatmeal linen, beeswax, hardwood, dried citrus, and rust, ochre, and cream wool. Handmade pieces make a table look collected instead of bought, and most of these projects fit on a single tray, so small kitchens are no obstacle. Begin with whatever takes longest to dry, press, or cure.
Quick Reference
| Factor | Answer |
|---|---|
| Best starting point | Pressing leaves and slicing oranges, both of which need waiting time |
| Biggest impact area | The dining table and the space overhead |
| Budget to start | Roughly $20–$40 (approximate) |
| Time to complete | 1–3 hours of hands-on work per craft; clay needs 1–3 days to dry |
The Crafts, Quick Wins First
1. Pressed-Leaf Place Cards With a Metallic Pen Name
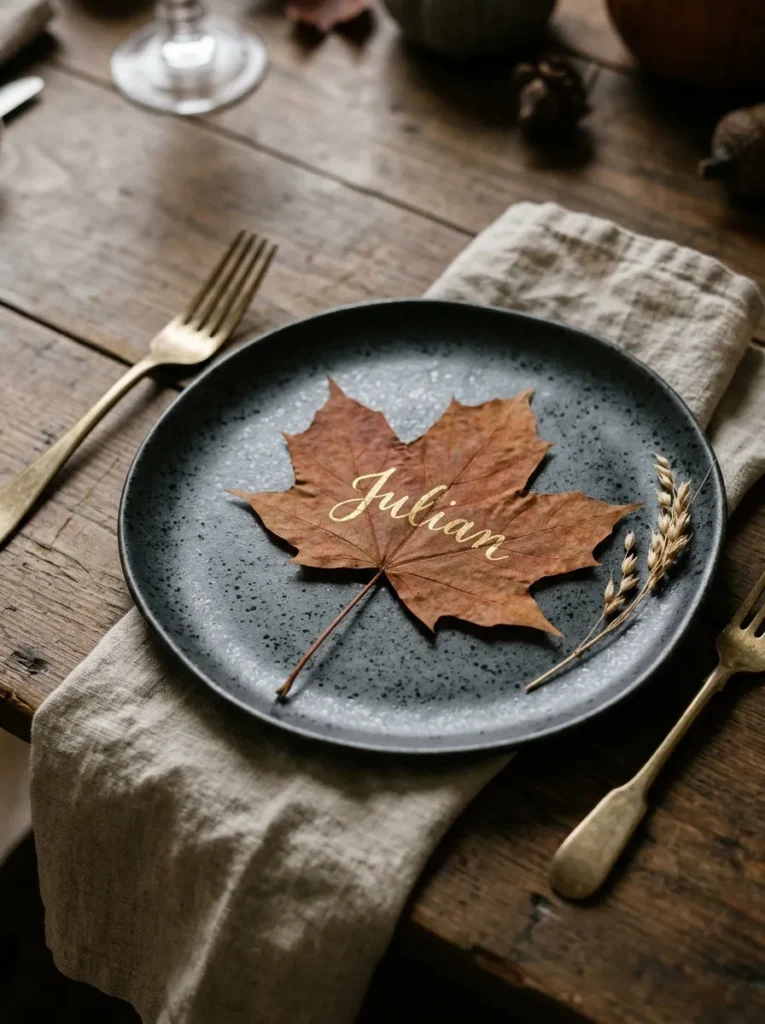
One pressed leaf at each plate, the name inked in gold along the midrib, looks quiet and deliberate. Thin leaves such as maple press flat and stay supple, while thick, leathery ones curl as they dry. Press them between sheets of paper under heavy books for about a week, swapping the paper once if it feels damp. Write on the matte underside, which usually takes a paint pen better than the glossy top. It suits hosts who want a handmade detail at every seat without any glue or stitching.
🟡 Pro Tip: Press five or six more leaves than you have guests. Some crack when the pen pushes on a thick vein, and spares save the last-minute scramble.
Also view: 15 Creative Fall Decor DIY Crafts on a Small Budget
2. Dried Orange and Cinnamon Garland
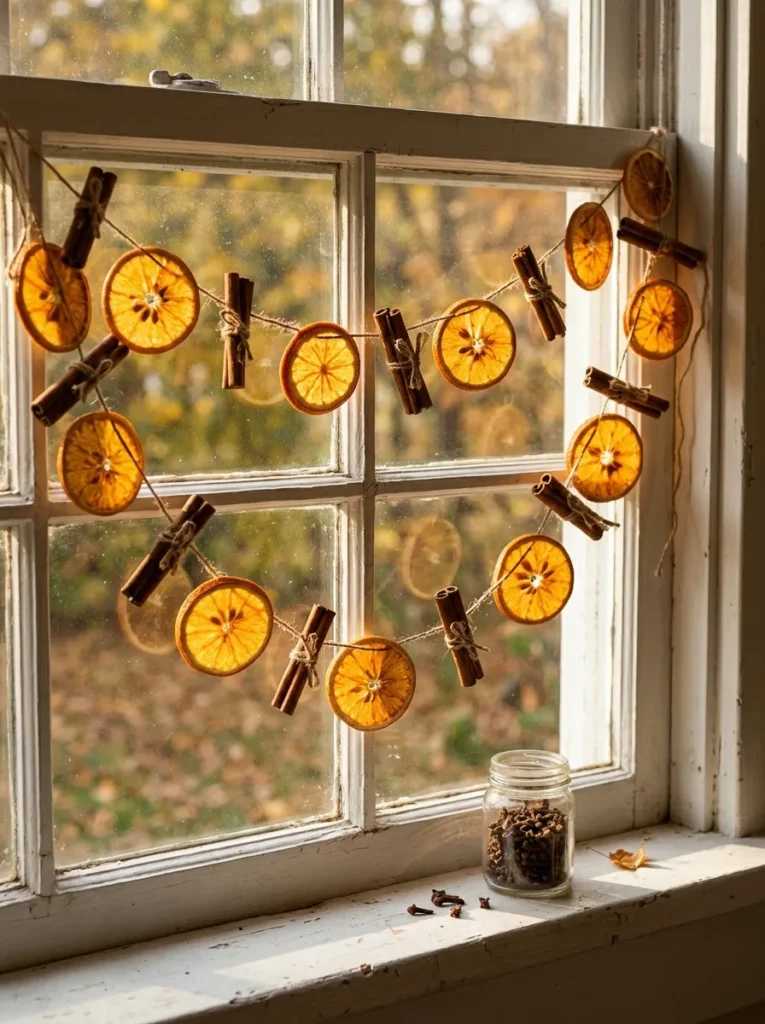
Slice oranges about ¼ inch thick, blot them, and lay them on a rack in a 200°F oven for roughly 2–3 hours, flipping once. They are done when leathery with no sticky center; timing varies by oven and fruit. Thread them on jute twine with a needle, alternating with cinnamon sticks tied in pairs. Hung across a window, the light turns the slices stained-glass amber. It works well for renters, since a pair of removable hooks holds the whole thing.
⚠️ Warning: Slices thicker than ¼ inch stay damp at the core and turn moldy once strung. If a slice bends like wet felt, return it to the oven.
3. Gold-Leaf Mini Pumpkins
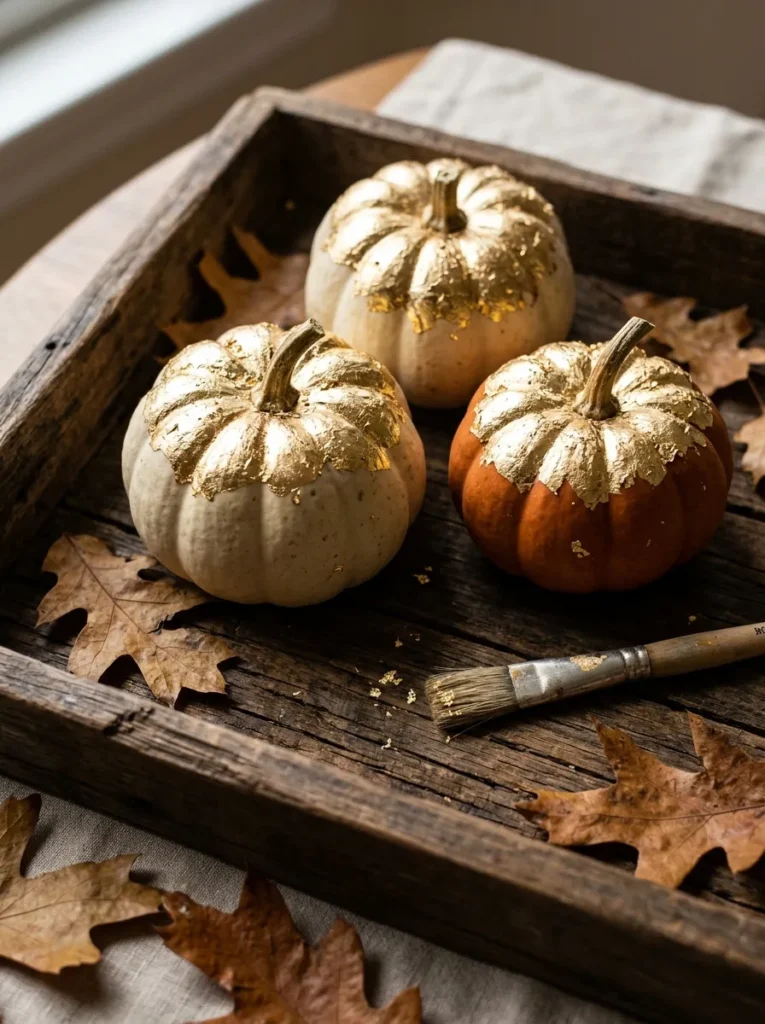
Fully gilded pumpkins look like Christmas ornaments. Gild only the stem and the top third, and the gold reads like sunlight catching the harvest. Wipe each pumpkin clean and dry, brush gilding size on the stem and shoulders, and wait until the size turns tacky as its label directs. Press imitation gold leaf on, then tap it down with a soft brush. Leaf sticks only where adhesive sits, so the ridges leave a naturally broken edge. That imperfection is the look.
📌 🎨 Styling Note: Group gilded pumpkins in odd numbers, three or five, at different heights so the gold catches light at several levels.
Clay shrinks and cracks when rushed, and the napkin rings in the next idea take more patience than anything so far.
4. Leaf-Imprinted Clay Napkin Rings
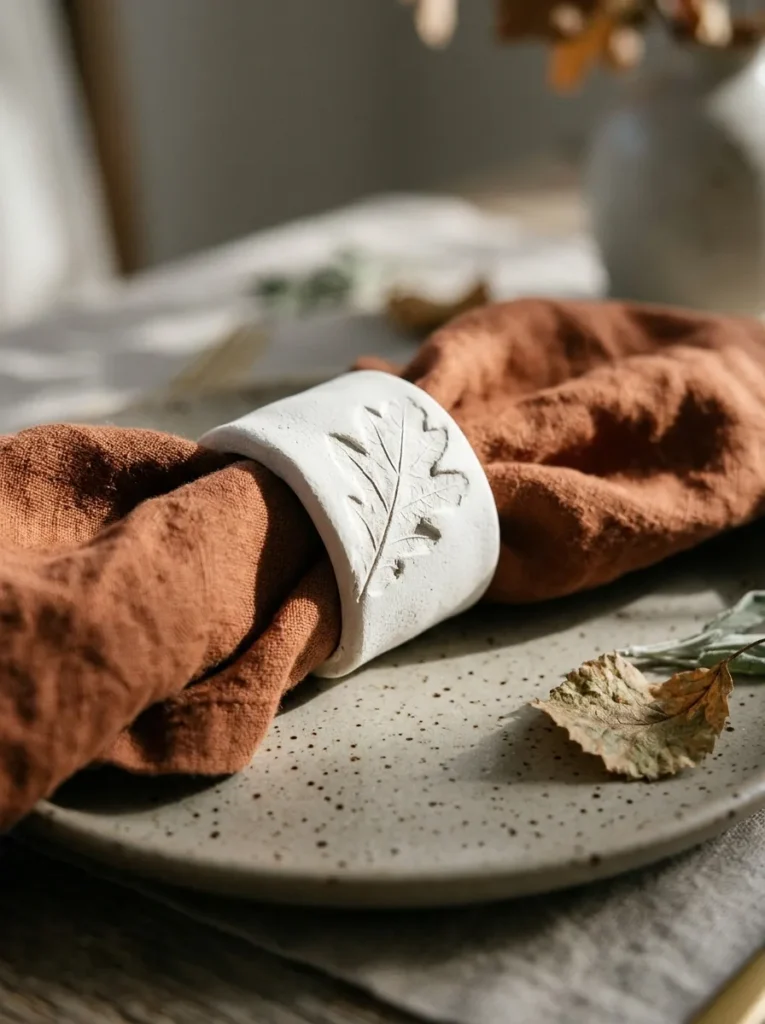
Relief reads only when it throws a shadow, so press deep into thin clay. Roll air-dry clay to ¼ inch and press a vein-heavy leaf into it, underside down, because the veins are raised there. Cut a strip about 1½ inches wide and 7 inches long. Wrap it around a parchment-lined roll roughly 2 inches across, then score and dab the seam with water to join it. Dry away from radiators for 1–3 days, since fast drying cracks clay. This suits anyone who wants a set that outlasts the holiday.
✅ Clay Napkin Ring Sequence:
- [ ] Roll clay to ¼ inch thick
- [ ] Press the leaf underside down, then peel it off
- [ ] Cut a strip 1½ inches wide and about 7 inches long
- [ ] Wrap around a parchment-lined roll, scoring and joining the seam
- [ ] Dry 1–3 days, sand the edges, and seal matte
5. Rolled Beeswax Taper Candles
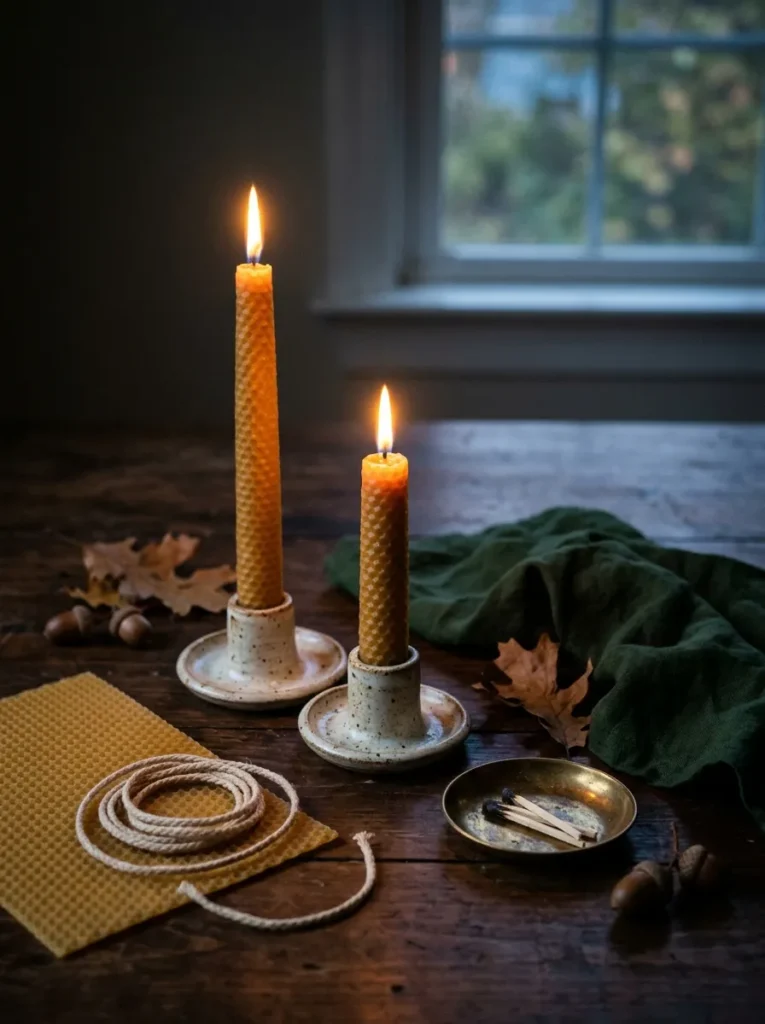
Anyone who wants candlelight without melting wax can roll it from honeycomb sheets in about ten minutes. Warm a sheet briefly with a hair dryer so it bends without cracking. Lay the wick along one edge with about an inch of it sticking out past the top, then roll tightly and press the seam closed. Cut the sheet on a diagonal and the roll comes out as a tapered candle. Thicker candles need a thicker wick, so match them.
Safety: trim the wick to about ¼ inch before lighting, never leave a flame unattended, and keep tapers well away from dried garlands and anything hanging overhead.
6. Sweater-Sleeve Pumpkins From Thrifted Knits
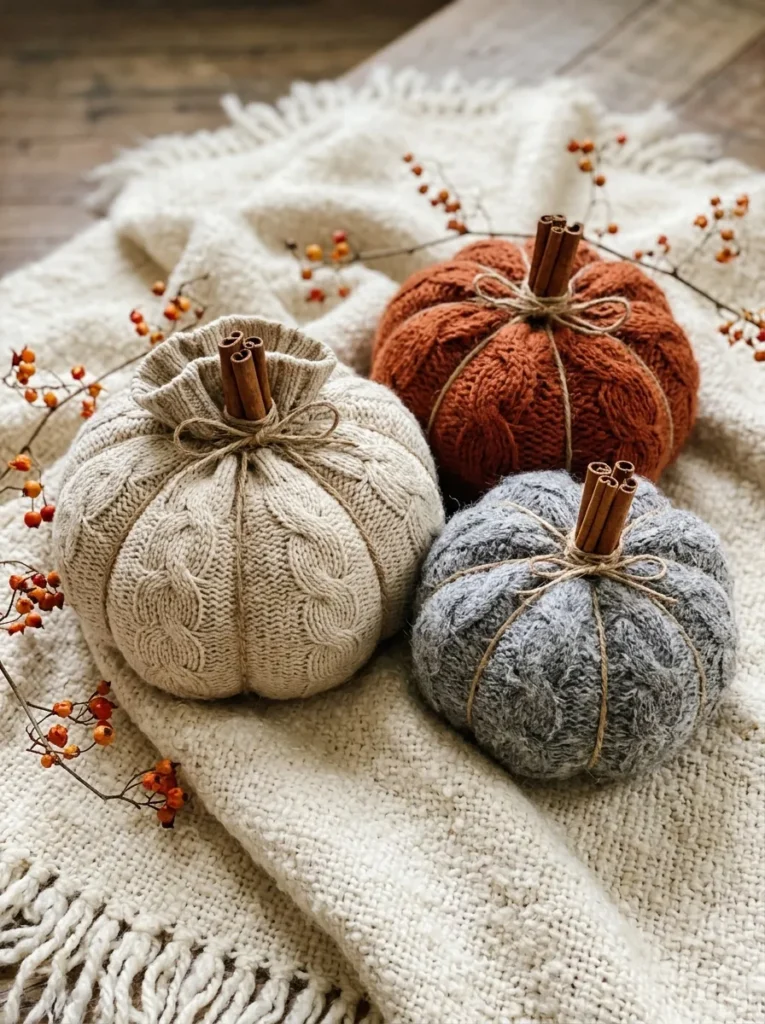
Chunky cable knits in oatmeal, rust, and gray make slouchy, textured pumpkins that look nothing like plastic ones. Choose heavy-gauge sweaters, because fine knits stretch and show the stuffing through. Cut off a sleeve, turn it inside out, and sew a running stitch around the cut end. Pull it tight, flip it right side out, and stuff firmly. Gather the hemmed cuff end closed, then wrap twine from top to base in segments for the ridges. Push a cinnamon stick into the top for a stem.
📌 Important: Knit stretches as you stuff, so a pumpkin that looks full will sag by the next day. Keep stuffing until it feels slightly overfilled.
A 20-minute prewash decides whether the printed runner in the next idea lies flat or puckers.
7. Block-Printed Linen Table Runner
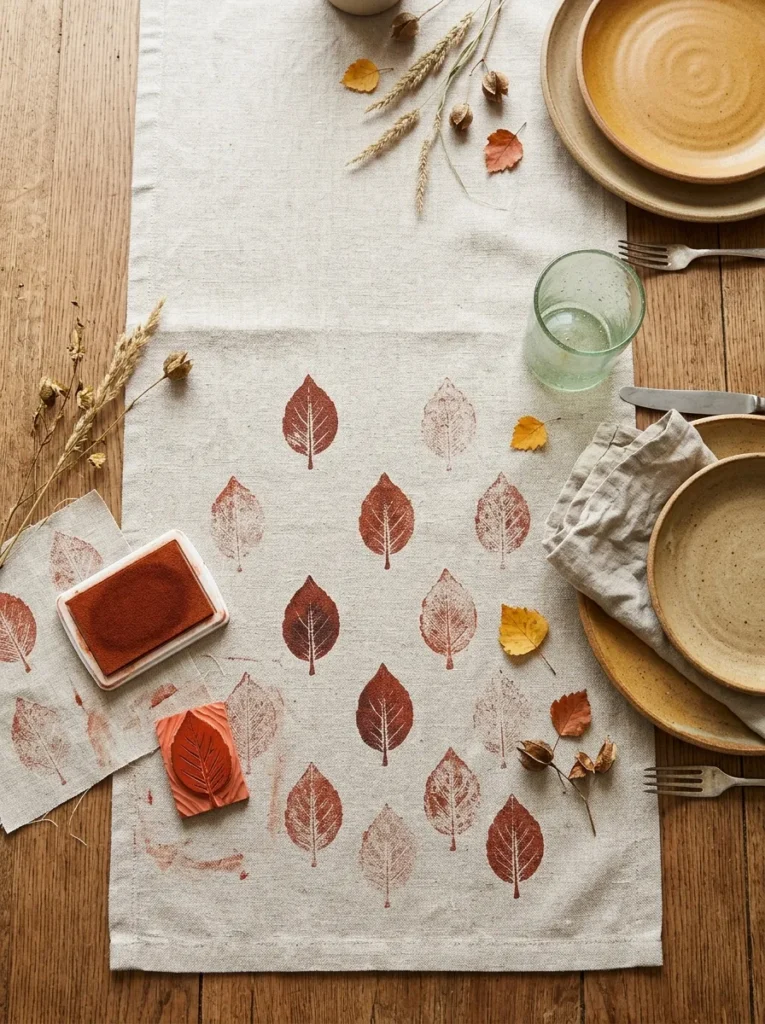
Scattered motifs look chaotic; a staggered grid looks printed on purpose. Prewash and press the runner to remove sizing and shrinkage before any ink touches it. Carve a simple leaf into a soft rubber block, ink it, and stamp over a folded towel for even pressure. Mark rows lightly with chalk and alternate the leaf’s direction. Hand-carved prints never match exactly, and the slight variation is what keeps it from looking factory-made. Heat-set with an iron through a pressing cloth, following the ink’s label.
🟡 Pro Tip: Stamp a scrap of the same fabric first, and blot the inked block on a paper towel before each press, so the first real leaf comes out crisp.
What You’ll Need
| Product | What to look for |
|---|---|
| Natural linen table runner | Hemmed ends, long enough to hang over the table edge, prewashable |
| Soft rubber carving block | Soft enough to carve easily, larger than your leaf motif |
| Permanent fabric ink pad | Labeled for fabric and heat-settable, in rust or ochre |
8. Gratitude Branch With Hanging Tags
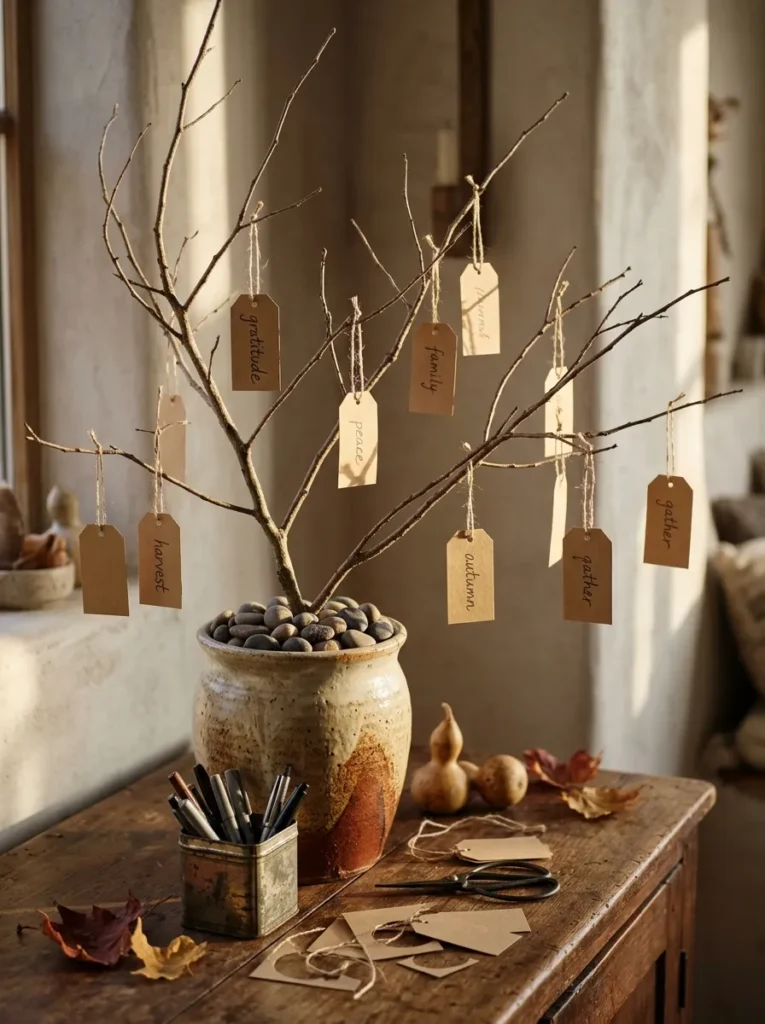
Anchor a dry, forked branch in a vase heavy enough that a light bump can’t tip it, packing pebbles around the base to hold the angle. Choose a branch with many fine twigs, because each one is a place for a tag. Punch holes in heavy kraft cardstock and pre-tie thread loops so guests only have to write. After dinner, read a few aloud. It works for hosts with a talkative table who want a ritual that costs almost nothing.
💡 Quick Win: Set out a mug of pens and a stack of ready-tied tags by the entry, so guests write while they wait for the rest to arrive.
9. Thrifted Teacup Soy Candles
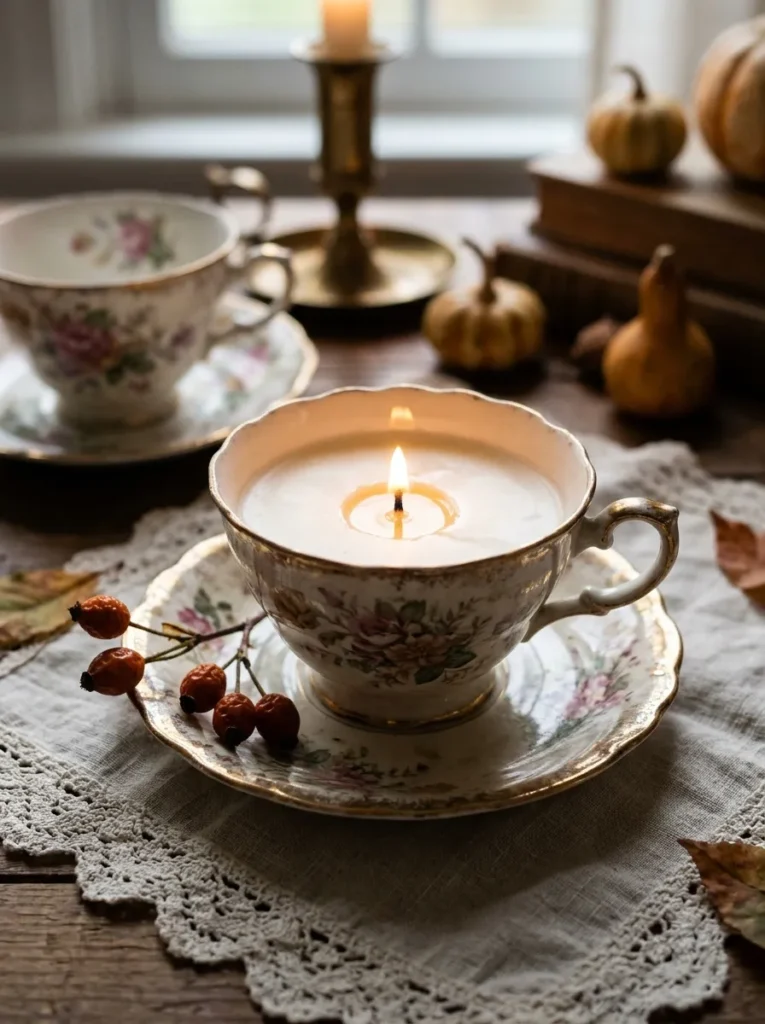
For someone who wants a gift or centerpiece with a story, thrifted teacups make each candle one of a kind. Stick a pre-tabbed wick in the center with a dab of hot glue. Melt soy wax in a heatproof pitcher set in a pan of simmering water, not over direct heat, and never walk away from it. Pour in two stages, saving a little wax, because wax shrinks as it cools and leaves a dip that needs topping off. Many makers let soy candles cure for a week or more before burning.
⚠️ Warning: Check every cup for hairline cracks before pouring. Hot wax finds them and leaks, and a cracked cup can also break from the heat.
The spice jars in the next idea cost less than a candle and get used before the weekend is over.
10. Cinnamon-Orange Simmer Jars
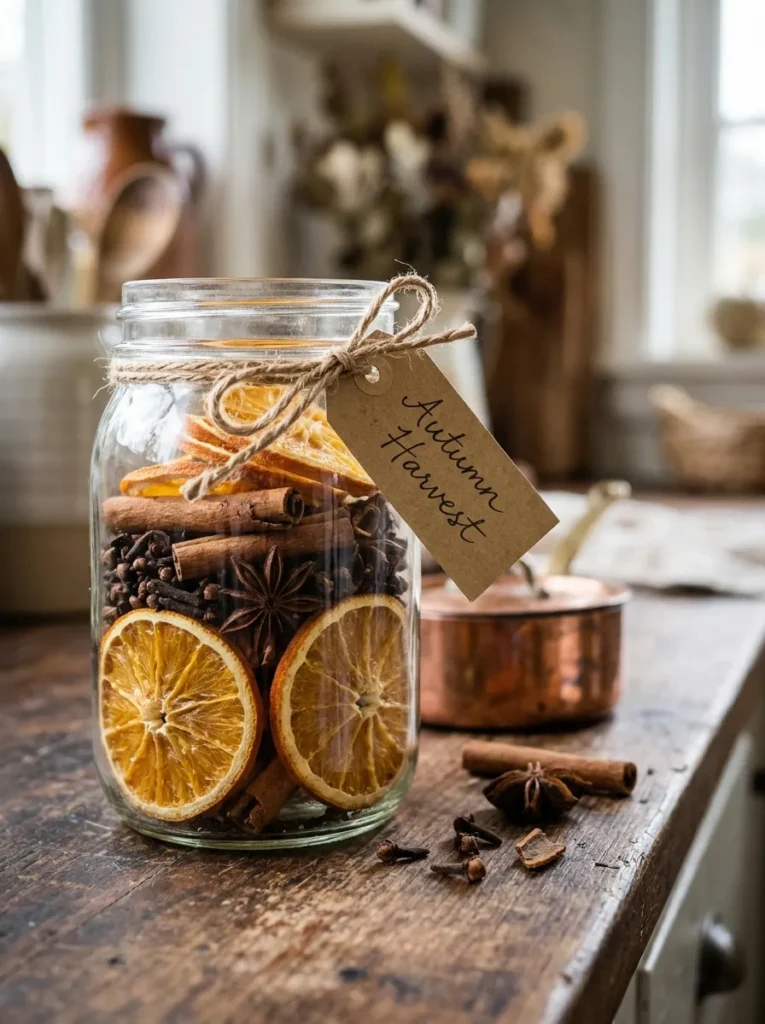
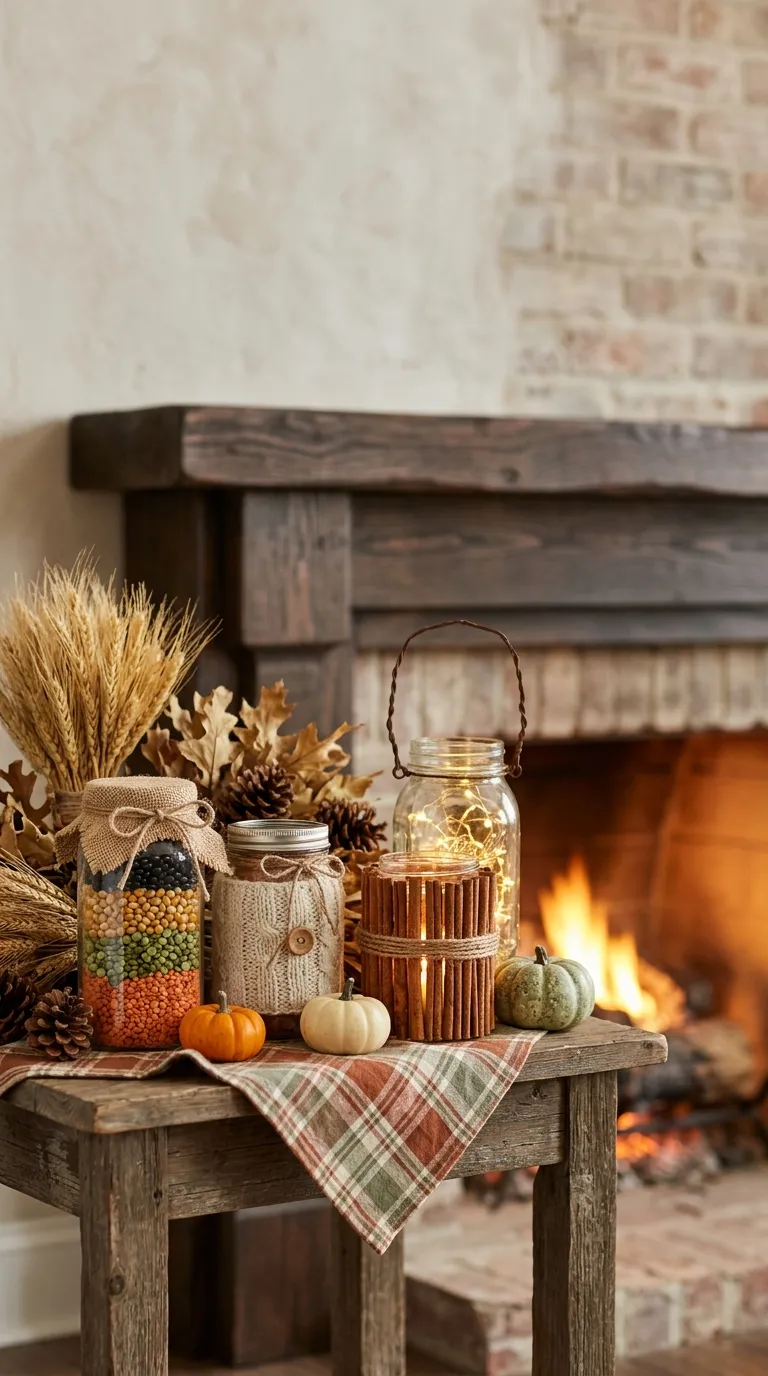
A gift should get used in the weekend it’s given, and a simmer jar does. Layer dried orange slices against the glass, then cinnamon sticks, whole cloves, and star anise in the center. Use whole spices, not ground, which cloud the water and scorch. The tag says to simmer the contents in a pot of water on low heat, topping up the water so the pot never boils dry, and never leaving it unattended. Reuse leftover slices from the garland.
📌 Important: Label the tag “for simmering, not drinking.” The jar looks like tea mix, and guests often assume it is.
11. Wood-Burned Serving Board
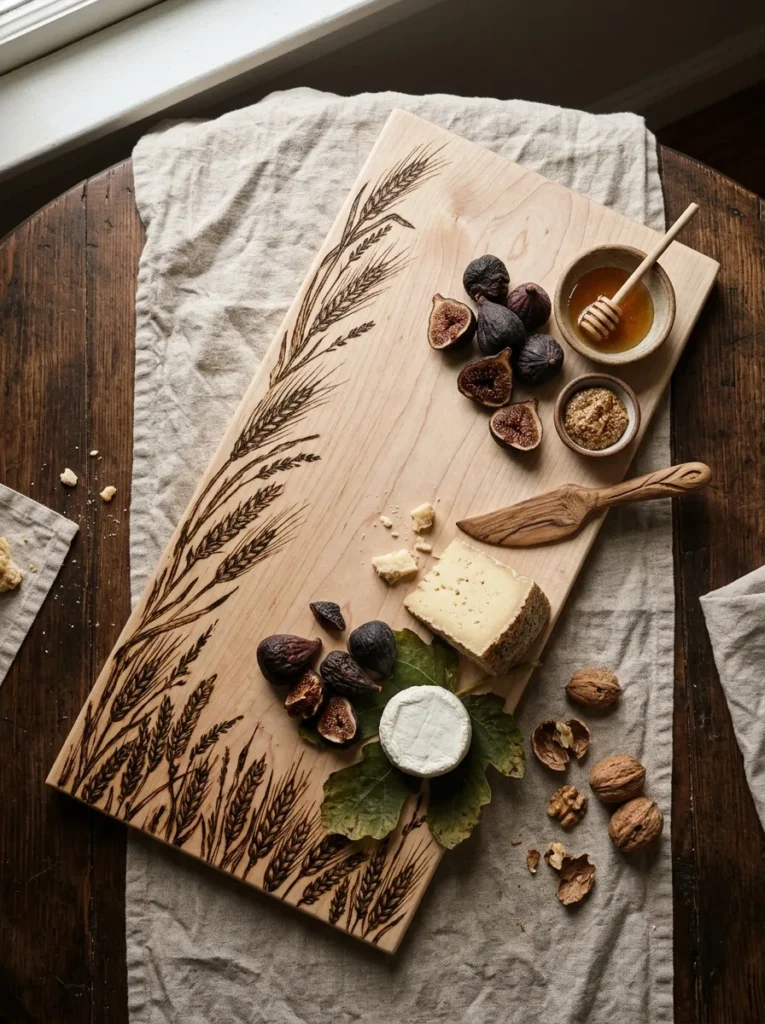
A pale hardwood board with a dark, hand-drawn wheat sprig along its edge looks like something from a market stall. Sketch lightly in pencil, then burn with the grain, since pens drag and skip across it. Practice on the underside first. Keep the burning to the border and handle so the cutting surface stays clean, and finish with a food-safe board oil. Safety: the pen tip stays hot after you unplug it, so rest it in a stand, work with a window open, and never leave it plugged in unattended.
What You’ll Need
| Product | What to look for |
|---|---|
| Unfinished hardwood serving board | Smooth, flat sanded surface; a pale wood that shows burn lines clearly |
| Small ceramic ramekins | Sized to sit on the board without crowding the burned border |
| Wooden cheese knife set | Handles in a similar wood tone to the board |
12. Onion-Skin Dyed Napkins
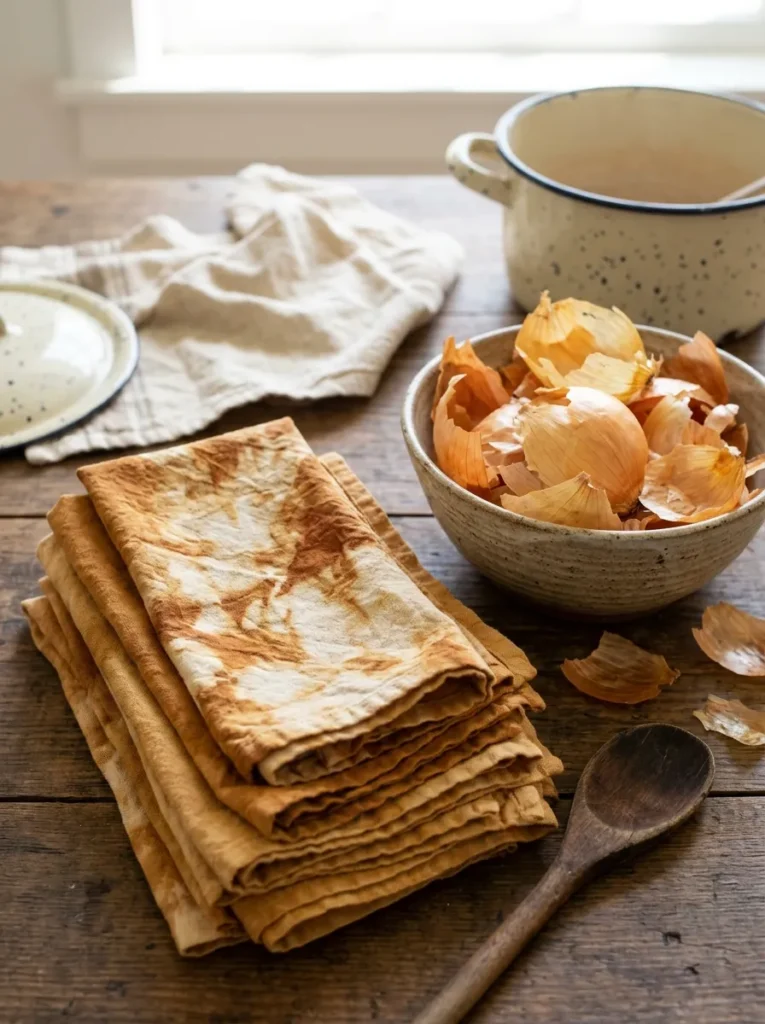
Store-bought “pumpkin orange” napkins shout; onion-skin amber murmurs. Wash natural-fiber napkins (cotton or linen, since synthetics won’t take dye) to strip any finish. Simmer a big handful of yellow or brown skins in water for about 30–60 minutes, strain, then add the wet napkins and simmer another 30–60 minutes. Depth depends on skin quantity and time. A mordant such as alum helps the color last, but use a pot you won’t cook in again. Rinse, dry, and wash separately the first few times.
🟡 Pro Tip: Bind napkins with rubber bands before dipping for a mottled, shibori-style pattern.
Weaving looks like it needs a loom; the next idea needs a branch and one habit: leaving slack.
13. Woven Fringe Wall Hanging on a Branch
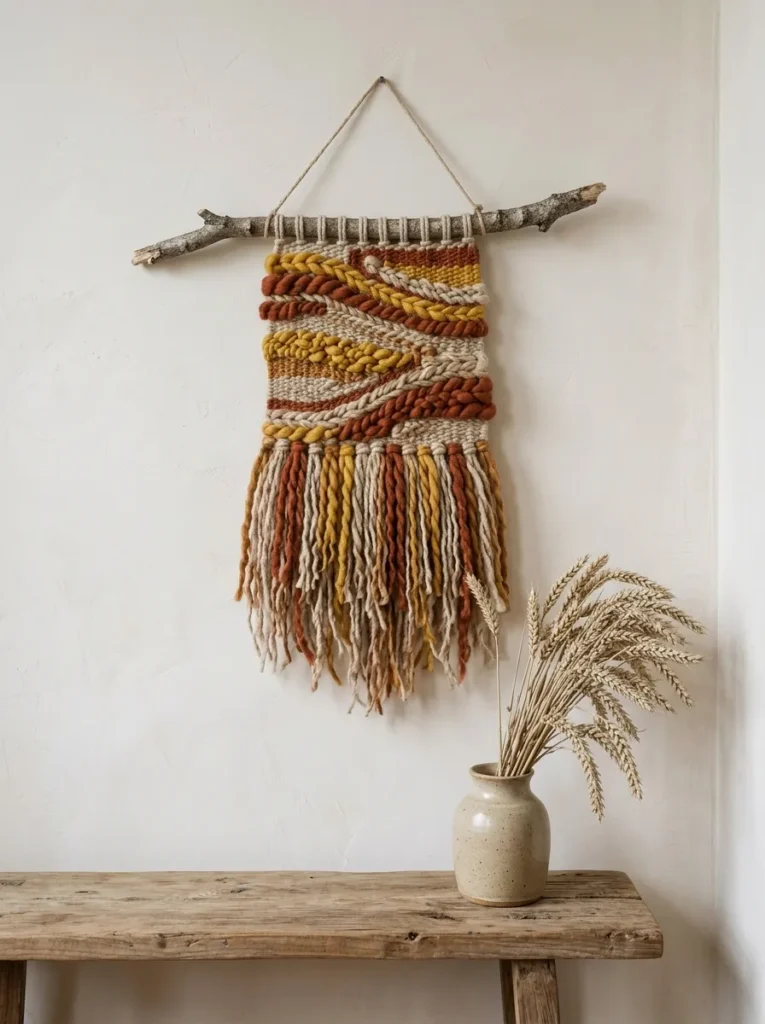
Tie warp threads to the branch with lark’s head knots, then weave the weft over and under in rust, mustard, and oatmeal. The beginner mistake is pulling each row taut, which makes the sides narrow like an hourglass. Instead, lay each row in a gentle upward arc and let it settle. Finish with a long cut fringe. A hanging this size is light enough for a small nail or hook, but weigh the finished piece and check the hook’s rating.
💰 Budget Version: Use remnant yarn from a thrift store and a branch from the yard, and the whole thing comes in well under $100.
14. Watercolor Leaf Prints in Matted Frames
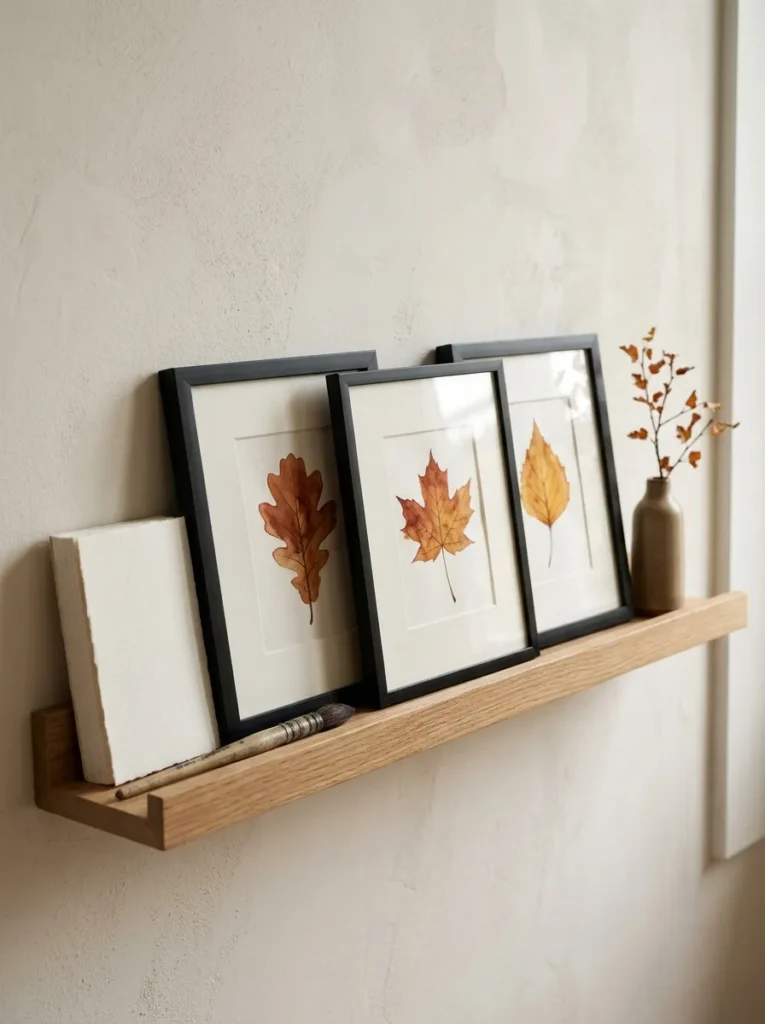
Negative space does the work here: one leaf floating in a wide mat looks like a gallery piece. Paint on 140 lb (300 gsm) cold-press paper, which resists buckling. Wet the leaf’s shape, drop in rust and ochre, let them bleed, and add veins once the paper is only damp. Paint 5×7 pieces and mat them in 8×10 frames, so the border does most of the framing.
📌 Important: Watercolor dries lighter than it looks wet. Paint a shade darker than you want the finished leaf to be.
What You’ll Need
| Product | What to look for |
|---|---|
| Frames with pre-cut mats | 8×10 outside size with an opening that fits a 5×7 painting |
| Cold-press watercolor paper block | 140 lb (300 gsm), with edges bound to reduce buckling |
| Narrow picture ledge | Deep enough to hold the frames, with a front lip so they don’t slide |
15. Hand-Bound Family Recipe Booklet
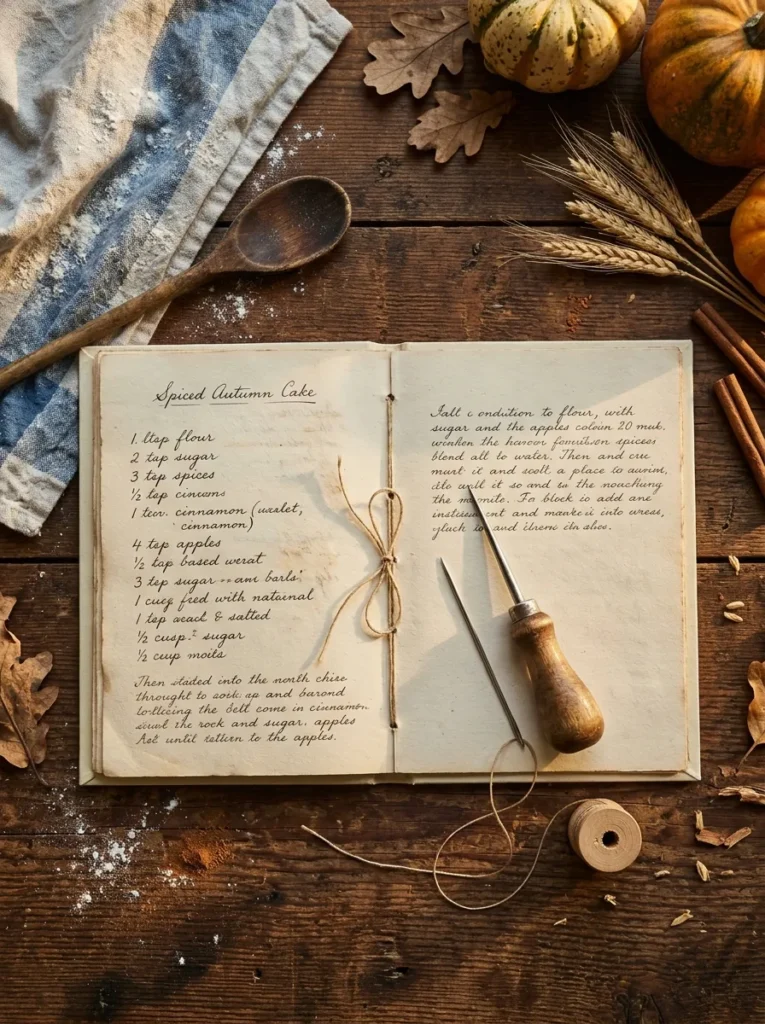
For whoever owns the stained, handwritten recipe card everyone fights over, this is the keeper. Scan the originals and print them so the handwriting survives. Fold sheets in half to form a signature and punch three holes through the spine fold using a paper template as a guide. Stitch with waxed thread in a pamphlet stitch, tying off inside. Keep one signature to about five folded sheets (20 pages), because thicker stacks bulge at the fold; for more pages, stitch several signatures together. Use a heavy cover stock to protect the pages.
🧠 INSIDER OBSERVATION
The assumption worth testing: that variety makes a handmade table richer. Nine crafts in nine colors read as a craft fair. Hold the palette to three, say rust, ochre, and oatmeal, and repeat those shades across napkins, tapers, pumpkins, and leaves, and the table reads as one decision. Texture can vary freely. Color shouldn’t.
Terracotta paint looks easy until you reach the drainage hole; the next idea shows where to stop.
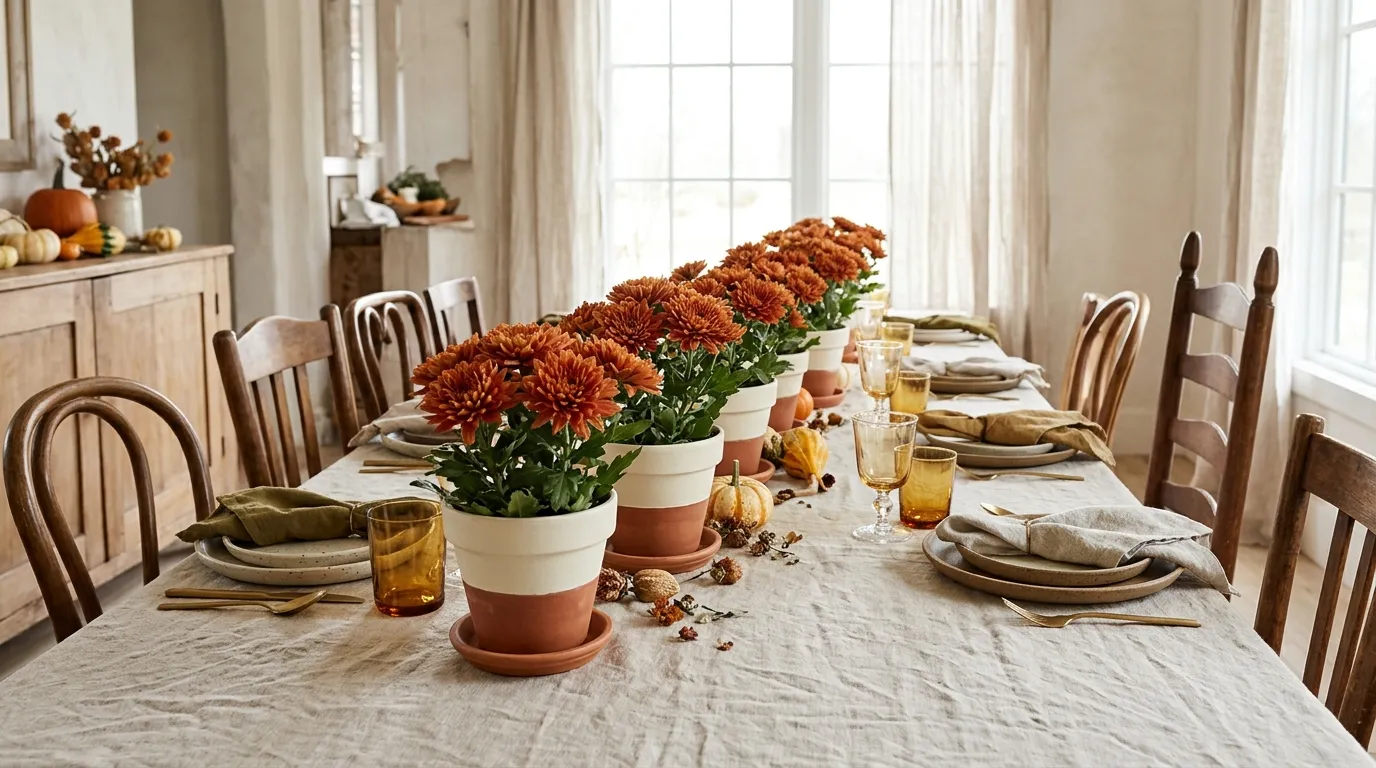
16. Color-Dipped Terracotta Pots With Mums
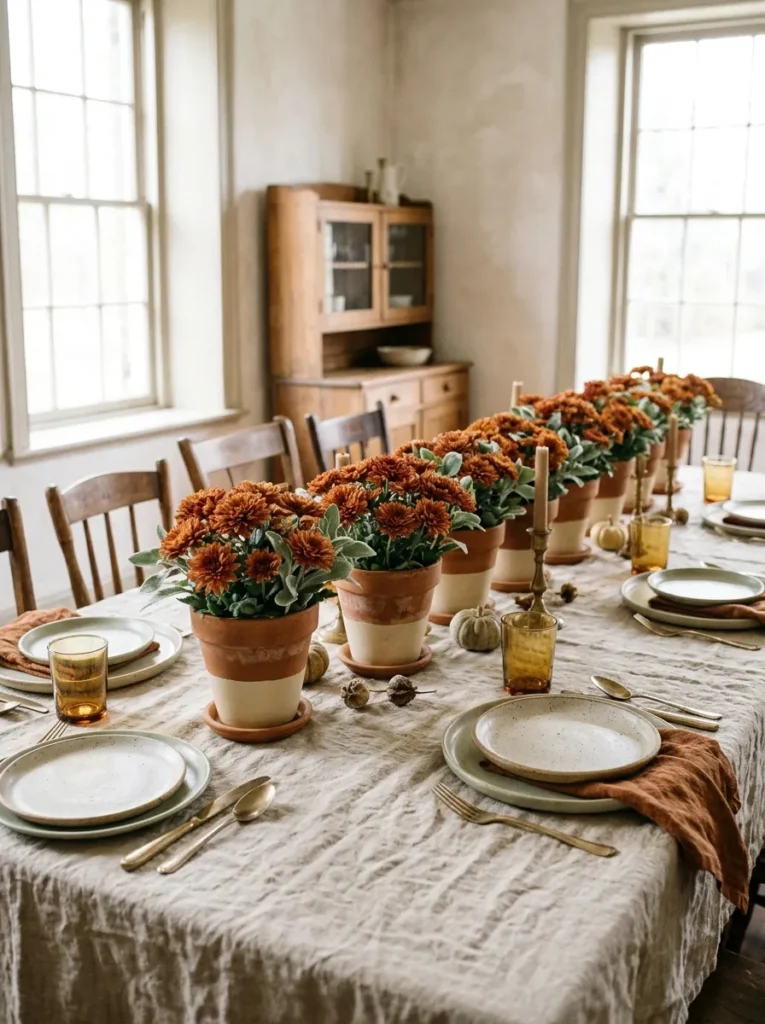
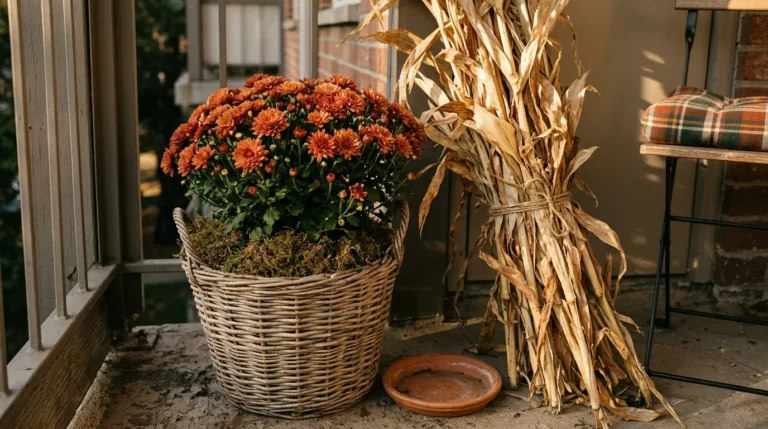
Terracotta pots dipped halfway in cream, each holding a single mum, make living place settings. Brush two coats of acrylic around the outer rim and upper half. Keep paint off the drainage hole and the inside so the clay can still breathe, which is a practical recommendation rather than a hard rule. The raw lower half against the cream is the contrast that makes it look designed. Set each pot on a small saucer so water doesn’t mark the linen.
📐 Small-Space Tip: Line small pots down the center of the table instead of building one large arrangement, so the middle stays flat and plates keep their room.
17. Hanging Dried-Botanical Hoop Over the Table
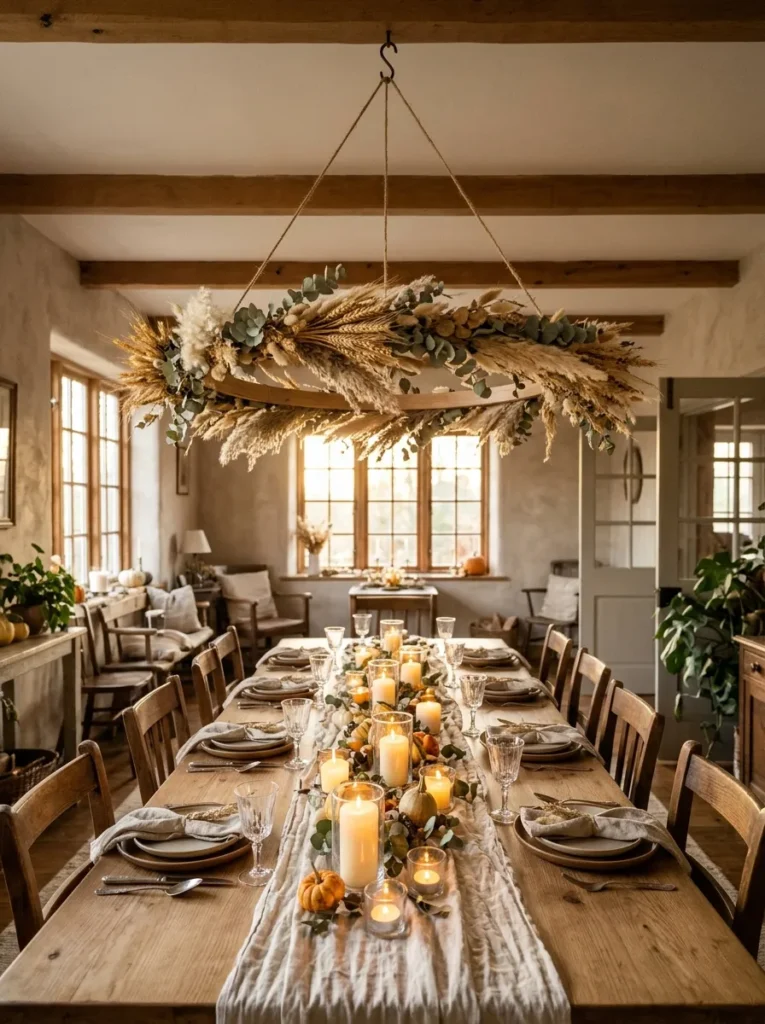
Centerpieces compete with sightlines and gravy boats; an overhead hoop leaves the tabletop clear. Wrap a large wooden hoop with wire, tuck in bundles of dried wheat, pampas, and eucalyptus, and suspend it with three twine drops joined to a single hook. A common guideline for dining fixtures is 30–36 inches above the table, but check by sitting down and looking across it. Keep flame and hot bulbs away from dried botanicals, and light the table with LED candles.
⚠️ Warning: Hang the hoop from a ceiling hook rated for more than its weighed weight, anchored into a joist or with a toggle made for ceilings. If you aren’t sure, ask a handy professional, and renters can use an existing hook.
What You’ll Need
| Product | What to look for |
|---|---|
| Large wooden hoop | Wide enough to leave sightlines open, smooth enough to wrap |
| Ceiling hook | Rated for more than the finished hoop’s weighed weight |
| Dried wheat and pampas bundles | Natural undyed stems, in a warm gold or cream |
How to Start Your Handmade Thanksgiving Transformation
Start here: press leaves and slice oranges first, since both need to wait. The right first move follows the rule that holds the whole list together: begin with whatever needs to dry, press, or cure, and finish with what can be assembled in an evening. Leaves pressing on the counter is the cheapest way to start.
The most common mistake is saving everything for the last weekend. Clay cracks when rushed, soy candles smell fuller after curing, and dyed napkins need a few washes. Fix it by sorting your list into “waits” and “assembles” and doing the waits first.
Three items under $50 combined: a set of metallic paint pens for the place cards, a spool of natural jute twine for the garland, ties, and pumpkins, and a pack of kraft tags for the gratitude branch. Each typically costs a few dollars, and they work across a dozen ideas here.
A full transformation takes about three weekends. A starter budget runs roughly $20–$40 for the first few crafts; a fully handmade table, with fabric, wax, and frames, lands around $100–$200 (approximate). Weekend jobs include the garland, napkin rings, and prints. Slower ones, like clay and candles, need days between steps.
Frequently Asked Questions
What are easy Thanksgiving crafts for adults who aren’t crafty?
Pressed-leaf place cards, the orange garland, and the gratitude branch are the easiest starts. All three use common materials and no special technique, and each can be finished in one sitting after the waiting time.
How far ahead should I start?
Start about three weeks ahead. Leaves need roughly a week to press, clay needs 1–3 days to dry, and soy candles do better with a week or more to cure, so those early.
Is it safe to use candles near dried decor?
Keep open flame well away from dried garlands, hoops, and wheat, since dried plants ignite easily. Use LED candles near overhead pieces and light real tapers only where nothing dry hangs above them.
Can I do these in a small apartment?
Yes, most of them fit on one tray or table. Renters can hang the garland and wall hanging with removable hooks, and the hoop can use an existing ceiling hook.
Ready to Create Your Dream Handmade Thanksgiving Table?
These 17 Thanksgiving crafts for adults cover paper, clay, wax, fabric, wood, and dried plants, so there is a project for any amount of time and patience. What ties them together is sequencing: let the slow materials set first, and the last weekend is only assembly. Starting small is fine. One craft done well beats six rushed ones.
Tonight, collect a handful of dry leaves and put them under a stack of books. On Thanksgiving, the table will feel warm, deliberate, and unmistakably yours. Pin your favorite ideas so you can find them again.
Keep Exploring
- 15 Thanksgiving Tablescape Ideas Using What You Already Own
- 12 Fall Front Porch Crafts for Adults
- 10 Cozy Friendsgiving Hosting Ideas for a Small Apartment
[[FEATURED IMAGE PROMPT: A photorealistic, ultra-detailed autumn harvest dining room interior photograph featuring a long linen-covered table set with clay napkin rings, pressed-leaf place cards, rolled beeswax tapers, gilded mini pumpkins, and a dried-botanical hoop hanging overhead. Negative space in the upper third for text overlay. Mood: warm, deliberate, inviting. Color palette: rust, ochre, oatmeal, deep green. No people, no text, no watermarks. Style: photorealistic, 8K resolution, interior design magazine photography.