15 Easy Fairy Crafts for Adults Who Love DIY Projects
Easy fairy crafts for adults are simple handmade projects, such as miniature gardens, glowing lanterns, and tiny doors, that bring a touch of woodland whimsy into your home using natural, thrifted, and inexpensive materials. This article gives you 15 easy fairy crafts spanning color, materials, lighting, furniture, accessories, layout, and small-space ideas, most under $20 and finished in an afternoon.
Fairy crafting is the grown-up way to play. It asks you to look closely at moss, bark, and acorn caps, and to imagine a world scaled to the size of your palm. The result is part garden, part storybook, and wholly yours: soft green light, mossy textures, and tiny details that reward a second look. You don’t need artistic talent, only a free afternoon and a few found materials. Here are 15 ideas worth saving, and stealing.
Why Easy Fairy Crafts for Adults Work So Well
Fairy folklore runs deep in Celtic, Scandinavian, and English traditions, where small woodland spirits were said to live under toadstools, in hollow trees, and beneath hawthorn. The Victorians turned that folklore into an art form, with Cicely Mary Barker’s flower fairies and elaborate miniature scenes. Modern fairy gardening and miniature crafts inherit that spirit, blending storybook imagination with the handmade ethos of the cottagecore movement.
The palette is specific: moss green, sage, dusty lavender, soft cream, birch white, and warm bark brown, with small flashes of amber or gold from tiny lights. The materials are tactile and natural: sheet moss, air-dry clay, polymer clay, cork, driftwood, acorn caps, terracotta pots, twine, and seed beads. A reader could gather most of this on a single walk and a trip to a craft store.
The trend is current. Cottagecore, “fairycore,” and a broader appetite for slow, screen-free hobbies have made miniature crafts a staple of Pinterest boards, and adults increasingly treat making things by hand as an act of self-care. Fairy crafts also suit renters and small households because they scale down to a shelf, a jar, or a windowsill.
Small spaces are ideal for this style. Prioritize one container, such as a terrarium, a tray, or a wall niche, and let it hold the whole scene. The honest limit is that live moss and plants need light and moisture management, so use preserved moss for anything away from a window.
Style at a Glance
| Element | Detail |
|---|---|
| Philosophy | Small scale, found materials, storybook whimsy |
| Key Materials | Sheet moss, air-dry clay, cork, driftwood, acorn caps, terracotta |
| Key Colors | Moss green, sage, dusty lavender, birch white, warm bark brown |
15 Easy Fairy Crafts for Adults Who Love DIY Projects
1. Mossy Terrarium Fairy Garden: Easy Fairy Crafts Built on Color
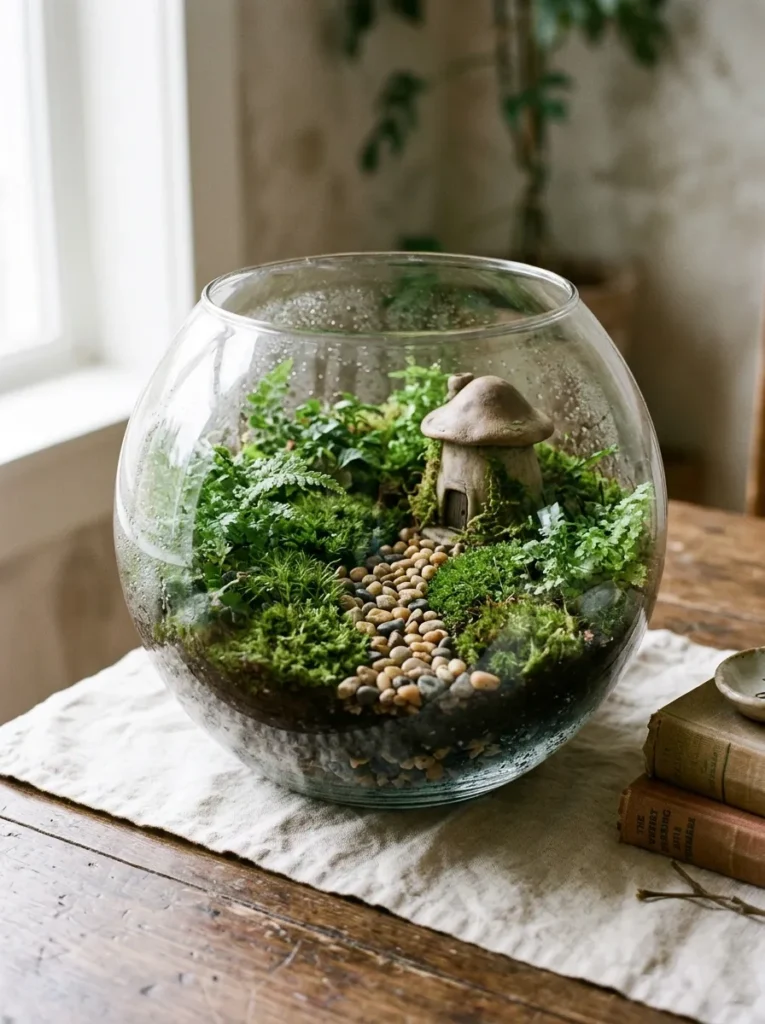
Vibe: The shelf feels lush, a tiny forest sealed inside glass.
Why it works: A monochromatic green palette keeps the scene calm, while varied moss textures supply visual interest through texture layering rather than color. The glass bowl frames the scene and focuses the eye.
How to get it: Layer ½ inch of pea gravel, a thin sheet of activated charcoal, then 2 inches of potting mix. Press in sheet moss and plant two small ferns, keeping the pebble path clear.
💡 Quick Win: A fishbowl from a thrift store costs about $4 and works as a ready-made terrarium.
Shop The Look
- Glass terrarium bowl large with lid
- Sheet moss preserved natural
- Activated charcoal horticultural small bag
- Mini fern plants 2 inch set
- Decorative pebbles natural small bag
Also view: 17 Fall Paper Crafts to Make for Cozy Autumn Decor
2. Air-Dry Clay Toadstool Houses
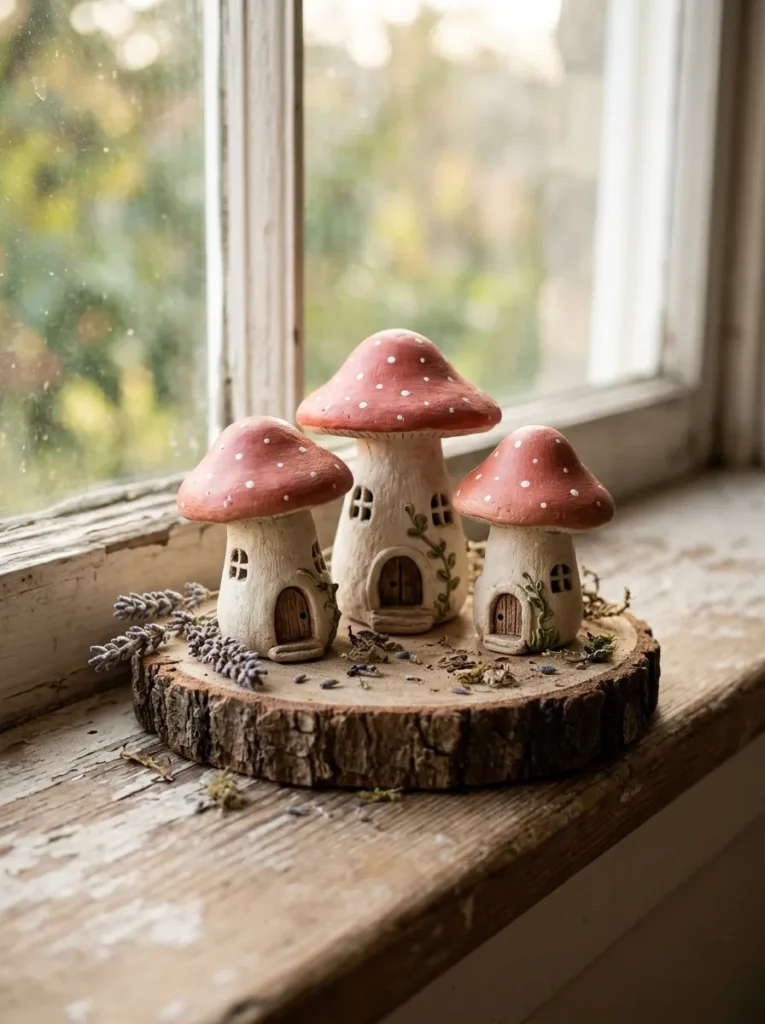
Vibe: The sill feels whimsical, a small village that appeared overnight.
Why it works: Contrasting a bright cap against a neutral stem creates a focal point at the top of each house, and varying heights gives the trio rhythm. Matte finishes keep the clay looking handmade rather than plastic.
How to get it: Form a stem cylinder and a rounded cap from white air-dry clay, press them together with a dab of water, and carve a door with a craft knife. Dry for 24 hours, then paint with acrylics and seal with matte varnish.
Shop The Look
- White air dry clay 2 lb
- Acrylic paint set earth tones
- Clay sculpting tool set fine
- Matte varnish brush-on small
- Wood slices round craft 3 inch
3. Jar Fairy Lanterns with Fairy Lights
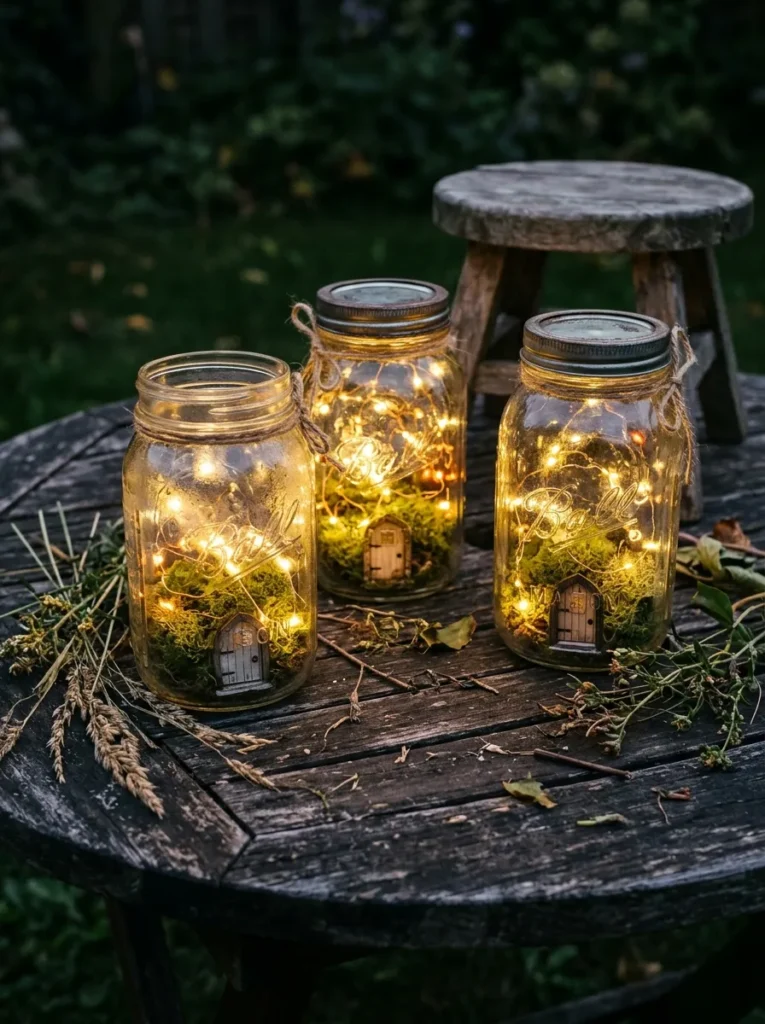
Vibe: The table glows enchanted, as though the jars hold small captured stars.
Why it works: Warm point lights inside glass produce a soft ambient glow without glare, and the transparent jar lets scattered light fall onto surrounding surfaces. Layering moss behind the glass adds depth.
How to get it: Glue moss and a paper door to the inside of a mason jar, coil a 20-light copper wire string inside, and screw on the lid. Use battery-powered LED lights only.
💡 Quick Win: A 10-pack of copper wire fairy lights costs around $10 and runs on a coin battery.
Shop The Look
- Mason jars wide mouth 16 oz
- Copper wire fairy lights battery warm
- Craft moss mini pads
- Frosted glass spray paint
- Hot glue sticks mini
4. Tiny Fairy Door with Acorn Cap Details
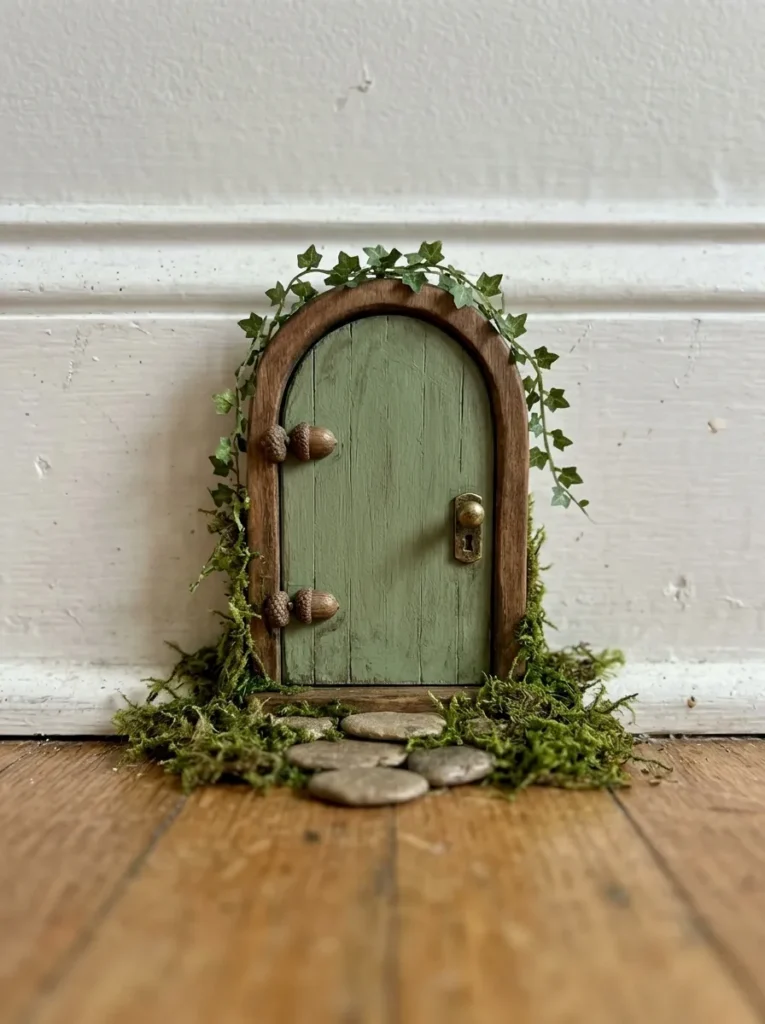
Vibe: The hallway feels storybook, with a door that invites a second look.
Why it works: Scale contrast, a very small door against a full-size wall, creates instant narrative, and placing it at baseboard height reinforces the illusion. A saturated paint color gives the tiny object enough presence to read from across the room.
How to get it: Cut an arched door from ¼-inch plywood or a craft-store wooden door, paint it in sage green, and attach a brass tack as the knob. Fix it to the wall with removable mounting tape.
Shop The Look
- Mini wooden fairy door unfinished arch
- Brass tacks small decorative
- Sage green craft paint matte
- Removable mounting tape heavy duty
- Faux ivy vine garland small
5. Driftwood Fairy Perch Shelf
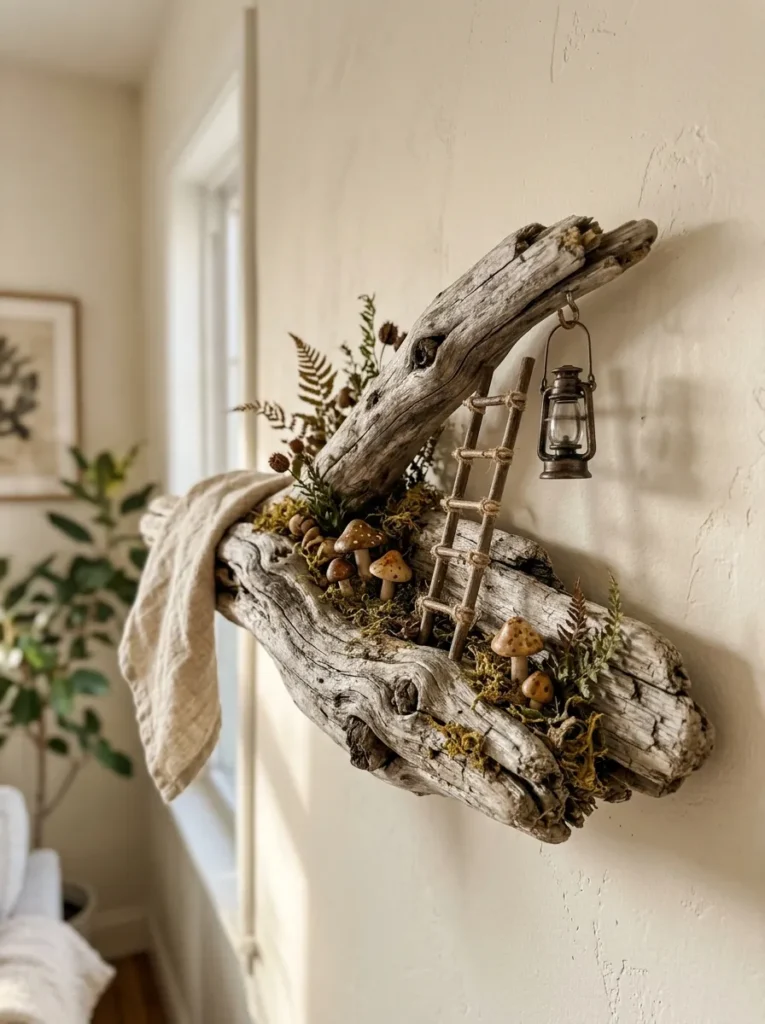
Vibe: The shelf feels woodland, a branch where something small might land.
Why it works: Driftwood’s irregular silhouette adds an organic horizontal line that contrasts with straight shelves and walls, a classic contrast principle. Using one weathered neutral lets small accessories stand out.
How to get it: Choose a flat-topped piece of driftwood about 14 inches long, drill two holes at the back, and mount it onto L-brackets. Seal with matte polyurethane and arrange the miniatures.
Shop The Look
- Driftwood pieces decorative natural large
- L brackets small black
- Mini wooden ladder craft
- Miniature hanging lantern small decor
- Matte clear polyurethane spray
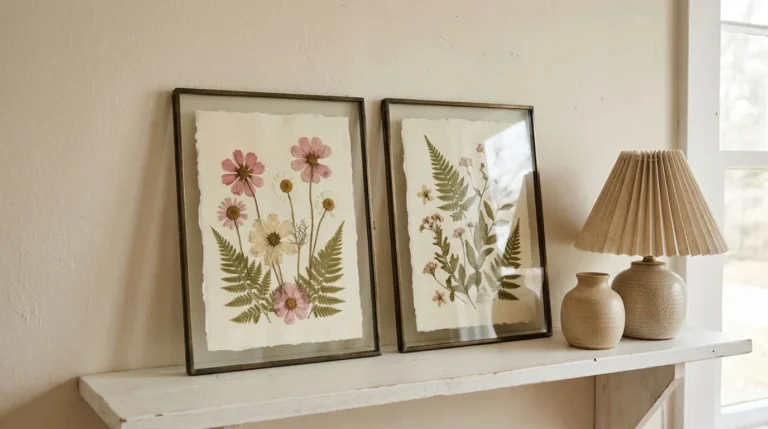
6. Pressed Flower Fairy Wing Art
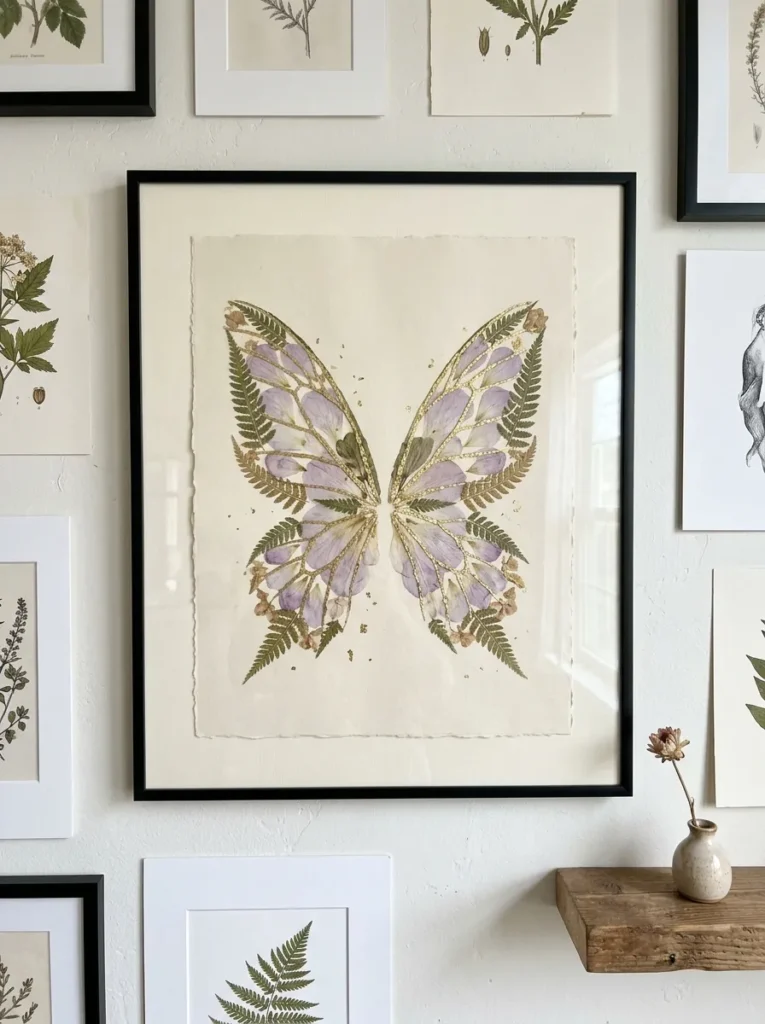
Vibe: The wall feels delicate, a pair of wings caught flat like a pressed specimen.
Why it works: Symmetry anchors the composition, and a generous mat creates negative space around the wings. Gold leaf accents catch light from one angle, adding quiet sparkle.
How to get it: Press ferns and small petals in a heavy book for 7 to 10 days. Arrange them as mirror-image wings on cream cardstock, glue with archival adhesive, and dab gold leaf along the veins.
💡 Quick Win: Ferns and violets from a walk are free and press well in under two weeks.
Shop The Look
- Flower press kit wooden
- Gold leaf sheets craft imitation
- Archival glue pen
- Black frame 8×10 with mat
- Cream cardstock heavy pack
7. Fairy Garden Tray in a Terracotta Saucer
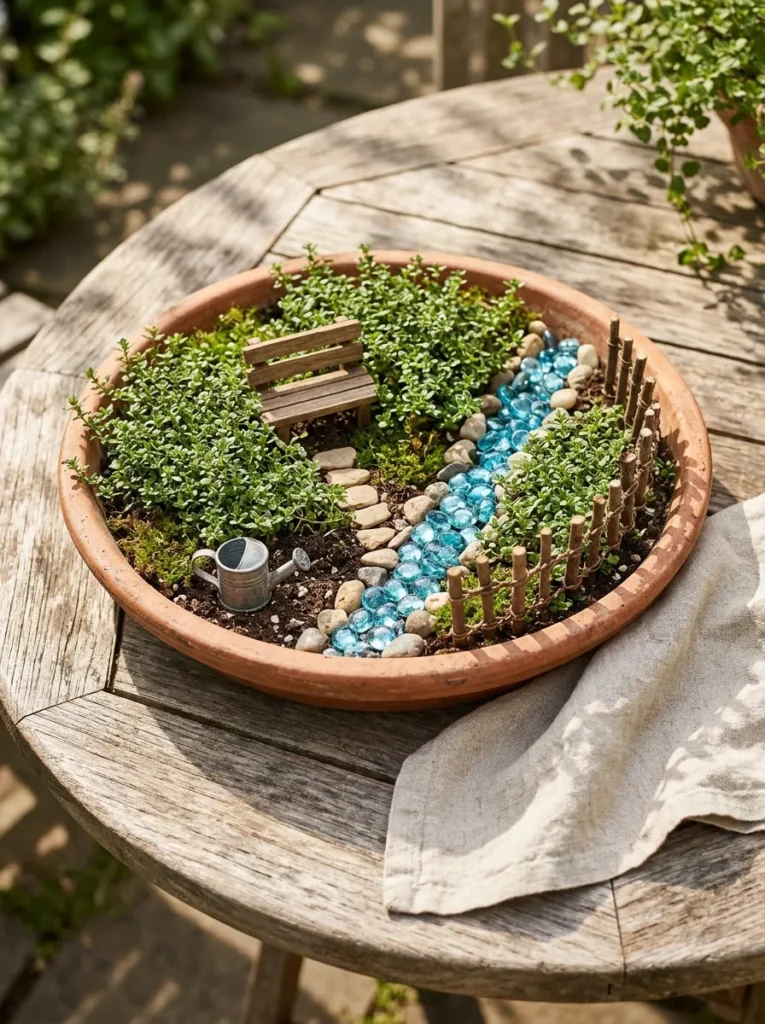
Vibe: The patio feels sun-warmed, a full garden compressed into a saucer.
Why it works: A shallow wide container lets you lay out zones, like a path, a seat, and a planting, giving a small scene real layout. Terracotta’s warm tone sets off the greens.
How to get it: Use a 14-inch terracotta saucer with a drainage-safe layer of potting mix, plant creeping thyme, and lay a stream from blue glass pebbles. Place the bench and fence after planting.
Shop The Look
- Terracotta saucer 14 inch large
- Creeping thyme plant live
- Miniature bench fairy garden wooden
- Blue glass pebbles decorative
- Miniature twig fence craft
8. Birch Bark Fairy Houses
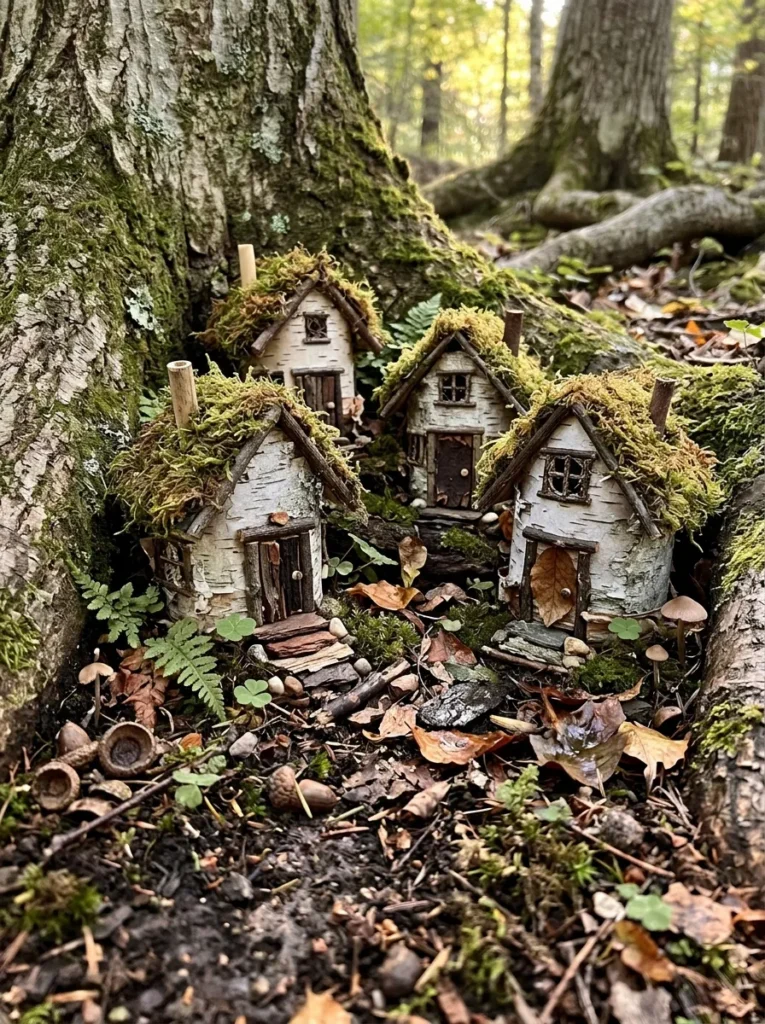
Vibe: The base of the tree feels hushed, as if the houses were left by someone just out of sight.
Why it works: Natural materials blend into the landscape, so the houses read as part of the setting rather than imposed on it. Varying heights adds a village skyline.
How to get it: Use fallen birch bark only, never stripped from living trees. Cut rectangles, curl them around a small jar as a form, bind with twine, and glue a moss roof on top.
Shop The Look
- Birch bark sheets craft natural
- Twine natural jute thin
- Preserved moss roof pads
- Outdoor weatherproof craft glue
- Mini twigs bundle decorative
9. Polymer Clay Mushroom Cluster
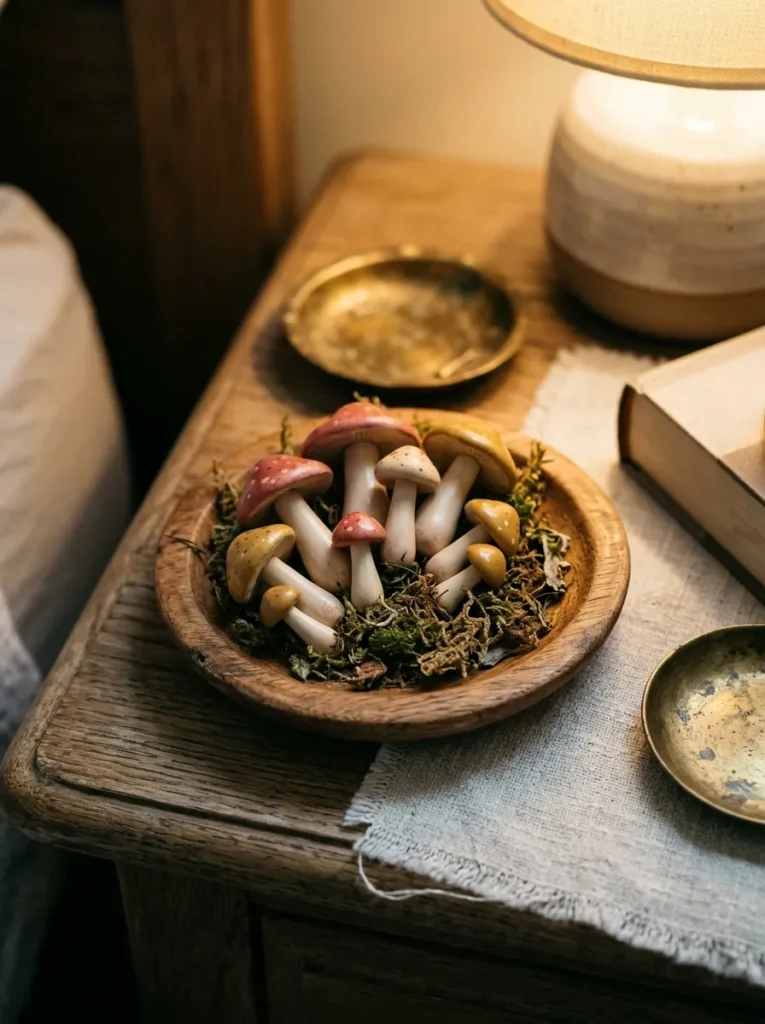
Vibe: The nightstand feels tactile, a small cluster begging to be touched.
Why it works: Grouping three to five items in varied heights makes a natural cluster rather than a row, and the glossy finish contrasts with the matte wood beneath. Speckles and uneven edges feel handmade.
How to get it: Roll polymer clay into stems and domed caps, press tiny white clay dots on the cap, and bake following the package, usually 275°F for 15 minutes per ¼ inch of thickness. Buff with a soft cloth once cool.
💡 Quick Win: A starter polymer clay pack with six colors costs about $10 and makes dozens of pieces.
Shop The Look
- Polymer clay starter set 24 colors
- Small clay tool set sculpting
- Small wooden dish round
- Soft bristle brush for clay
- Clay glaze satin finish
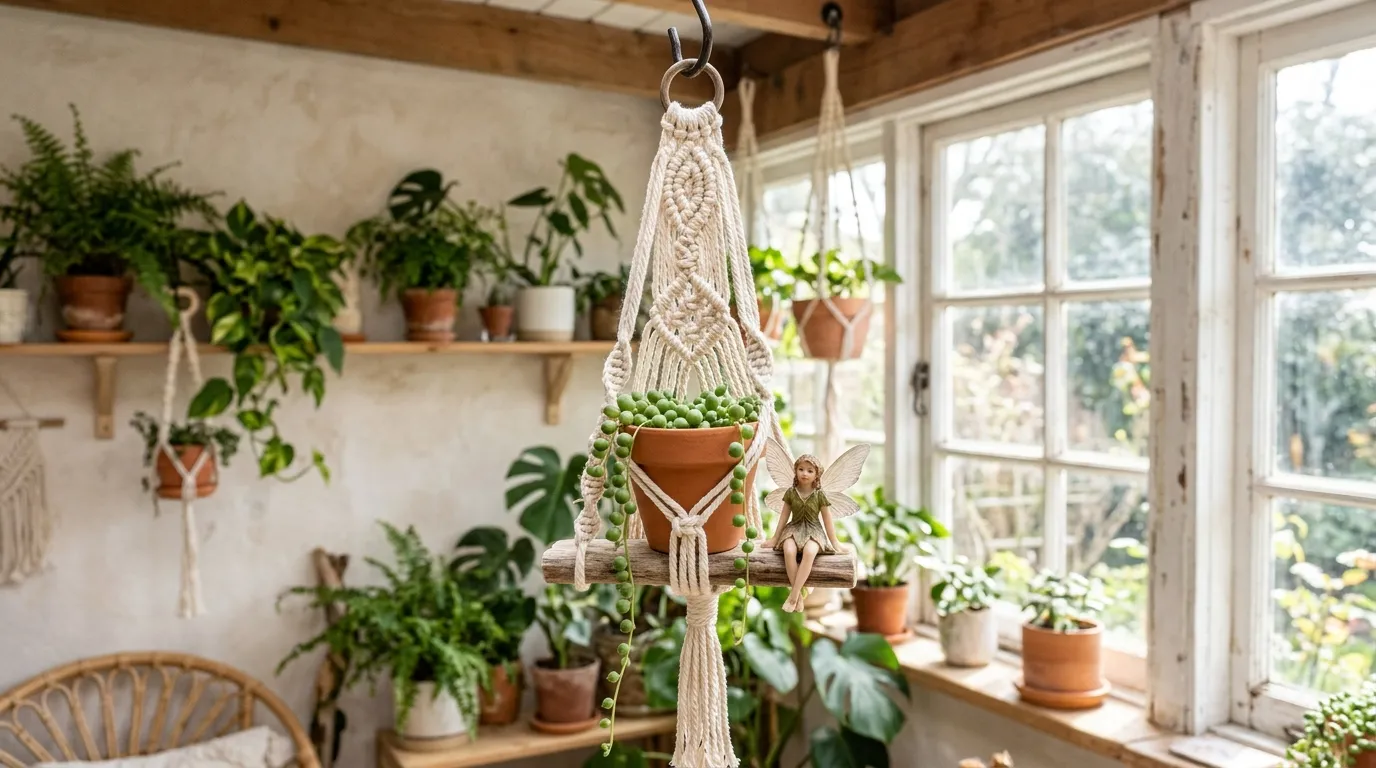
10. Macramé Fairy Swing Planter
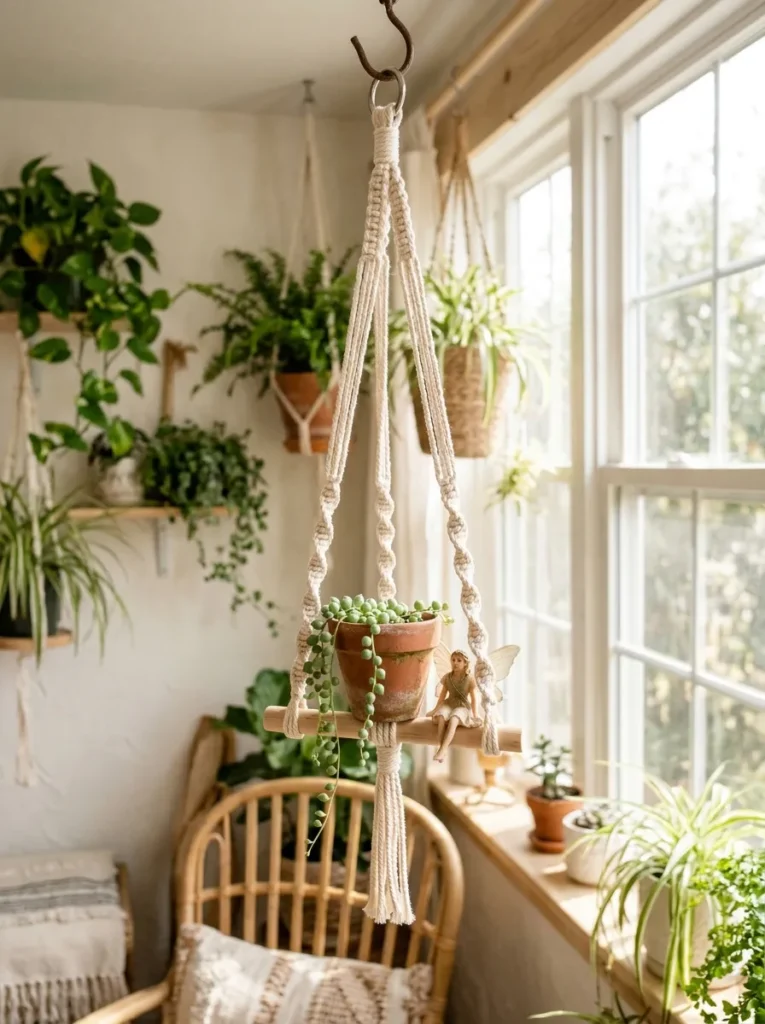
Vibe: The sunroom feels airy, with a small swing turning slowly in the light.
Why it works: Hanging decor claims vertical space, leaving shelves and surfaces open, which matters in a small room. Cotton cord adds soft texture against hard glass and wood.
How to get it: Cut four 4-foot lengths of 3 mm cotton cord, knot them through a 4-inch wooden dowel, and tie gathering knots about 6 inches above. Hang from a ceiling hook rated for the weight.
Shop The Look
- Macrame cotton cord 3mm natural
- Wooden dowel 4 inch craft
- Ceiling hook heavy duty swag
- Mini terracotta pot 2 inch
- Small trailing succulent plant live
11. Fairy Garden Wall Terrarium Frame
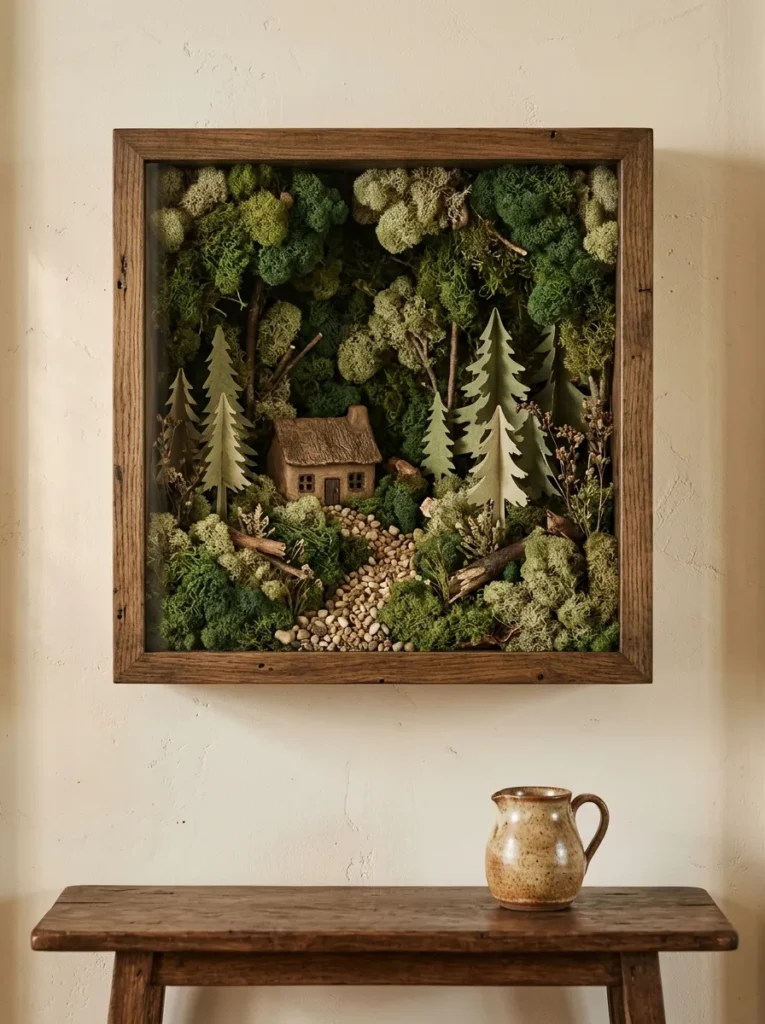
Vibe: The hallway feels nestled, with a small scene tucked into the wall like a window onto another world.
Why it works: A wall-mounted shadow box gives a small scene its own frame and floor, creating a diorama that doesn’t use any surface space. Preserved moss stays green without any watering.
How to get it: Glue preserved moss to the backing board, layer three cardstock tree cutouts on foam spacers, and place the cottage in the front third. Seal the frame and hang with a heavy-duty picture hook.
Shop The Look
- Deep shadow box frame 8×10
- Preserved moss sheets forest green
- Foam spacer dots 3D adhesive
- Heavy duty picture hanging kit
- Mini clay cottage decor
12. Acorn Cap Fairy Candle Holders
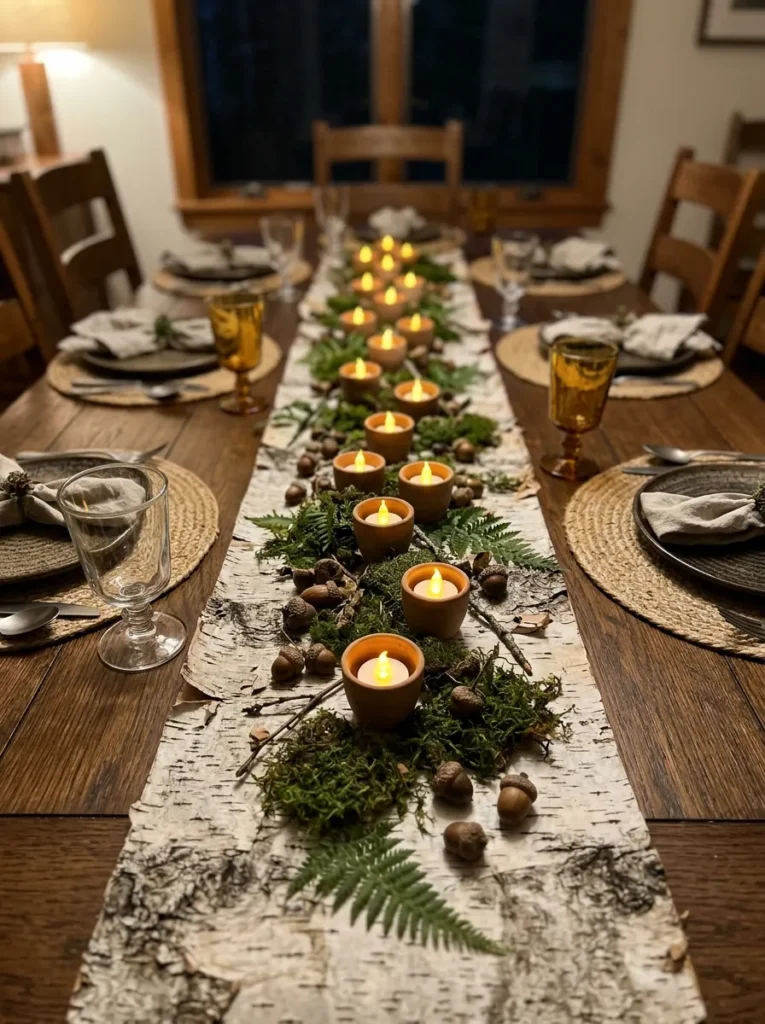
Vibe: The table glows gathered, with small lights set along the middle of the evening.
Why it works: A repeated small element in a line creates rhythm along a table and defines a central spine without blocking sightlines. Warm light against pale bark adds contrast.
How to get it: Collect acorn caps and sort by size, dry them in a 200°F oven for 30 minutes to remove pests, then glue each one to a small clay disc. Slide a flameless LED tea light inside each.
💡 Quick Win: Dry the acorn caps first. It stops mold and insects from ruining your centerpiece.
Shop The Look
- Acorn caps craft natural bag
- Flameless LED mini tea lights warm
- Birch bark table runner natural
- Air dry clay mini discs
- Craft glue strong clear
13. Enchanted Book Page Fairy Garland
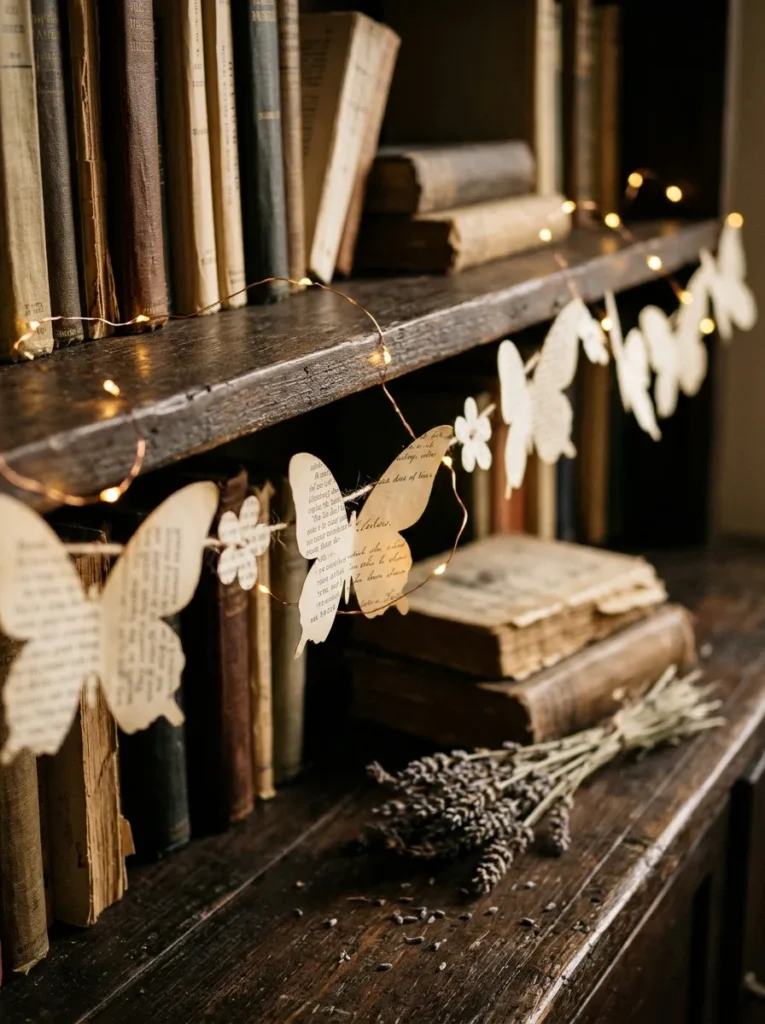
Vibe: The shelf feels dreamy, as if the stories had grown wings.
Why it works: A neutral aged-paper garland keeps visual weight light while adding line and movement. Repeating one motif across the length gives it rhythm, and a few lights add warmth.
How to get it: Cut 30 wing shapes using a punch or template from old book pages, fold each along the center, and glue them onto twine every 4 inches. Twist a copper-wire fairy light string along the garland.
Shop The Look
- Vintage book pages craft bundle
- Butterfly wing paper punch large
- Natural twine thin spool
- Copper wire fairy lights battery
- Dried lavender bundle small
14. Twig and Wire Fairy Furniture Set
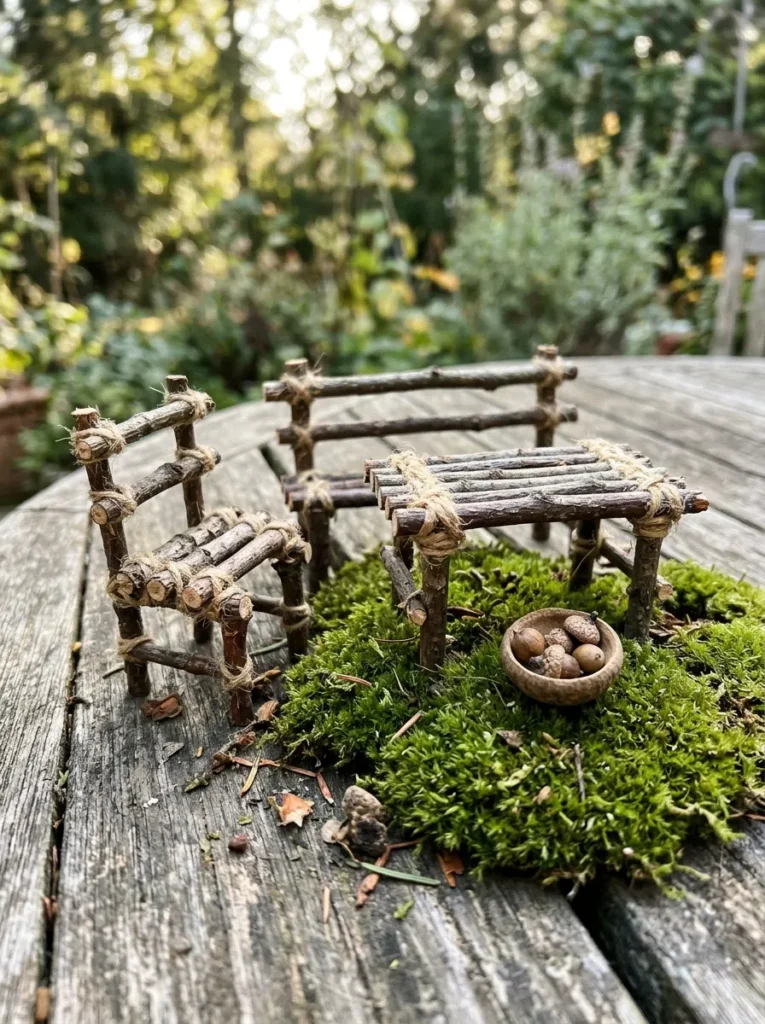
Vibe: The patch feels handmade, as though a tiny carpenter had just stepped away.
Why it works: Lashing creates visible joinery, so structure becomes decoration, and using straight twigs keeps proportions consistent across a set. A cluster of three pieces tells a story of use.
How to get it: Cut ¼-inch twigs into 3- and 4-inch lengths, form a square seat frame, and lash the corners with twine, adding a dab of glue to each wrap. Build the table and bench in the same way.
Shop The Look
- Twigs assorted craft bundle straight
- Twine natural jute thin
- Small garden pruner craft
- Outdoor craft glue waterproof
- Mini moss mat decorative
15. Fairy Dust Bottle Charms and Hanging Vials
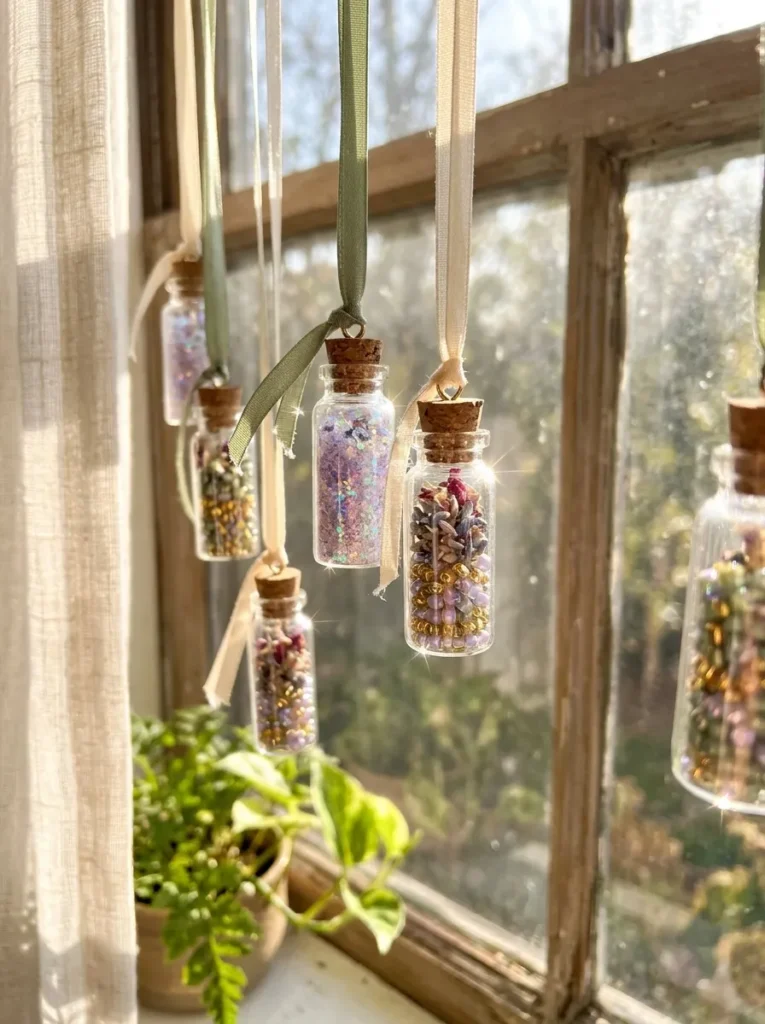
Vibe: The window feels shimmering, scattering small flecks of colored light.
Why it works: Glass vials catch and refract daylight, throwing small points of color across the room, which is a simple way to use natural light as decoration. Varying the hanging heights creates a staggered display.
How to get it: Fill 1-inch glass vials with a pinch of biodegradable glitter, dried petals, and seed beads, then seal with a cork and a dab of glue. Thread ribbon through the cork’s eye-pin and hang from a tension rod.
Shop The Look
- Mini glass vials with cork 1 inch set
- Biodegradable glitter fine iridescent
- Seed beads assorted pastel
- Eye pins craft small
- Satin ribbon sage cream thin
How to Start Your Fairy Crafting
The single best first move is to buy one 2-pound tub of white air-dry clay. It becomes the toadstool houses, mushroom clusters, cottages, and candle bases across several projects here, so your first purchase unlocks the most ideas and gives everything you make the same matte, handmade look.
The most common mistake is using thick craft glue or hot glue on delicate natural materials like moss and bark. It leaves visible blobs, dissolves dyed moss, and weakens over time. Instead, use a tacky craft glue in tiny dots, or a low-temperature hot glue gun with thin beads, and press for ten seconds until the bond grabs.
Three items under $50 get you started: a 24-color polymer clay set ($12), a bag of preserved sheet moss ($9), and a set of copper wire fairy lights ($10). Between them they cover sculpting, texture, and light.
A weekend gets you a terrarium, a set of toadstool houses, and a lantern for $25 to $60. All 15 projects realistically take three to four weeks of evening sessions at roughly $120 to $220 total, and foraged twigs, bark, and acorn caps lower that figure.
Frequently Asked Questions About Easy Fairy Crafts for Adults
What is the difference between fairy crafts and cottagecore crafts?
Fairy crafts focus on miniature, folklore-inspired scenes like tiny doors, toadstool houses, and glowing jars, while cottagecore crafts cover a broader rural-nostalgia style including embroidery, baking, and pressed flowers. They overlap in palette and natural materials, so many projects here fit both. Fairy crafts lean smaller, more whimsical, and more narrative.
What colors work best for easy fairy crafts for adults?
Moss green, sage, dusty lavender, birch white, and warm bark brown form the most cohesive palette, with small accents of soft red or gold for focal points. Keep to three main colors plus one accent. Avoid neon and heavy glitter, which can tip a woodland scene into costume-party territory.
How much do easy fairy crafts cost to make?
Most projects cost $3 to $20 in materials. A jar lantern runs around $10, a polymer clay mushroom cluster about $12, and a twig furniture set nearly nothing if you forage. A complete collection of 15 generally lands between $120 and $220, and foraged materials bring it down.
Can fairy crafts work in a modern or minimalist home?
Yes, with restraint. Choose one or two pieces, such as a terrarium or a single shadow box, and give them space on a clean shelf. Stick to neutral clay colors, preserved moss, and glass, and avoid crowding the surface with figurines.
How do I keep a fairy garden alive indoors?
Use moisture-loving plants like ferns, moss, and creeping fig, and place the garden near bright, indirect light. Mist lightly once or twice a week rather than soaking, and use a container with drainage or a layer of gravel to prevent root rot. For dark spots, use preserved moss, which needs no water or light.
Ready to Start Your Easy Fairy Crafts for Adults?
These 15 easy fairy crafts cover the full range, from the color of a mossy terrarium and the texture of birch bark to the glow of a jar lantern and the layout of a tiny garden tray. Starting small isn’t a compromise, because one finished toadstool or one lit jar will teach you more about your style than a cart full of supplies. Today, pick up a tub of air-dry clay or gather a handful of acorn caps on your next walk. When your tiny world is finished, you’ll feel the quiet delight of a space that looks back at you with a little mischief. Pin the fairy crafts that made you smile, because the ones that stay with you are the ones worth stealing.