14 Cardboard Crafts Kids Will Keep Playing With Long After the Glue Dries
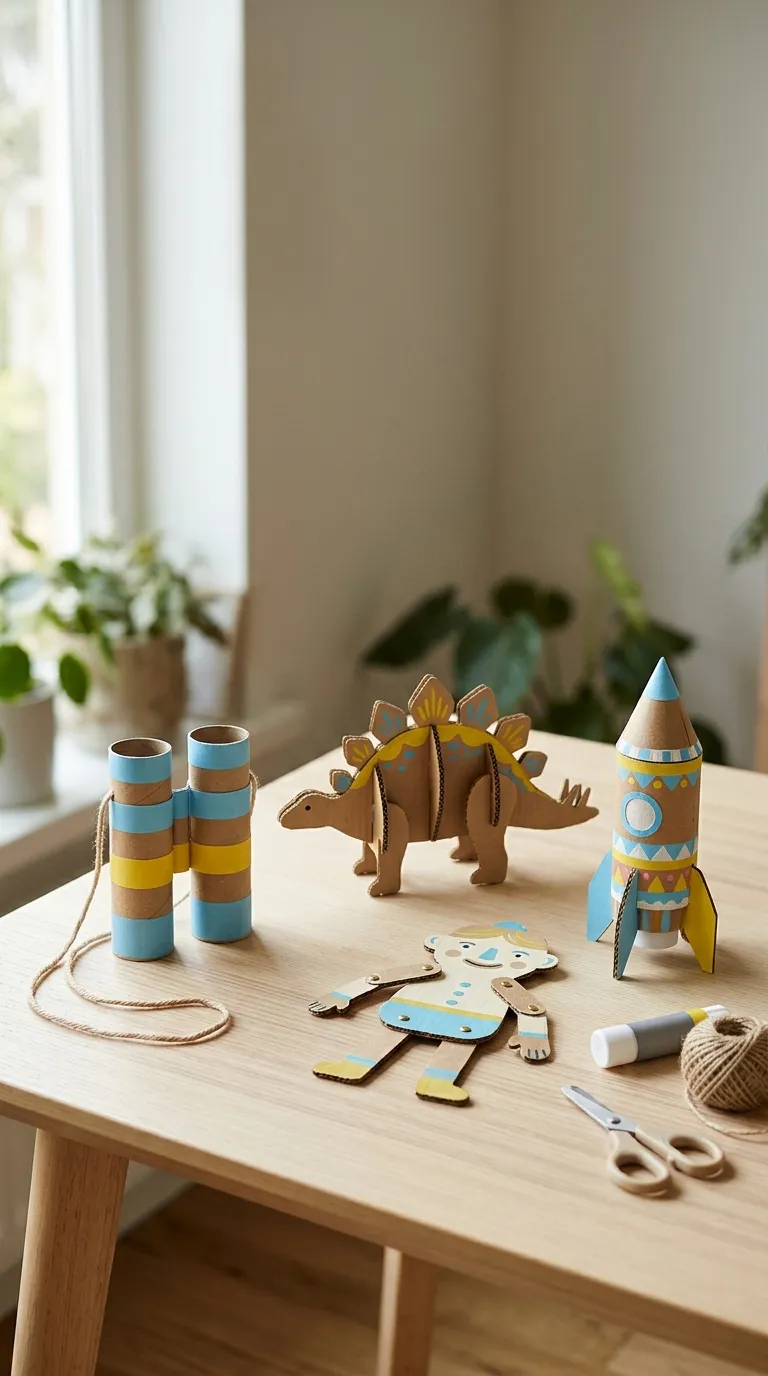
Cardboard is the one craft material already sitting in your recycling bin, and it builds far sturdier than it looks once you know which way its ridges run. These 14 cardboard crafts kids can actually finish, with twin-tube binoculars, a ride-in racecar, and a working marble run among them, all follow one rule: work with the flutes, not against them, so the cardboard’s own stiffness does the building.
A good cardboard build feels solid in small hands: a crisp fold, a tube that rolls without a kink, a joint that swings freely but doesn’t flop. Corrugated board takes washable paint with a soft, chalky matte finish, and shipping-box brown makes every colour look warmer. Nothing in the pile is precious, so a failed first attempt costs a minute and nothing else. By the end of an afternoon the living room holds a small fleet of things that kids carry around all week and argue about keeping.
Jump To
- Why Cardboard Crafts for Kids Make Such a Difference
- The Builds, From Quick Wins to Weekend Projects
- Twin-Tube Binoculars
- Corrugated-Edge Stamps
- Slot-Together Dinosaurs
- Cardboard Loom Weaving
- Fold-Tab Town Buildings
- Moving-Joint Puppets
- Half-Pipe Marble Run
- Papier-Mâché Animal Masks
- Wear-It Racecar
- Weighted Tube Bowling Set
- Rocket With a Rolled Cone Nose
- Layered Shoebox Diorama
- Standing Photo Frame With an Easel Brace
- Rubber-Band Box Guitar
- How to Start Your Cardboard Craft Corner
- Frequently Asked Questions
- Ready to Turn Your Recycling Pile Into a Craft Weekend?
Why Cardboard Crafts for Kids Make Such a Difference
Corrugated board is two flat paper faces with a rippled layer between them, and that ripple (the flutes) lets it fold cleanly in one direction and crush in the other. Shipping boxes, cereal cartons, and paper-towel tubes cover nearly every build below, so the real cost is glue and paint. Most projects fit on a kitchen table, so start with the tube builds if space is tight.
Quick Reference
| Factor | Answer |
|---|---|
| Best starting point | Twin-tube binoculars: no cutting, done in about 15 minutes |
| Biggest impact area | Flute direction, which decides which folds stay crisp and which legs stand |
| Budget to start | Roughly $10–$25 (approximate) |
| Time to complete | 15 minutes to an afternoon, plus drying time for the mask |
The Builds, From Quick Wins to Weekend Projects
1. Twin-Tube Binoculars With a Slip-Off Strap
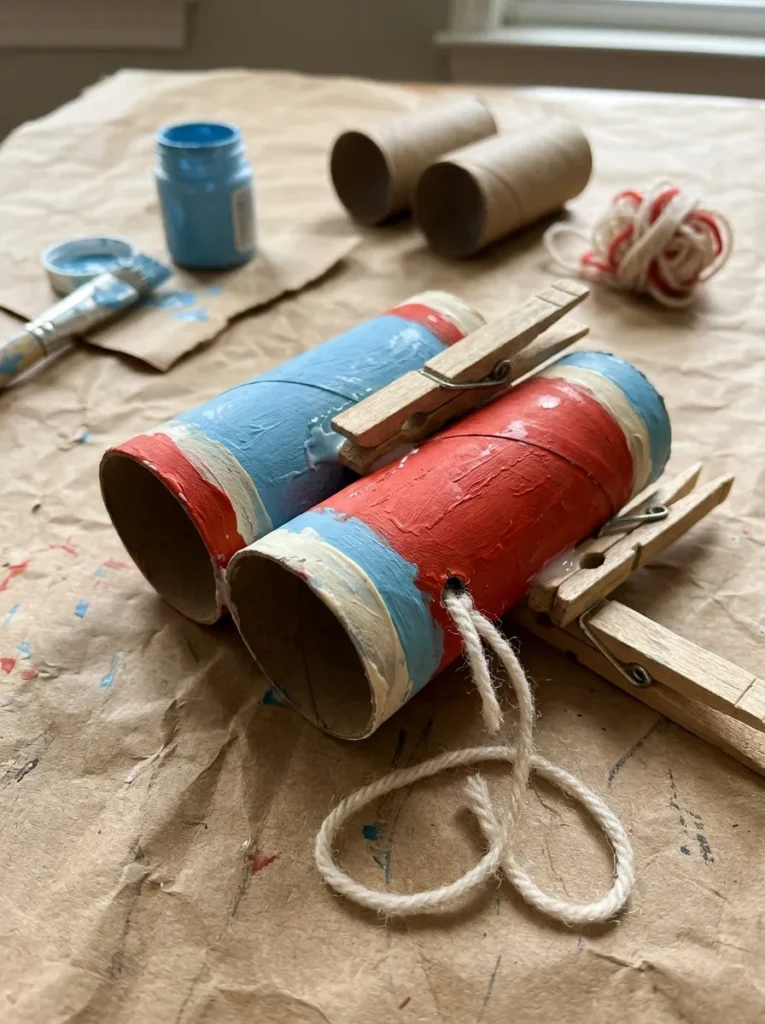
Preschoolers get the fastest payoff here, since the only skill involved is gluing two tubes side by side. Paint both toilet-paper tubes first, with a bold ring of contrasting colour around each rim so they read as lenses. Then stand them edge to edge, run white glue down the seam, and clip them together with two clothespins until the glue grips.
Wait until it’s dry before punching the strap holes, because wet cardboard tears out around a hole. Loop yarn through one hole on each outer side and keep the strap short enough to hang at chest height, tied with a loose knot that pulls apart under strain. Under-threes are better off with no strap at all.
2. Corrugated-Edge Stamps for Ridged Prints
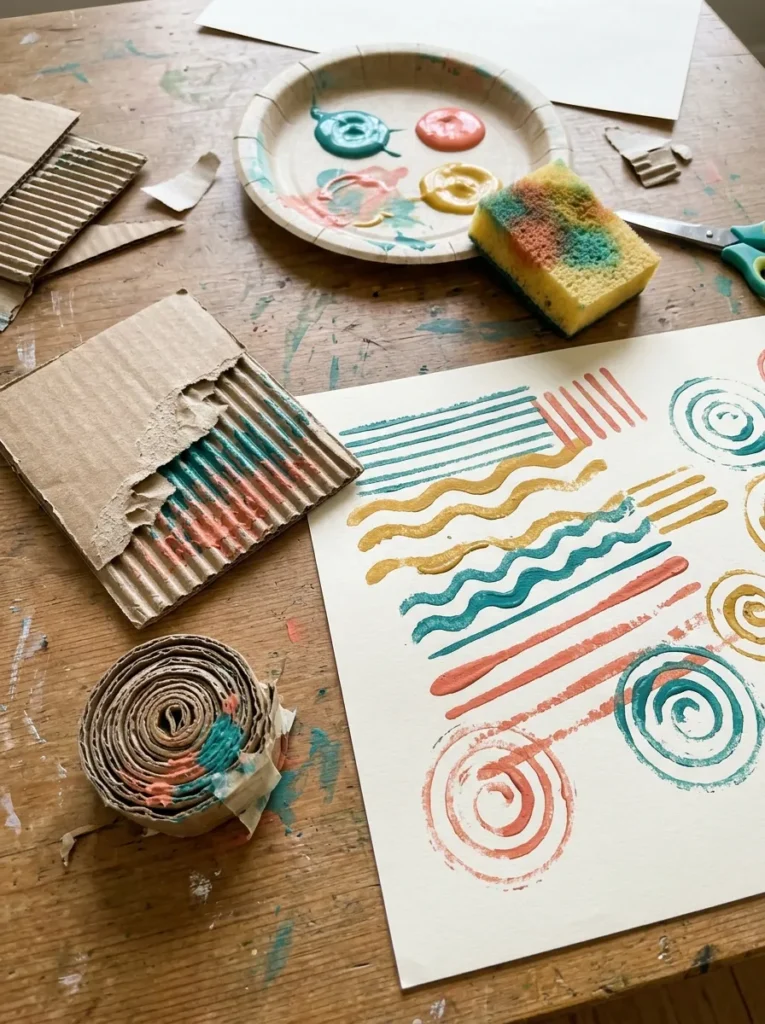
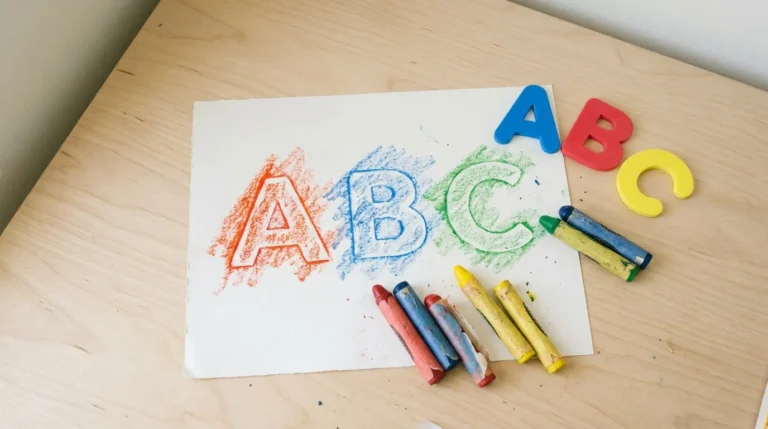
Dragged across paper, a corrugated stamp leaves a band of fine parallel lines, and a rolled coil of it prints tight concentric rings. Peel the top paper face off a scrap of corrugated board and the rippled layer underneath is exposed; each ridge picks up paint on its peak and releases it as a clean line.
Cut a rectangle for stripes, or roll a long strip into a spiral and glue the loose end for rings. Press the stamp into washable paint spread on a damp sponge, which works as a stamp pad. Children who already enjoy handprint painting will take to this at once, and toddlers can join in while a parent cuts the strips.
Pro Tip: Press the stamp onto a scrap sheet first. The first print from a fresh load of paint is always the blobby one, and pressing off the excess keeps the ridges from filling in.
3. Slot-Together Dinosaurs That Stand Without Glue
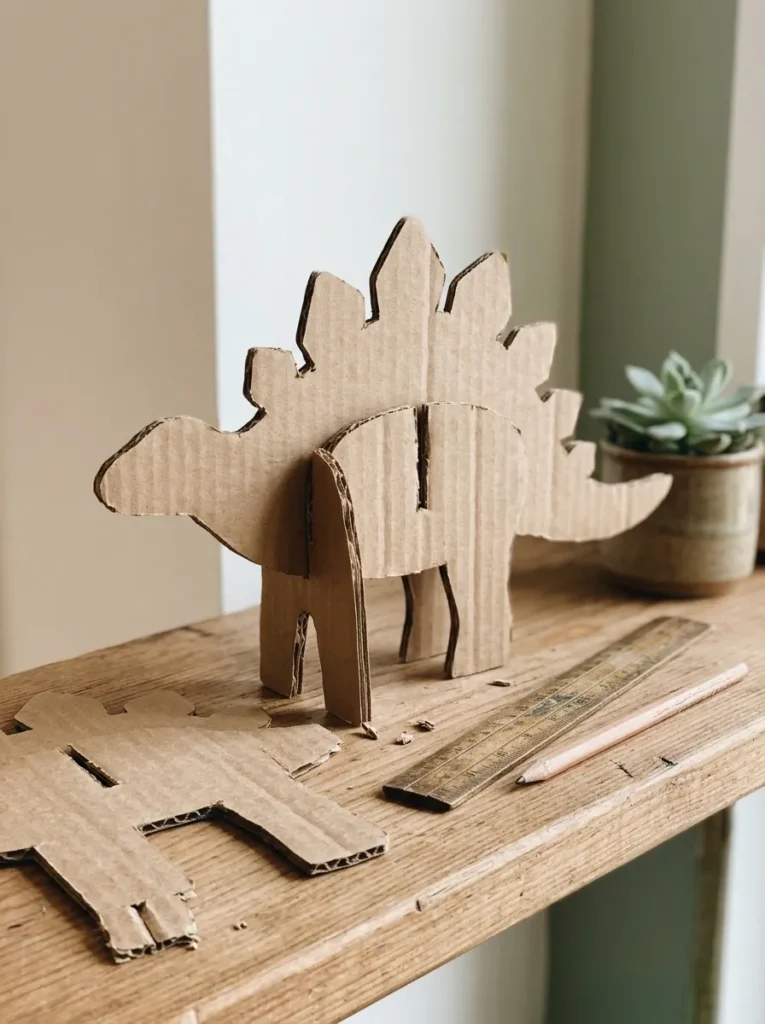
Trace one side profile of a dinosaur twice onto corrugated board, then cut a slot from the top edge halfway down in one piece and from the bottom edge halfway up in the other. Slide the slots together and the two flat shapes cross into a freestanding figure. Cut each slot only as wide as the board is thick, so the pieces grip without glue; a slightly wider slot wobbles, and a slightly narrower one crushes the flutes.
Turn the board so the flutes run top to bottom through the legs, which lets them carry weight like short columns. An adult should cut the slots with a blade on a cutting mat, while kids cut the outlines with blunt scissors. Best for children who like to design their own creature: change the outline, keep the slot rules.
Warning: A slot cut to the full height of a piece splits it in two. Mark the halfway point with a ruler on both pieces first, and test the fit on a scrap before cutting the real ones.
Next up: a loom made from one notched edge and a ball of yarn, where the secret is how loosely each row gets pulled.
4. Cardboard Loom Weaving With Chunky Yarn
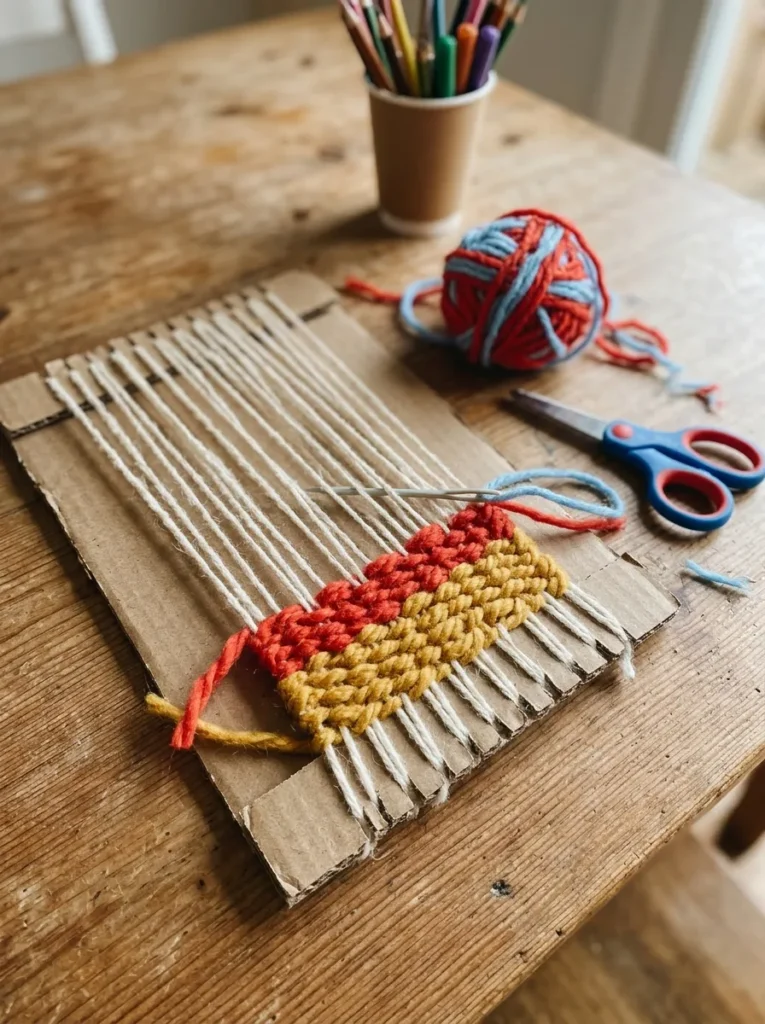
Weaving works because tension holds everything in place, and a notched rectangle of cardboard supplies it. Cut notches about 1 cm apart along the top and bottom edges, each about 1 cm deep, then run yarn up and down through them to form the vertical threads.
Weave a second yarn over and under those threads, pulling each row into a gentle upward arc before pushing it down; a straight, tight pull drags the sides inward and the piece ends up shaped like an hourglass. A blunt plastic needle does the passing, and the loose ends tie off at the back. Kids around six and up who enjoy repeating a motion will stick with it, and the ones who do can move on to crochet projects.
What You’ll Need
| Product | What to look for |
|---|---|
| Chunky yarn | Two or three high-contrast colours so each row shows; smooth rather than fuzzy, so it doesn’t snag in the notches |
| Plastic yarn needle | Blunt tip and an eye large enough for chunky yarn to pass through easily |
| Felt strips | Pre-cut strips woven in beside the yarn for a thick, raised stripe |
5. Fold-Tab Town Buildings
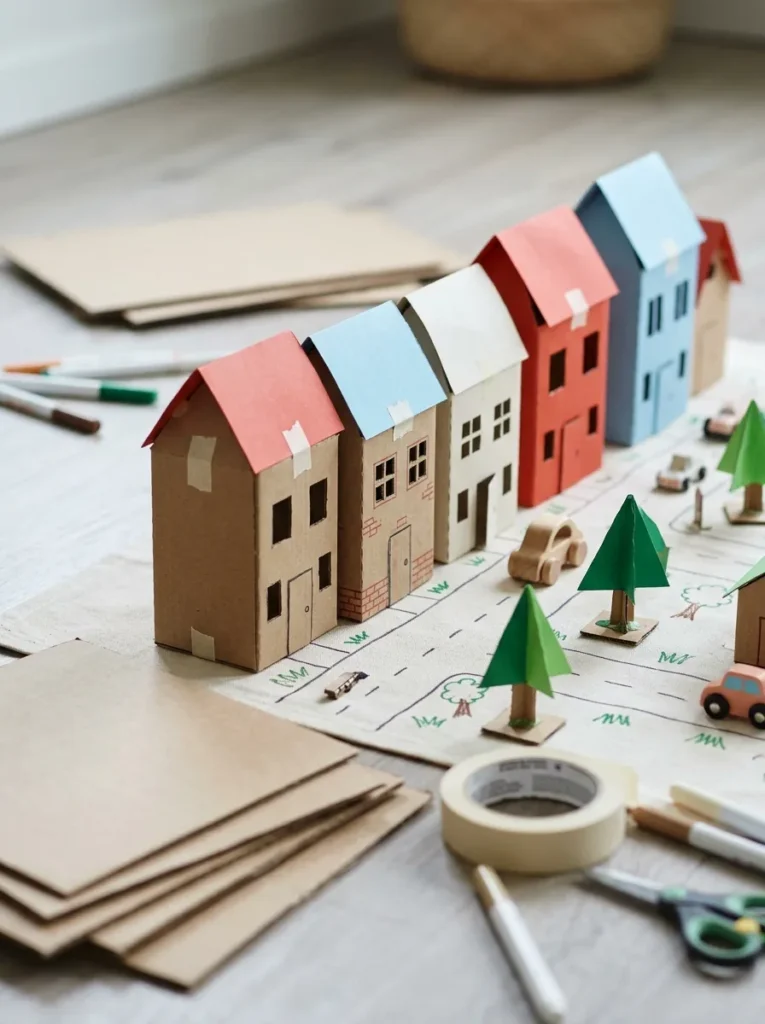
Cutting out flat houses and leaning them against a wall is how most cardboard towns start and end, with floppy buildings that fall over by afternoon. Folded buildings stand alone. Cut a long strip of corrugated card with the flutes running vertically, score four evenly spaced vertical lines with a ruler and a dry ballpoint pen, add a narrow glue tab at one end, then fold the strip into a box and glue the tab inside.
Because every fold line now runs parallel to the flutes, the corners fold clean instead of cracking. Add a folded roof, cut in windows, and set the buildings along a road drawn on a flattened box. Siblings sharing a table can build one each.
Important: Scoring is not cutting. A ballpoint pen pressed along a ruler should leave a groove, not break the paper face. If the top layer tears, use less pressure and score a fresh line.
6. Moving-Joint Puppets on Brass Fasteners
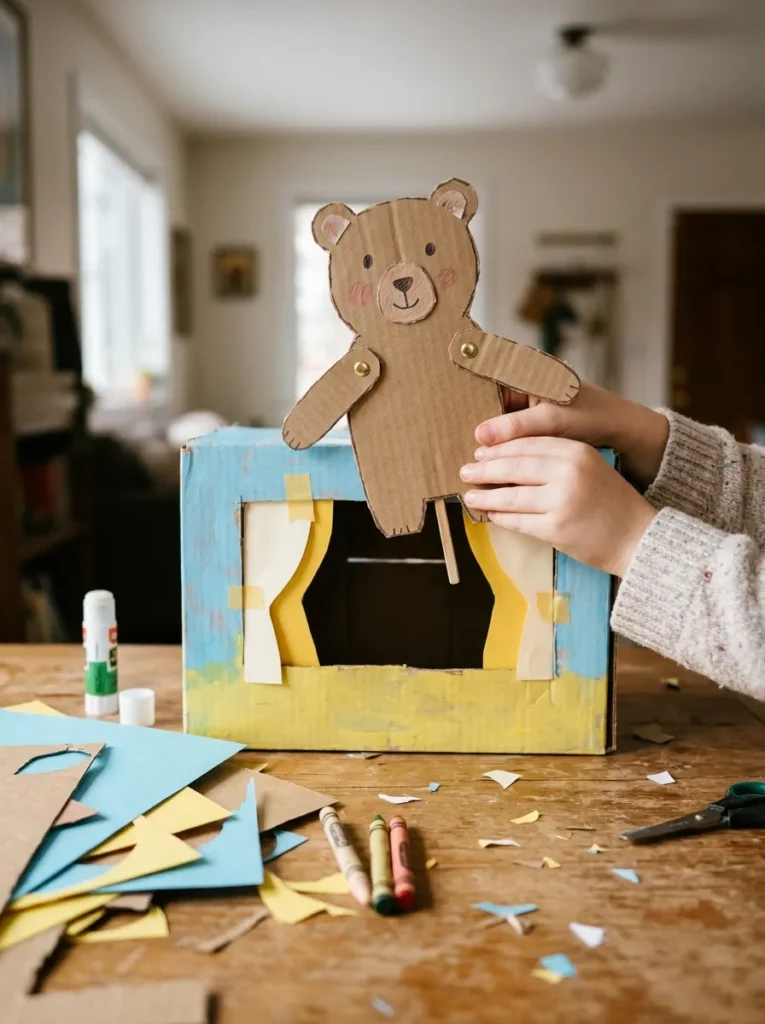
A cardboard puppet whose arms swing from the shoulder looks far more alive than one with glued-on limbs. The joint is a brass fastener (a split pin) pushed through both layers where two pieces overlap, with its prongs spread flat on the back. Overlap the limb and the body by about a thumb’s width and put the hole in the middle of that overlap.
Widen the hole slightly with a wiggled pencil point, then fasten with a tiny gap so the limb pivots freely; a pin pulled snug gives a stiff joint. Press a strip of tape over the flattened prongs so no sharp ends are exposed. A paper-plate face, like those in DIY paper plate crafts, makes a light head, and kids from about five up can manage the rest with an adult piercing the holes.
What You’ll Need
| Product | What to look for |
|---|---|
| Brass fasteners | Short shanks that clear two layers of card without sticking out far; round heads that sit flat |
| Googly eyes | Self-adhesive backing; one generous size per puppet so the face reads from across a room |
| Pipe cleaners | Soft, bendable length for antennae or hair, anchored by twisting through a pierced hole at the back |
Next, the marble run, which fails at its corners rather than its slopes, so the build starts with the bend.
7. Half-Pipe Marble Run With Banked Corners
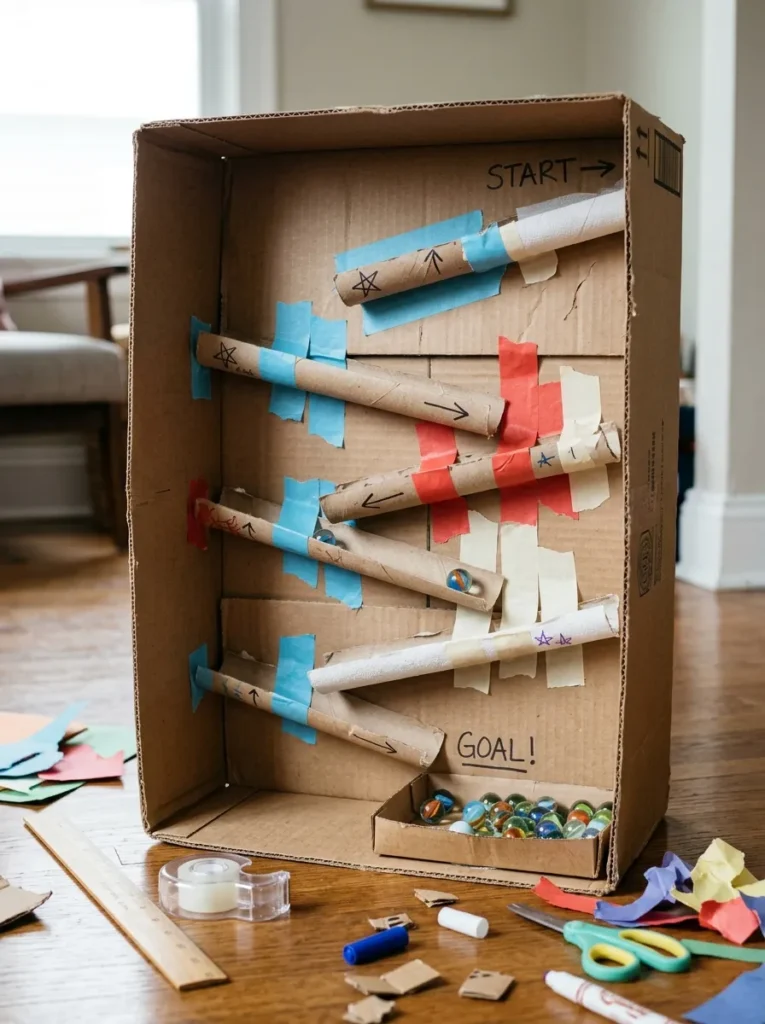
A marble run is a gravity problem, and gravity needs very little slope. Stand a large box on its side, cut paper-towel tubes in half lengthwise (an adult job) to make open troughs, and tape each one inside the box tilting gently down toward the next.
A steep slope looks exciting but launches the ball off every bend, so keep the drop gentle and raise a cardboard lip along the outside edge of each turn. Roll the ball through each trough before taping it down for good, and pick tubes noticeably wider than the ball. Skip small balls for children under three; anything that fits in a mouth does not belong in the room.
Mistake to Avoid: A gap between two troughs. The ball drops straight through it. Overlap the end of each upper trough onto the start of the next by a few centimetres.
What You’ll Need
| Product | What to look for |
|---|---|
| Ping-pong-sized balls | One size and weight for the whole run, so every slope behaves the same way; larger is safer around young children |
| Paper cups | Sturdy with a taller rim, set at the finish to catch the ball without letting it bounce out |
| Funnel | Wide mouth with a spout only a little wider than one ball, so it releases one ball at a time without jamming |
8. Papier-Mâché Animal Masks Over a Cardboard Frame
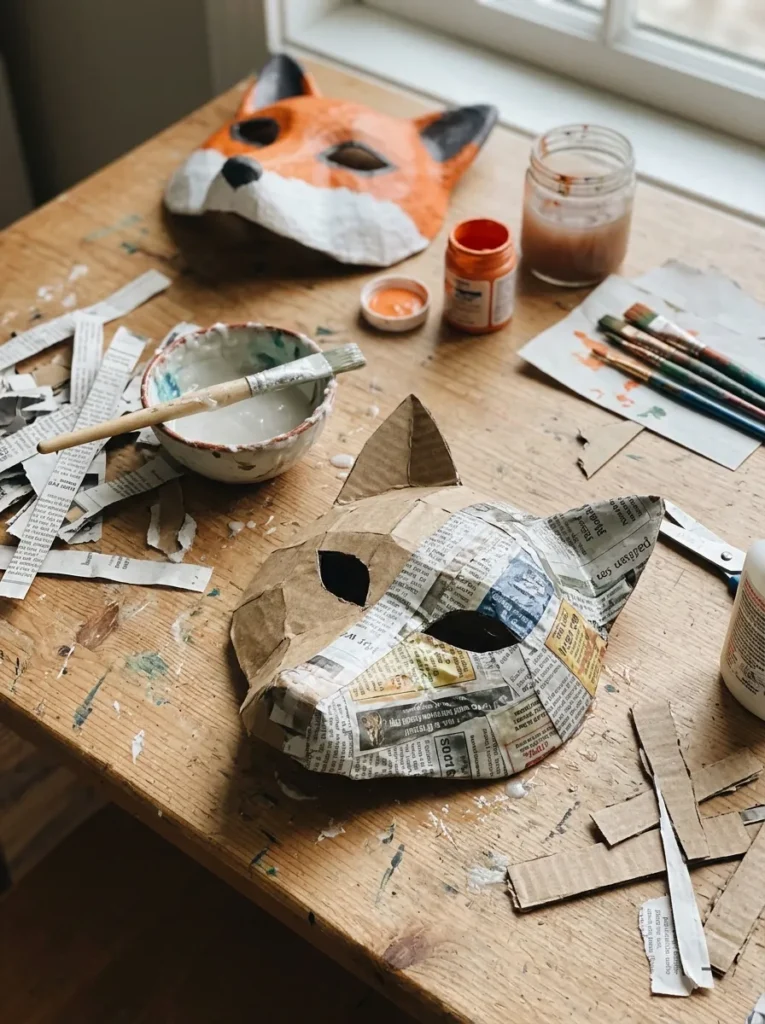
Papier-mâché usually starts with a balloon, which is fine for a bowl and awkward for a face. A cardboard armature skips the balloon: cut a face-width oval from corrugated board, fold a strip into a nose or snout, tape it on, and paste strips of newspaper over the top.
Cut the eye openings bigger than seems necessary, because two or three layers of paper shrink them. Leave the mouth and nose fully open. Flour-and-water paste works, but only if the mask dries completely, since damp paste can turn mouldy. Ages seven and up can handle the strips, and younger children can decorate a finished mask.
✅ Mask-Making Checklist:
- [ ] Cut the oval and the eye openings, then tape on the snout strip
- [ ] Tear newspaper into strips about as wide as a finger
- [ ] Paste on two to three layers, smoothing each one flat
- [ ] Dry until hard all the way through, overnight or longer
- [ ] Paint, then add elastic through holes at the sides
9. Wear-It Racecar Box
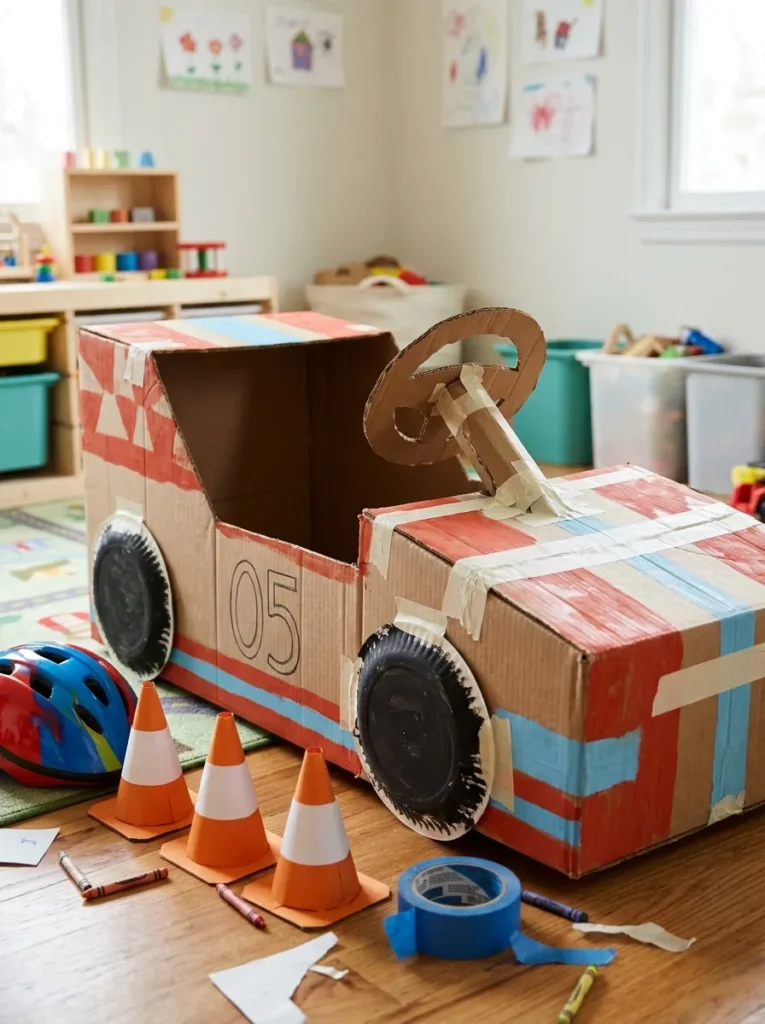
Kids who would rather be the vehicle than build one get a ride-in racecar. Choose a box that reaches about hip height on the child, cut off the top and bottom flaps so it becomes an open tube, and attach two straps over the shoulders. Cut the front edge a little lower than the back so the child can see their own feet. Paper plates or painted cardboard circles glued to the sides turn the box into a car.
Tape alone won’t hold shoulder straps, so pass ribbon or webbing through two slits and knot it. Keep play on flat ground, away from stairs, and stay nearby while the child gets used to a box that limits their view of the floor. Suits ages three and up.
Pro Tip: Glue a square of doubled cardboard behind each strap slit before threading. The patch spreads the pull so the strap doesn’t tear through a single layer.
Tubes tip over by default; the next build fixes that with a circle of cardboard and a wad of scrap paper.
10. Weighted Tube Bowling Set
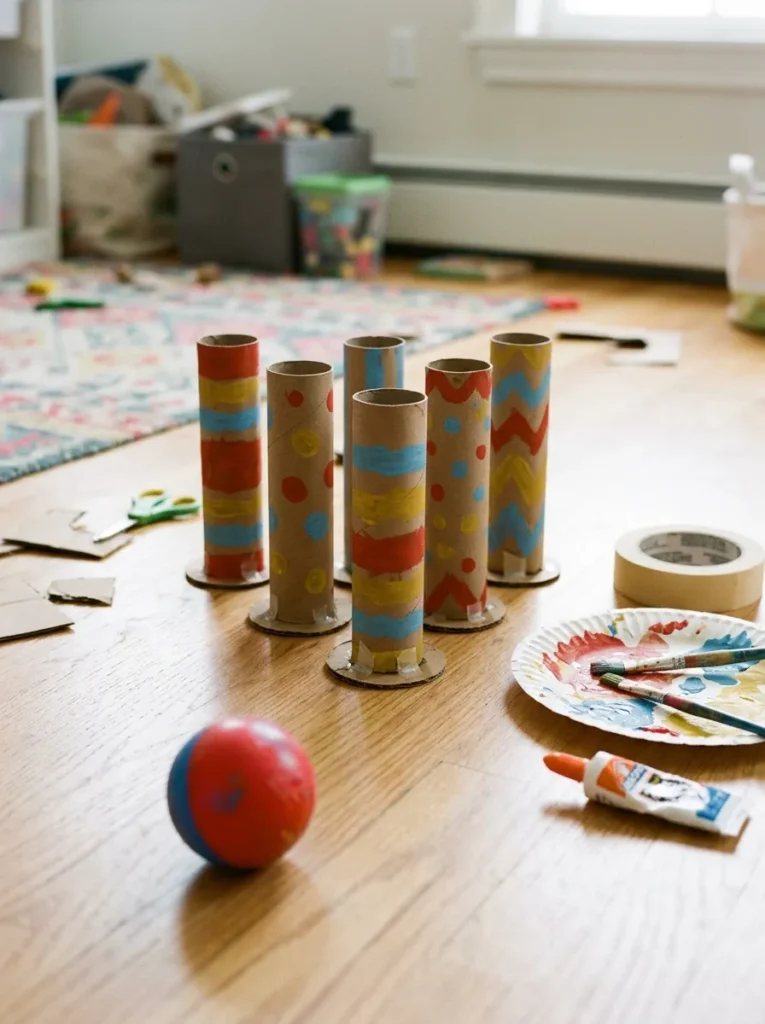
Six upright tubes painted in bright bands look like a store-bought bowling set, and they fall with a satisfying clatter. Paper-towel tubes topple at the slightest brush unless they have a base, so glue each one to a cardboard circle traced around a jar lid; the wider footprint steadies it.
Stuff the lower third of each tube with scrunched paper before gluing on the base, so the pin carries its weight low. A soft ball, such as fabric or foam, does the knocking, since a hard ball dents the tubes and sends pins flying toward faces. A good group project, because each child can make a pin.
Quick Win: Trace all six base circles at once with a jar lid on a flattened box and cut them in one sitting. The same lid keeps every pin the same size.
11. Rocket With a Rolled Cone Nose
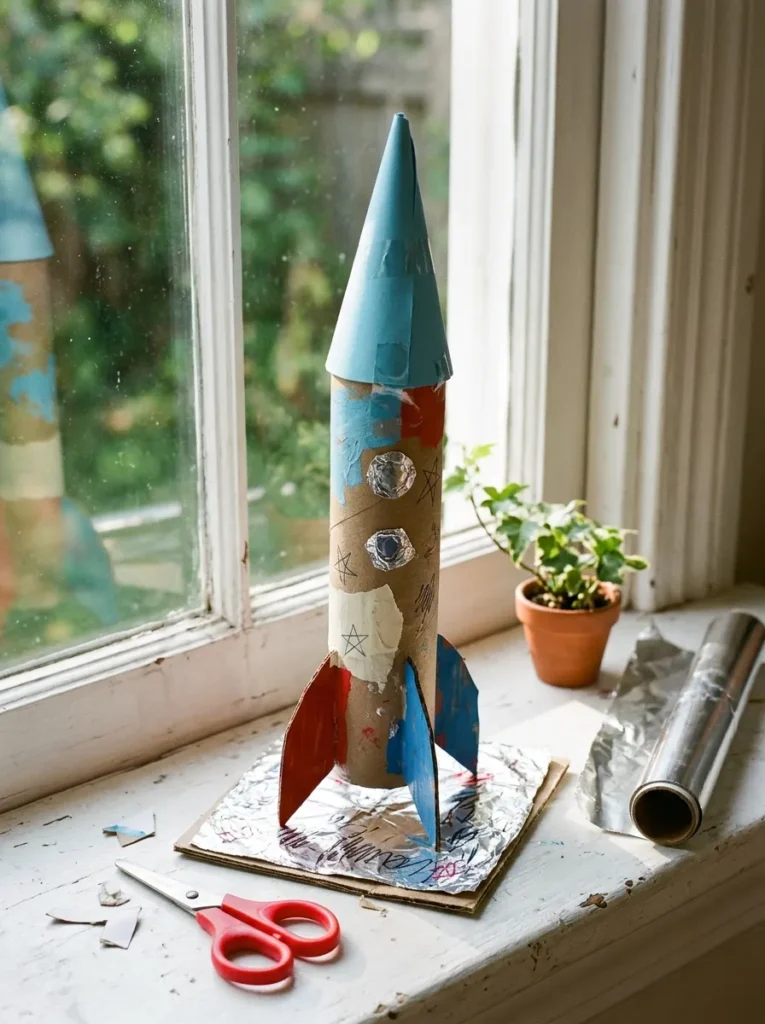
A cone is a flat circle with a wedge removed, rolled until the cut edges overlap, and the more they overlap, the narrower and sharper the cone. Draw a circle on cereal-box card rather than corrugated board, which crumples when curled in two directions at once.
Cut in from the edge to the centre and roll until the open end matches the rim of the rocket body. A tube makes a ready-made body, and three fins cut with a folded tab at the base glue flat to its sides. White glue is enough here; low-temperature glue guns are faster but belong in adult hands. A good second project once the tube builds feel easy, for ages six and up.
Warning: Gluing the cone before checking its fit. Rolled too wide, it overhangs the tube; too narrow, it drops inside. Roll it, hold it against the rim, adjust the overlap, and only then glue.
12. Layered Shoebox Diorama
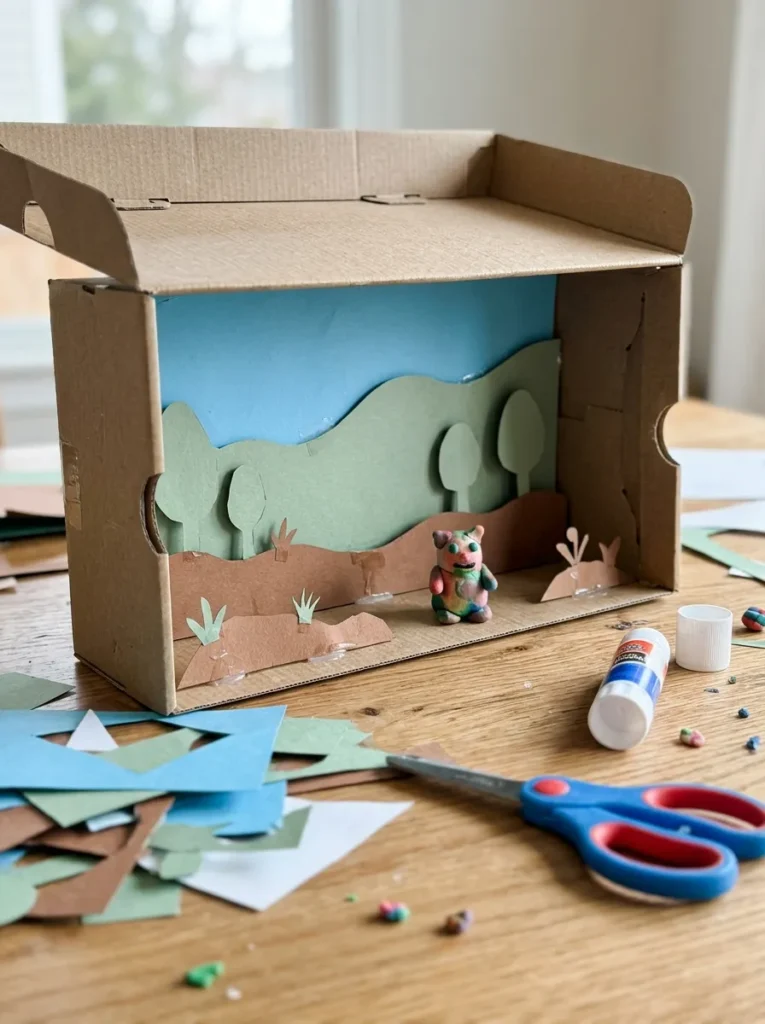
Open a shoebox on its side and the inside becomes a small stage. Three layers sell the depth: a painted background on the back wall, mid-ground cut-outs standing on folded tabs, and one small piece right at the front edge.
Make each layer’s colours a little paler as it sits farther back, since lighter, cooler tones read as distant. Fold a narrow strip at the base of every cut-out and glue it to the floor of the box so it stands upright, and cut the mid-ground figures slightly smaller than the foreground one. A rainy-day project for ages six and up, and it adapts easily to a school scene or story.
Styling Note: Cut a narrow window in the top or side of the box. Daylight falling through it throws soft shadows across the layers and adds depth for free.
Observation
Easy to get backwards: thicker cardboard is not automatically better. Corrugated is the right choice for anything that has to stand or carry weight, but for small, detailed pieces a cereal-box panel folds crisper, cuts cleanly with blunt kids’ scissors, and doesn’t show ripples under paint. Reserve shipping-box board for legs, bodies, and bases, and give the details to the thinner card.
Gluing wet to one face is how flat frames turn into curved ones, and the next build shows the fix before it happens.
13. Standing Photo Frame With an Easel Brace

Cut two identical rectangles from corrugated board, then cut a window from the centre of one to make the front. Glue the front to the back on three sides only, leaving the top open as a slot so a photo or drawing slides in and out.
For the stand, score a strip of cardboard about two-thirds the height of the frame, fold a narrow tab at its top, and glue the tab to the back, so the strip props the frame at a slight lean. Wrap the border in twine or glue on corrugated scraps for texture. Kids can make these for grandparents, which fits neatly with handmade Christmas gifts.
Important: Cardboard warps when only one face gets wet. Paint or seal both faces, or press the frame under a few books while it dries.
14. Rubber-Band Box Guitar With a Raised Bridge
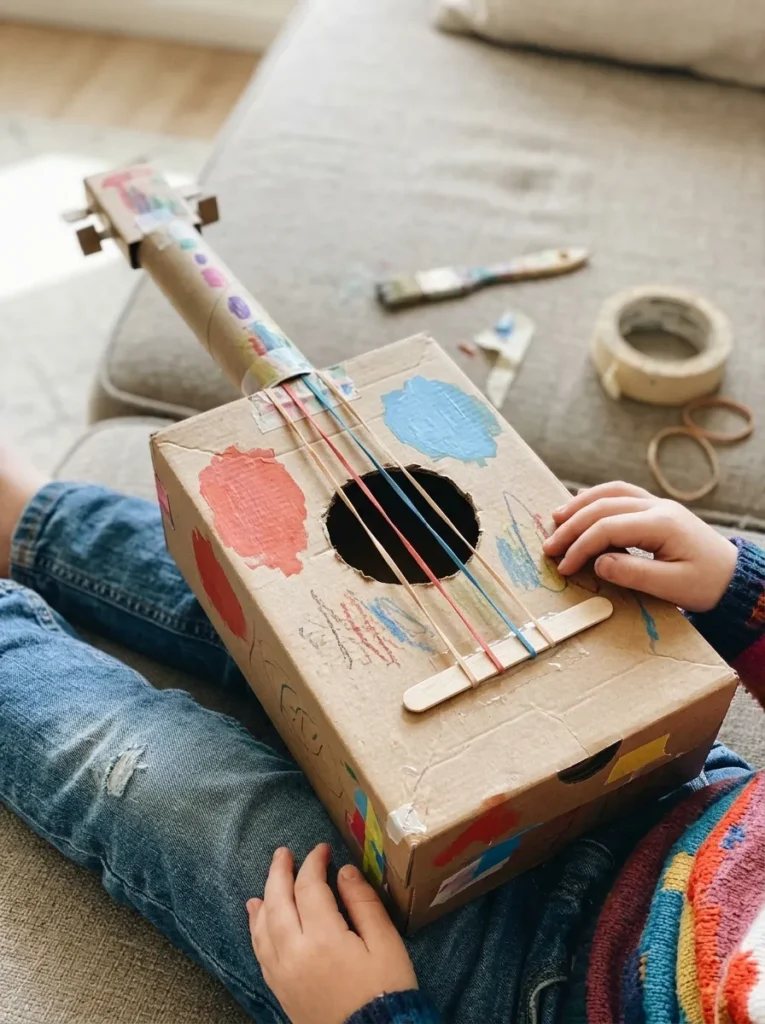
Rubber bands stretched across an open box twang, but they sound dull and rattle when they lie flat against the cardboard. The fix is a bridge: a craft stick glued under the bands at one end so they sit lifted off the surface. Cut a round hole in the box lid about the size of the base of a drinking glass, stretch four bands of different thicknesses lengthwise over the hole, and glue a tube to the box as a neck.
Thinner, tighter bands sound higher; thick, looser ones sound lower. Use a sturdy box, because bands pulled too tight bend a flimsy one inward. Keep faces well away from the bands while plucking, since a snapped band stings.
What You’ll Need
| Product | What to look for |
|---|---|
| Assorted rubber bands | A mix of thicknesses in one pack so each string sounds different; latex-free if allergies are a concern |
| Jumbo craft sticks | Flat and rigid, which lifts the bands cleanly; one serves as the bridge |
| Wide ribbon | Soft and wide, worn as a cross-body strap rather than a loop around the neck |
How to Start Your Cardboard Craft Corner
Start here: flatten a pile of boxes and mark an arrow on each sheet in the direction the flutes run, which shows as tiny tunnels along any cut edge. Every fold, curve, and standing leg in the builds above gets easier when it follows that arrow, so five minutes of sorting pays for itself on the first project. Sort the pile into three stacks as you go: shipping-box board for structure, cereal-box card for details, and tubes.
The mistake worth fixing early is a thick bead of glue. Corrugated board soaks it up unevenly, takes a long time to grip, and bows as it dries. Spread a thin film with a scrap of cardboard instead, then clip the join with clothespins until it holds.
Three items, each usually well under $50, make the whole routine easier: a washable tempera paint set in primary colours for the stamps, masks, and racecar; a low-temperature mini glue gun, held by an adult only, for joins that can’t wait for white glue; and a self-healing cutting mat for the adult blade work on slots and tubes.
A first project takes roughly 15 minutes to an afternoon. The mask stretches over a couple of days because of drying, and the town, diorama, and racecar each fill a weekend. A starter setup runs roughly $10–$25 (approximate), and a stocked kit with paint, fasteners, and yarn roughly $40–$80 (approximate). A whole cardboard town built one building at a time can keep going for a few weeks.
Frequently Asked Questions
What kind of cardboard works best for kids’ crafts?
Corrugated shipping-box board works best for anything that has to stand or carry weight, while cereal-box card suits small details. Corrugated gives legs, bodies, and bases their stiffness. Thin card folds sharper, cuts easily with blunt scissors, and curls into cones without crumpling.
How can kids cut thick cardboard safely?
Adults should cut thick corrugated board with a sharp blade on a cutting mat, while kids stick to blunt scissors and thin card. Kids can still trace outlines, score fold lines with a dry pen, and cut cereal-box card. Cutting along the flutes takes less pressure than cutting across them.
What glue holds cardboard best?
White school glue holds most cardboard joins well when spread in a thin film and clipped with clothespins until it grips. A thick bead soaks in unevenly and warps the board. Hot glue sets faster but is hot enough to burn, so a low-temperature gun in adult hands is the safer choice.
How do I make a cardboard craft last longer?
Paint or seal both faces of the board and keep finished pieces dry. One-sided moisture makes cardboard curl, and a fully painted piece resists scuffs better than bare board. Reinforce stress points like strap slits and joints with a doubled patch of cardboard glued behind them.
Ready to Turn Your Recycling Pile Into a Craft Weekend?
Fourteen builds covering printing, weaving, joints, wearables, and music all lean on one habit: let the direction of the flutes decide where things fold and where they stand. Starting small is the right way in, so today, flatten one box, mark the arrow, and make the binoculars before dinner.
By the end of the week you’re likely to hear “can we make another one?” instead of “I’m bored.” Save the cardboard crafts kids in your house will want to build first to a Pinterest board, so the slot dinosaurs and the box guitar are one tap away on the next rainy afternoon.
Keep Exploring
- 15 Handprint Crafts for Kids Who Love Getting Messy
- 12 Paper Plate Crafts for Kids to Make in an Afternoon
- 16 Back-to-School Crafts Kids Can Make From Supplies at Home