17 Easy Dollar Tree Crafts to Make and Sell for Beginners
Dollar Tree crafts to make and sell are handmade items built from the store’s budget supplies (glass, wood, foam, baskets, frames) that you upgrade with paint, texture, or styling and resell for a profit. This guide gives you 17 beginner-friendly projects, each with steps, a profit angle, and a shopping list, so you can pick a first product and start testing it.
The appeal is low-risk practice. A single glass jar or cork coaster set costs about the price of a coffee, so a flop teaches you something instead of draining your savings. There’s a quiet satisfaction in turning a plain $1.25 item into something that looks boutique, and in finding out a stranger will pay for it.
Here are 17 ideas worth saving, and stealing.
Why Easy Dollar Tree Crafts to Make and Sell for Beginners Work So Well
Dollar-store crafting grew out of Depression-era “make do” culture and was revived by the 2010s DIY blogging boom, when crafters began upgrading bargain-bin items into home decor. It differs from standard handmade selling because your supply cost is already near the floor, so even a modest markup produces a margin.
The core materials are glass jars and candlesticks, wooden letters and plaques, cork coasters, foam wreath forms, picture frames, jute twine, and tin pails. Matte black, warm white, sage green, terracotta, and gold paint finish them well. A small kit of acrylic paint, a hot glue gun, and spray sealer covers most of the projects below.
The trend is driven by inflation-conscious shoppers who want handmade gifts that don’t cost department-store prices, and by side-hustle interest in markets like Etsy, Facebook Marketplace, and local craft fairs. Finishing matters more than the base item, so buyers pay for the look, not the dollar-store origin.
Small spaces work well. A card table, a drop cloth, and one shoebox of paint and glue is enough. Start with one product, make six, and sell those before buying supplies for a second.
| Element | Detail |
|---|---|
| Philosophy | Low-cost base, high-perceived-value finish |
| Key Materials | Glass jars, wood plaques, cork, foam forms, picture frames, jute twine |
| Key Colors | Matte black, warm white, sage green, terracotta, gold |
1. Faux Terrazzo Trinket Dishes from Air-Dry Clay
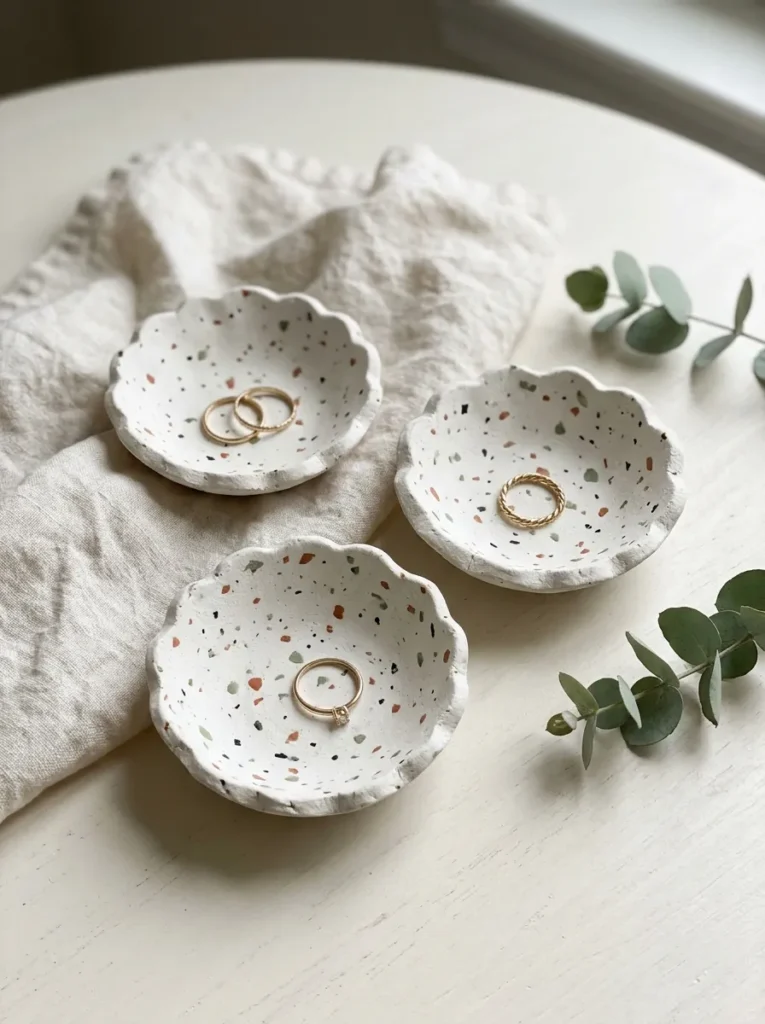
Vibe: Speckled and calm, like something from a boutique ceramics shelf.
Why it works: Terrazzo’s scattered color chips read as expensive because the contrast between a plain white base and small bright flecks looks designed. Buyers rarely guess the base is air-dry clay.
How to make it: Knead white air-dry clay with torn colored clay flecks, press it into a Dollar Tree shallow dish as a mold, and let it dry for 24 hours. Sand the rim and seal with matte varnish. Sell as a set of three.
💡 Quick Win: Use the shallow plastic bowl as a mold and pop the dried clay out instead of sculpting freehand.
Shop the Look
| Product |
|---|
| White air-dry clay, 2 lb block |
| Matte water-based varnish, small bottle |
| Fine-grit sanding sponge set |
| Terracotta acrylic craft paint |
| Small plastic shallow dishes for molds |
Also view: 19 Handmade Wooden Gifts Everyone Will Absolutely Love
2. Layered Bath Salt Gift Jars
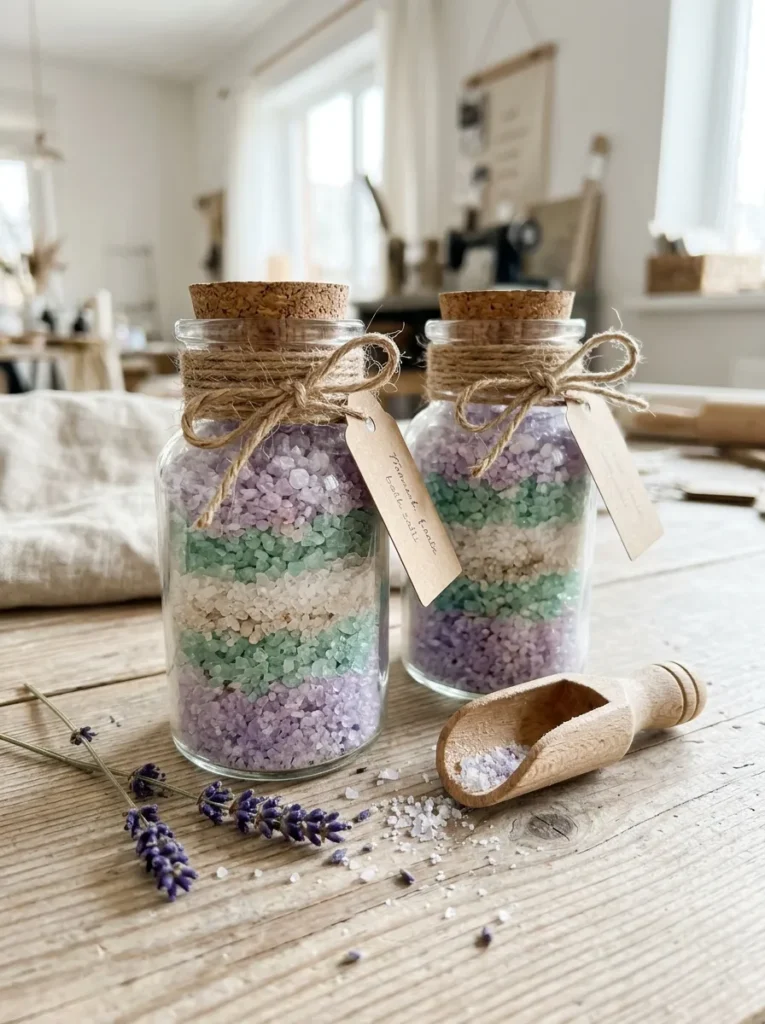
Vibe: Layered and fresh, like a spa shelf you can give away.
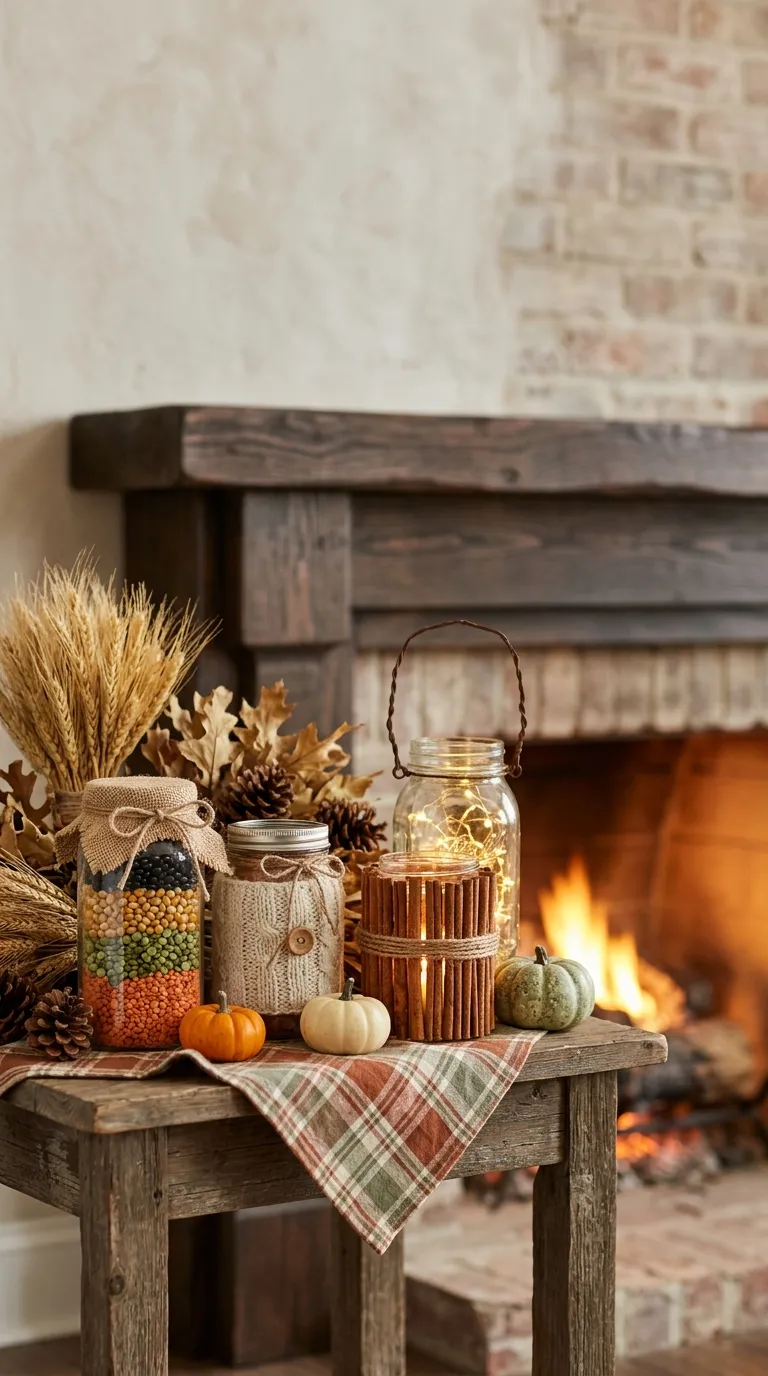
Why it works: Visible color layers use contrast against clear glass, which makes the product look more premium than the same salts in an opaque container. Gift-oriented products also tend to sell faster in November and December.
How to make it: Color Epsom salt with a few drops of food coloring, spoon each color into a clean glass jar, and tap it flat between layers. Add a drop of skin-safe essential oil, seal with a cork, and tie on a handwritten tag.
Shop the Look
| Product |
|---|
| Epsom salt, 4 lb bag |
| Skin-safe lavender essential oil, 10 ml |
| Kraft paper gift tags with string, 50 count |
| Wooden mini scoop spoons, 12 count |
| Cork stoppers for glass jars, assorted |
3. Picture Frame Jewelry Organizer
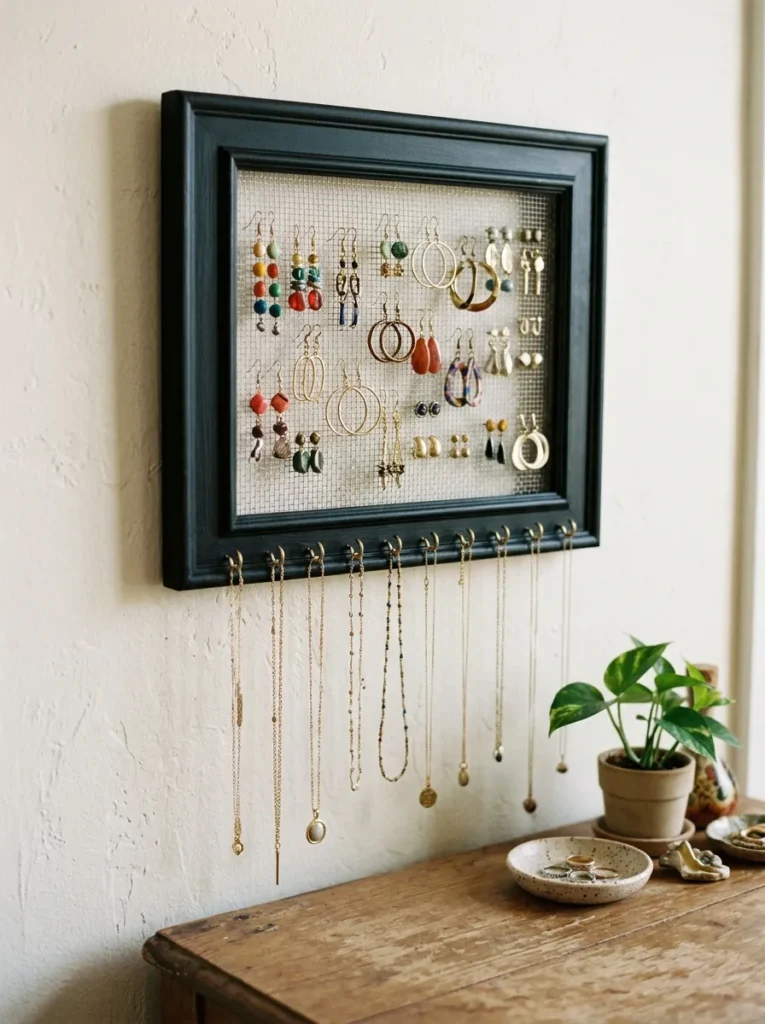
Vibe: Tidy and purposeful, like a boutique display you actually use.
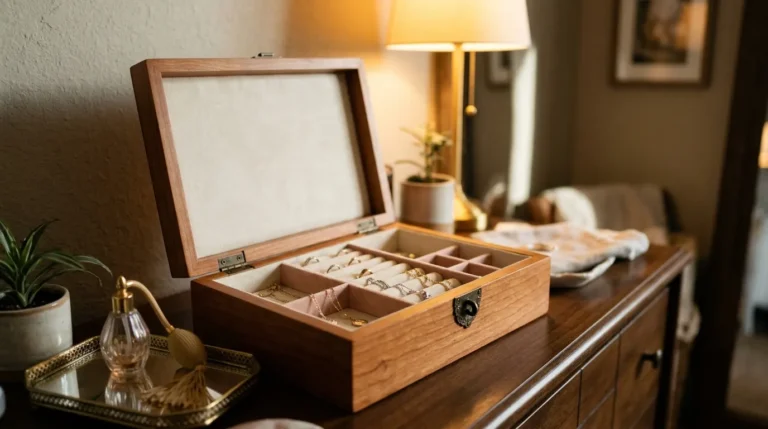
Why it works: Functional products have a clear reason to buy, and a mesh panel is a visually quiet surface that makes earrings the focal point. The frame provides structure that no-sew crafters can’t easily replicate.
How to make it: Remove the glass and backing, spray the frame matte black, then staple plastic canvas or fine mesh across the opening. Screw four small gold cup hooks into the bottom edge and add a sawtooth hanger.
💡 Quick Win: Use a 4×6 frame as a small “earring card” version at a lower price point.
Shop the Look
| Product |
|---|
| Matte black spray paint, 12 oz |
| Plastic canvas mesh sheets, 7-count |
| Gold cup hook screws, 50 count |
| Sawtooth picture hangers, 25 count |
| Heavy-duty staple gun with staples |
4. Stacked Glass Candlestick Holders
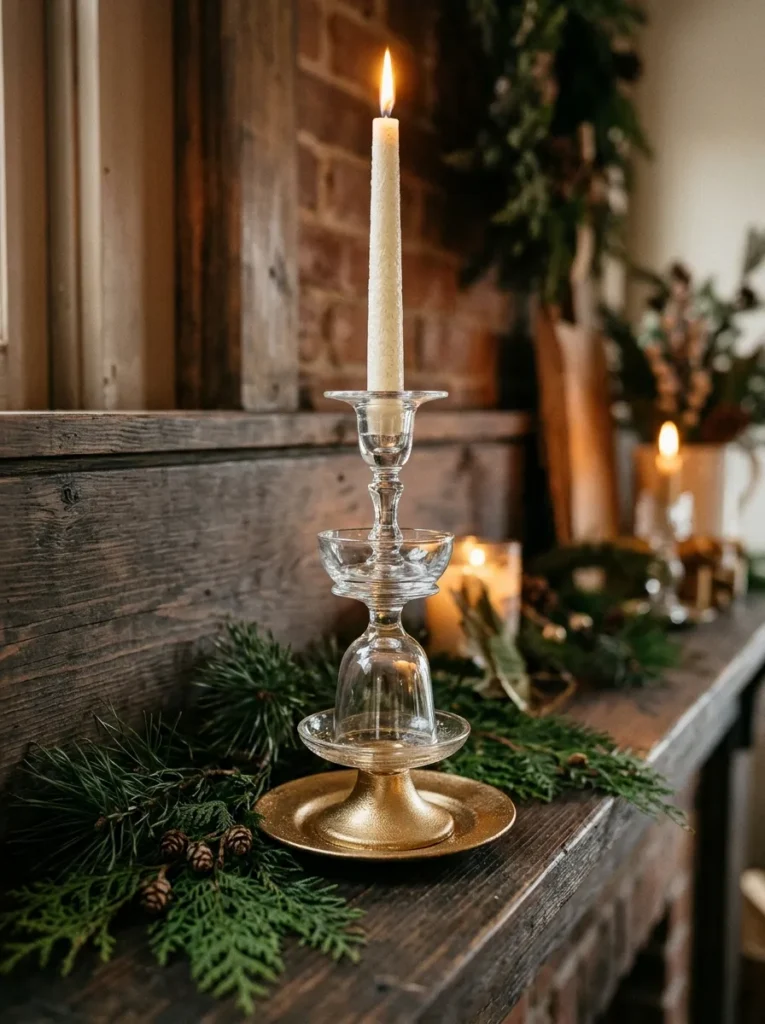
Vibe: Warm and polished, like candlelight at a dinner party.
Why it works: Stacking glass pieces creates height, which increases perceived value, and a gold-painted foot adds a warm metallic accent against clear glass. Height and shine are two reasons these resemble designer pieces.
How to make it: Glue a glass goblet upside down to a glass plate using clear industrial adhesive, glue a small candle cup on top, and cure for 24 hours. Spray the foot gold and label the item “decorative use; supervise burning candles.”
Shop the Look
| Product |
|---|
| Clear industrial strength adhesive, E6000 type |
| Metallic gold spray paint |
| Tapered ivory candles, 12 count |
| Glass candle cup toppers |
| Painter’s tape, 1-inch roll |
5. Dry-Erase Frame Weekly Planner
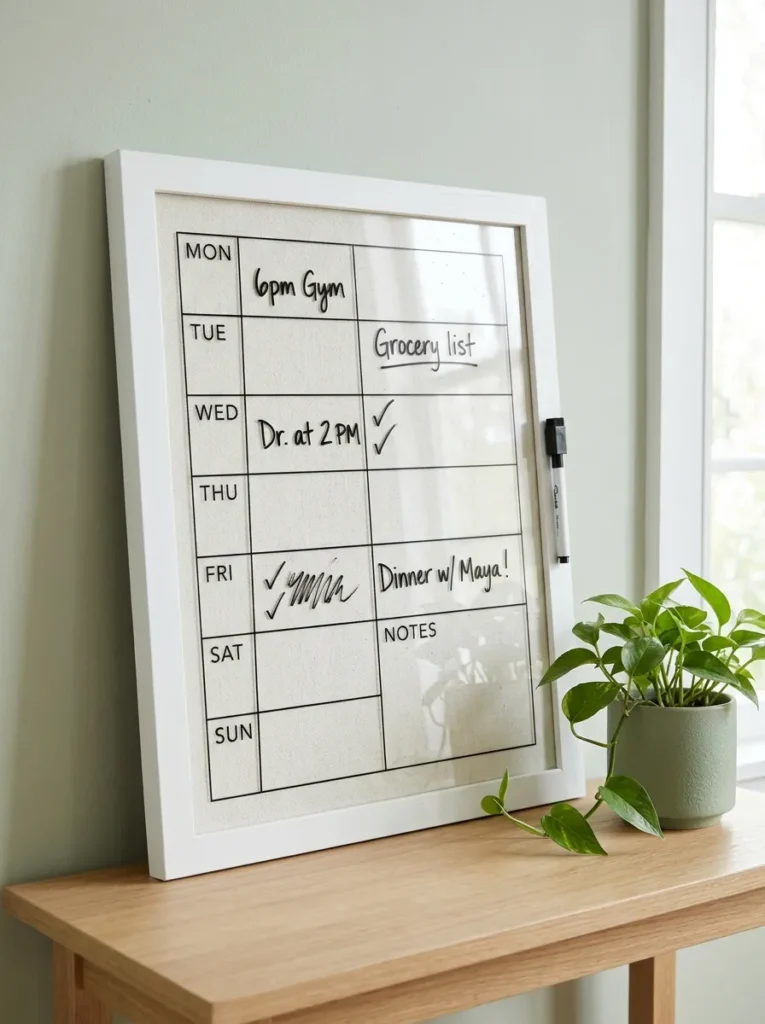
Vibe: Crisp and organized, like a fresh Monday.
Why it works: Glass-front frames work as a reusable dry-erase surface, so the product’s usefulness repeats weekly. A printed grid under the glass gives structure without needing fine drawing skill.
How to make it: Print a weekly grid on cardstock, cut it to fit the frame backing, and insert it behind the glass. Add a self-adhesive clip on the side for a dry-erase marker.
💡 Quick Win: Offer a monthly and weekly version, since a second size lets you charge for both.
Shop the Look
| Product |
|---|
| White 8×10 picture frames, set of 6 |
| Printable matte cardstock, 100 sheets |
| Fine-tip dry-erase markers, assorted colors |
| Self-adhesive pen holders, set of 10 |
| Fabric paint pen for grid lines |
6. Twine-Wrapped Planter Pots
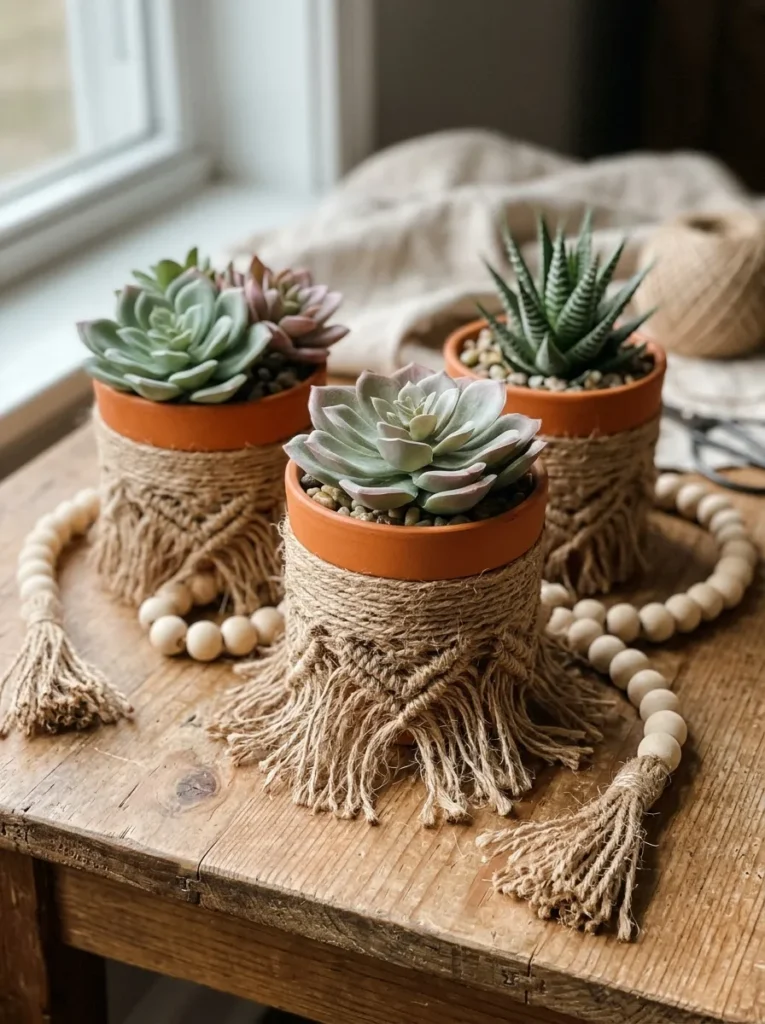
Vibe: Layered and earthy, like a sunroom shelf in morning light.
Why it works: Wrapped fiber adds a texture layer around a plain smooth pot, and the tassel fringe gives it a handmade look that mass-produced planters rarely have.
How to make it: Hot glue the end of a twine ball to the pot rim, wrap tightly downward in even rows, and secure the tail inside. Tie a 6-inch tassel to the front and hot glue it in place.
Shop the Look
| Product |
|---|
| Natural jute twine, 300 ft spool |
| Small terracotta pots, 3-inch, 12 count |
| Wooden craft beads, assorted, 100 count |
| Mini hot glue gun with low-temp sticks |
| Faux succulent picks, assorted |
7. Painted Wood Letter Monograms
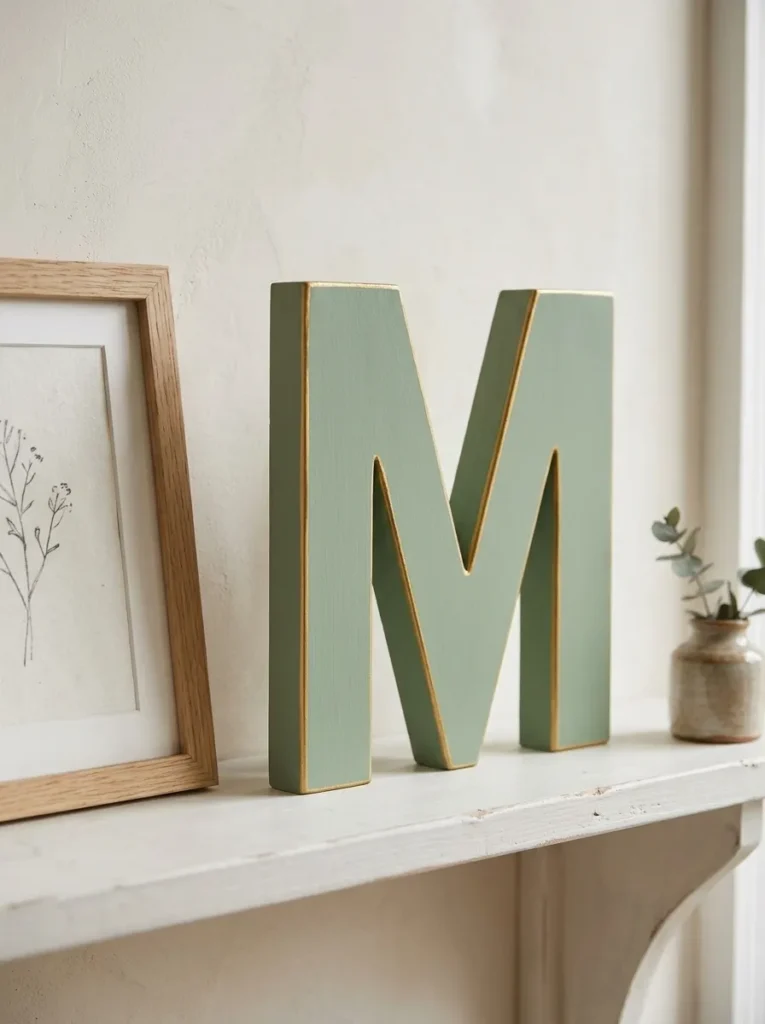
Vibe: Still and personal, like a name made into a room accent.
Why it works: Personalization raises willingness to pay, since a buyer sees their own initial in a finished style. A simple two-tone finish, a main color with a metallic edge, adds polish with minimal skill.
How to make it: Sand the letter lightly, prime it, paint two thin coats of sage green, and let it dry. Run a gold paint pen along the edges and seal with a spray topcoat.
💡 Quick Win: Make the most popular initials (A, M, S, J) first to avoid leftover inventory.
Shop the Look
| Product |
|---|
| Unfinished wooden letters, assorted, 6-inch |
| Sage green chalk-style paint, 8 oz |
| Gold metallic paint pens, fine tip |
| White acrylic primer, small can |
| Clear matte spray topcoat |
8. Hand-Stamped Cork Coasters
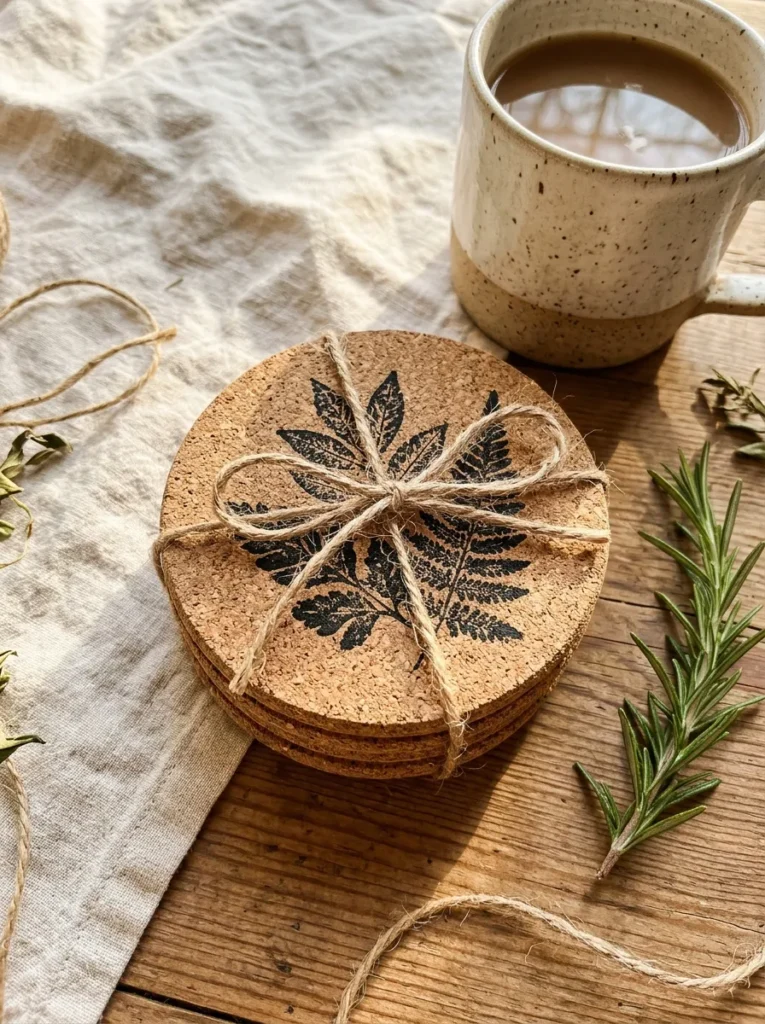
Vibe: Warm and natural, like a quiet kitchen table.
Why it works: Stamping repeats a single motif, which gives a set a uniform look even when individual prints vary. Natural cork reads as eco-friendly, which appeals to gift buyers.
How to make it: Press a leaf-shaped rubber stamp onto an ink pad, stamp each coaster once, and let it dry for 10 minutes. Seal with a clear spray, stack four, and tie with twine.
Shop the Look
| Product |
|---|
| Round cork coasters, 4-inch, 24 count |
| Botanical leaf rubber stamp set |
| Black permanent archival ink pad |
| Clear acrylic sealer spray |
| Kraft bands for coaster sets |
9. Marbled Clear Ornaments

Vibe: Glossy and swirled, like a snow globe made of paint.
Why it works: Marbling uses the movement of paint inside a clear sphere, which creates a one-of-a-kind pattern each time. Uniqueness lets you price pieces as handmade art rather than commodity decor.
How to make it: Squeeze a teaspoon of floor polish into an ornament, add three drops of acrylic paint in different colors, and tilt slowly until coated. Pour out the extra, dry the ornament upside down overnight, and cap it.
💡 Quick Win: Sell sets of three in coordinated palettes so buyers feel they’re getting a collection.
Shop the Look
| Product |
|---|
| Clear fillable glass ornaments, 12 count |
| Floor polish, acrylic finish, small bottle |
| Blush and gold acrylic paint set |
| Gold ornament hanging caps, 24 count |
| Satin ribbon spool, 1/4-inch |
10. Mini Tin Pail Herb Planters
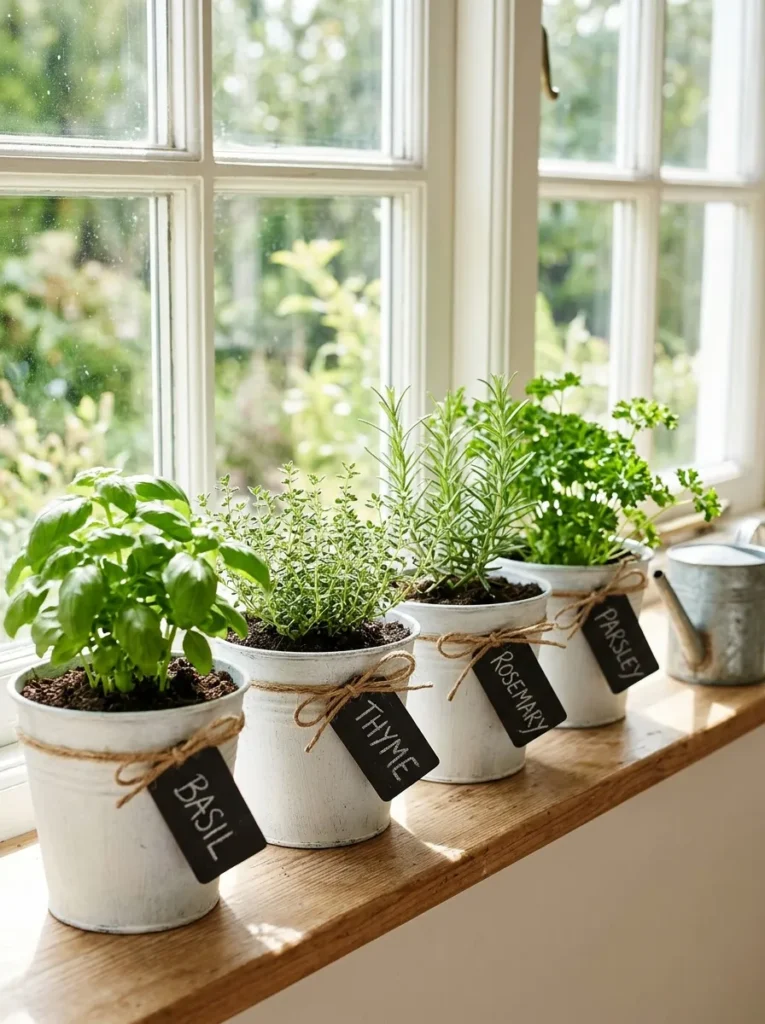
Vibe: Fresh and bright, like a kitchen windowsill in spring.
Why it works: Living herbs add scent and function, and matching white pails create a uniform set with a clean farmhouse look. Planters in sets of three are easy to price as a bundle.
How to make it: Poke three drainage holes in the bottom of each pail, paint them white, and let them dry. Add potting mix, plant small herb starts, and place a chalkboard tag in the soil.
Shop the Look
| Product |
|---|
| Galvanized mini tin pails, 3-inch, 12 count |
| White metal-safe spray primer |
| Chalkboard plant marker stakes, 24 count |
| Organic potting mix, 8 quart bag |
| Herb seed starter packets, assorted |
11. Jute-Wrapped Storage Baskets

Vibe: Grounded and tactile, like a basket woven in a country workshop.
Why it works: Wrapping an everyday plastic base in a natural material changes its entire character, a texture swap that makes a utility item look like a designer piece.
How to make it: Hot glue the end of 1/4-inch jute rope to the basket’s base, coil upward in tight rows, and glue each row in place. Paint a stripe of black fabric paint around the upper third, and finish with a clear matte sealer.
💡 Quick Win: Start with a small round basket, since it uses much less rope than a rectangular one.
Shop the Look
| Product |
|---|
| Natural jute rope, 1/4-inch, 100 ft |
| Black acrylic fabric paint |
| Low-temp hot glue sticks, 50 count |
| Foam brush set, assorted widths |
| Clear matte sealer, brush-on |
12. Crayon-Melt Canvas Art
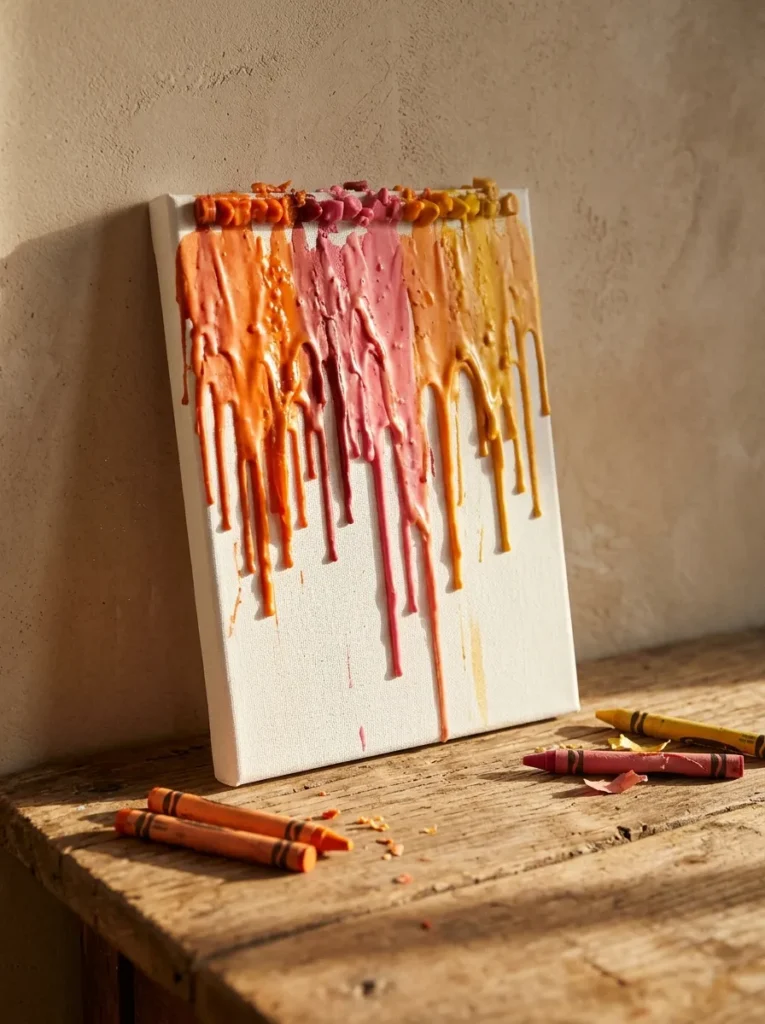
Vibe: Bright and dripping, like a sunset in motion.
Why it works: Gradient color sequences are easy for beginners because the heat does the blending. Abstract art also doesn’t depend on drawing skill, so results feel consistent.
How to make it: Glue crayons across the top edge of a canvas, aim a hair dryer on high at the crayons, and let the wax run downward. Let it cool, tilt the canvas as needed, and finish by wiping the edge.
Shop the Look
| Product |
|---|
| Small stretched white canvas, 8×10, 6 count |
| Crayon set, 64 color, jumbo |
| Hair dryer with concentrator nozzle |
| Drop cloth, plastic, 9×12 ft |
| Easel back stand-up supports |
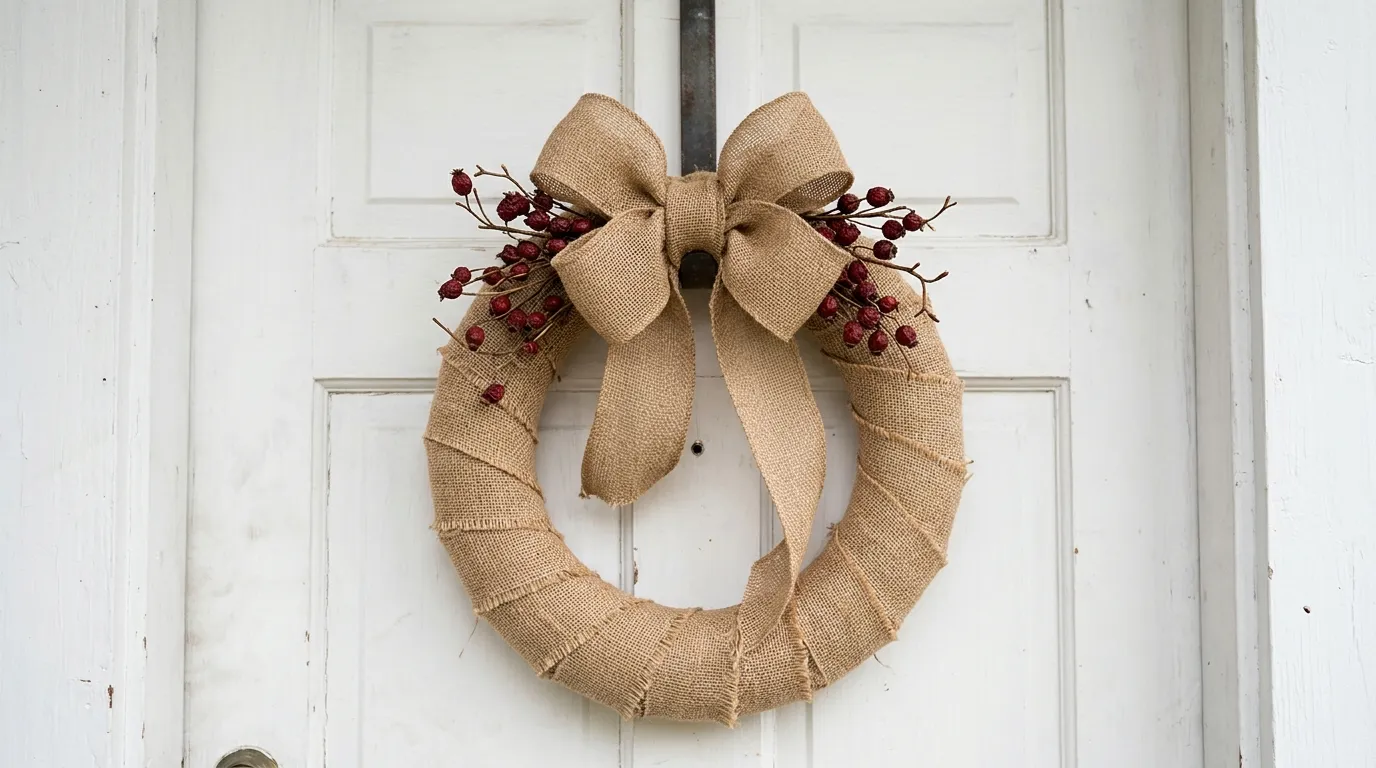
13. Seasonal Burlap-Ribbon Foam Wreaths
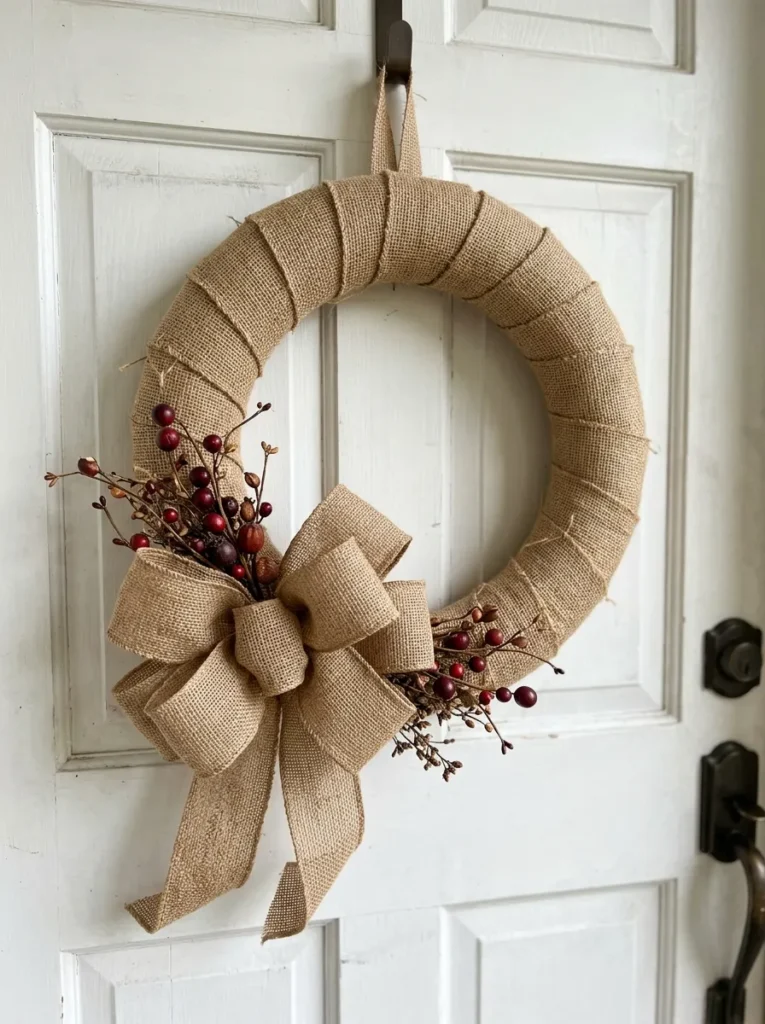
Vibe: Rustic and welcoming, like a front porch in November.
Why it works: Wreaths are among the most searched seasonal decor items, and the form is a ready base, so most of your time goes into decoration. Changing the picks and ribbon lets you sell the same base across four seasons.
How to make it: Pin the start of a burlap ribbon to the foam wreath form, wrap it around in overlapping layers, and pin the end. Tie a large bow, secure it with floral wire, and tuck in floral picks.
💡 Quick Win: Sell a “bow-only add-on” for $5 to increase your average order value.
Shop the Look
| Product |
|---|
| Foam wreath forms, 12-inch, 6 count |
| Natural burlap ribbon, 2.5-inch, 20 yard roll |
| Floral wire, 22 gauge, 3 spools |
| Red berry floral picks, 12 count |
| U-shaped floral pins, 100 count |
14. Painted Terracotta Pots with Faux Succulents
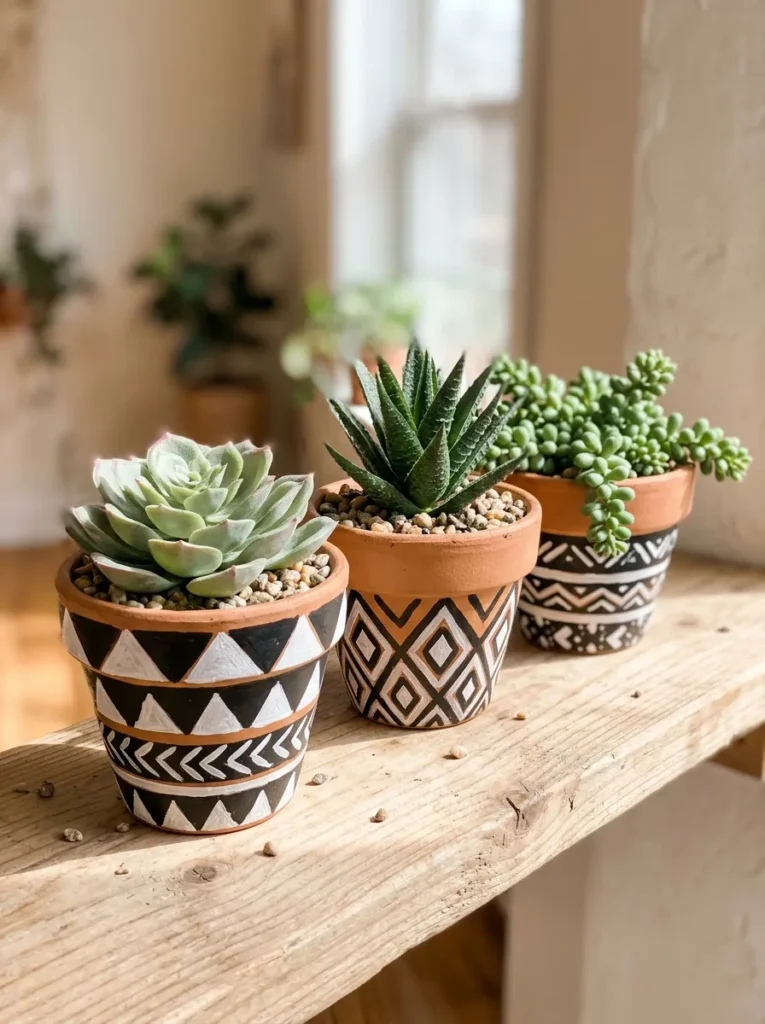
Vibe: Graphic and fresh, like a modern greenhouse corner.
Why it works: Geometric patterns use strong contrast to catch attention, and faux plants mean a buyer never has to water. Both help the product ship and last.
How to make it: Paint a base coat of white on the pot, use painter’s tape to mark triangles, and fill them with black paint. Peel the tape while the paint is still tacky for crisp lines, then press a faux succulent into foam inside.
Shop the Look
| Product |
|---|
| Small terracotta pots, 2-inch, 24 count |
| Delicate-surface painter’s tape, 1/2-inch |
| Black and white acrylic paint pair, 4 oz |
| Floral foam blocks for pots |
| Decorative white river pebbles, 2 lb |
15. Hand-Lettered Cardstock Bookmarks
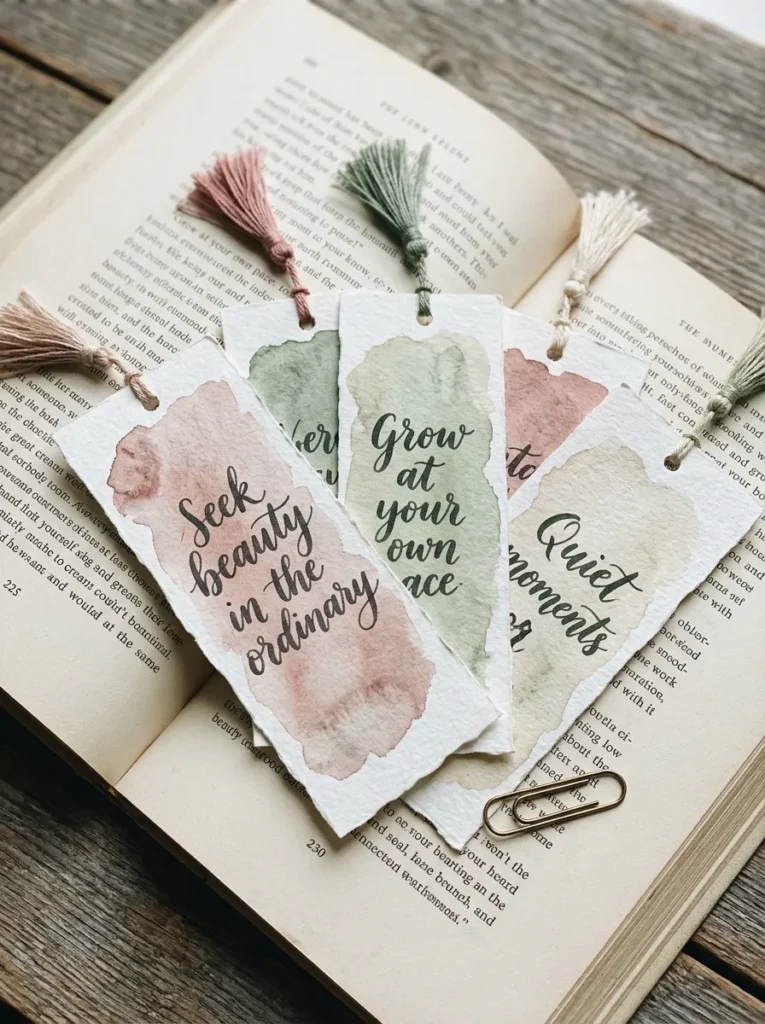
Vibe: Quiet and literary, like a rainy afternoon with a good book.
Why it works: Bookmarks have the lowest material cost of any item here, which means you can sell them as add-ons at a craft fair or bundle them into larger orders. Lettering adds personality that printed bookmarks lack.
How to make it: Cut cardstock into 2×6-inch strips, wash with diluted watercolor, and let them dry. Letter a short original phrase with a brush pen, punch a hole at the top, and tie on a tassel.
💡 Quick Win: Write your own short phrases to avoid any copyright issues with famous quotes.
Shop the Look
| Product |
|---|
| Heavyweight cardstock, white, 100 sheets |
| Watercolor pan set, 24 colors |
| Brush pens in black, dual-tip |
| Embroidery floss for tassels, assorted |
| Hole punch, single, heavy duty |
16. Farmhouse Wood Plaque Signs
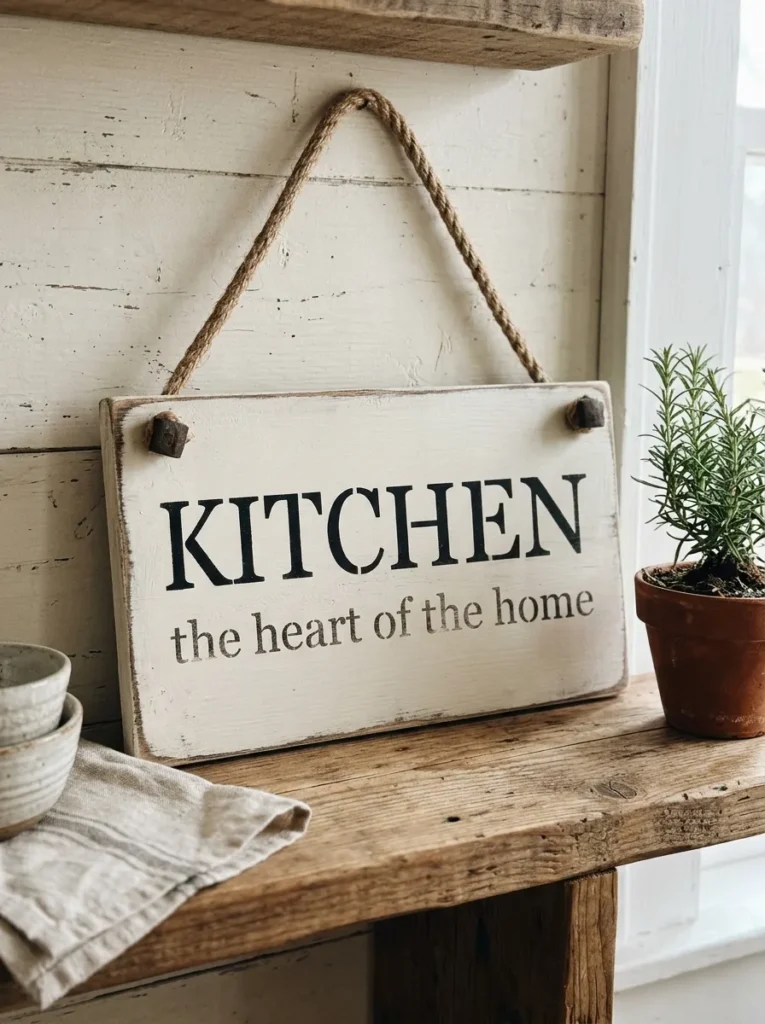
Vibe: Rustic and lived-in, like a sign in a farmhouse kitchen.
Why it works: Signs are a proven category because a short phrase can personalize a space. Light distressing on the edges adds an aged look without extra materials.
How to make it: Paint the plaque with two coats of warm white, tape a letter stencil in place, and dab black paint through it with a sponge. Sand the edges lightly, then seal and attach a rope hanger.
Shop the Look
| Product |
|---|
| Unfinished wood plaques, 5×7, 12 count |
| Reusable alphabet stencil set, 2-inch |
| Round stencil sponge dabbers, 6 count |
| Warm white chalk-style paint, 8 oz |
| Natural twine rope hangers, 25 count |
17. Mini Crate Floating Shelves

Vibe: Grounded and sturdy, like a small piece of furniture for the wall.
Why it works: Wall storage solves a real small-space problem, and a stained crate with brass brackets turns a simple box into a piece with furniture-like presence. It is the highest-priced item in this list.
How to make it: Sand a wooden crate, stain or paint it matte black, and let it dry for 24 hours. Attach brass L-brackets to the back, find wall studs, and mount with screws.
💡 Quick Win: Offer the crates unmounted with a hardware kit so you avoid shipping heavy assembled pieces.
Shop the Look
| Product |
|---|
| Small wooden crates, 10×6 inch |
| Matte black wood stain |
| Brass L-brackets with screws, 12 count |
| Wall anchor assortment kit |
| Fine sandpaper assortment pack |
How to Start Your Dollar Tree Craft Business
Start with one move: pick a single product from this list, such as the cork coasters or the trinket dishes, and make six. A single product forces you to learn pricing, photos, and packaging once, and six units are enough to test demand without tying up cash.
The most common mistake is pricing by what you spent on materials alone. A $3 set of coasters that took 40 minutes isn’t profitable at $5. Fix it by counting your time. Aim for an hourly rate you would accept, add your supply cost and any marketplace fee, and round up to a clean price.
Three items under $50 create immediate impact: a mini hot glue gun, a bottle of matte spray sealer, and a pack of 50 kraft gift tags with twine for packaging. They apply to nearly every project here.
A starter batch of six items typically takes a weekend and costs $20 to $60 in supplies. Building a repeat product line with photos, packaging, and a shop listing usually takes two to three months. Check each marketplace’s rules and your local sales-tax requirements before you sell, and avoid licensed characters or logos on anything you make.
Frequently Asked Questions About Easy Dollar Tree Crafts to Make and Sell for Beginners
Is it legal to resell crafts made from Dollar Tree items?
Generally yes, when you buy items and transform them into a new handmade product. Avoid reselling the store items unchanged, and don’t copy licensed characters, brand logos, or trademarked designs. Platforms like Etsy also have their own rules about handmade versus resold goods, so read the seller policy before you list.
What are the best Dollar Tree crafts to sell for beginners?
Items with simple steps and low material cost sell well, such as stamped cork coasters, trinket dishes, and bath salt gift jars. Their per-unit cost is usually a few dollars, and they work as add-on purchases. Start with one low-cost item before moving to larger pieces like crate shelves.
How much can I charge for Dollar Tree crafts?
Prices depend on your market, but many beginners sell small items such as coasters and bookmarks for $5 to $12, and larger pieces such as wreaths or crate shelves for $20 to $40. Calculate your supply cost, your time, and any platform fees first. A common rule of thumb is to price at roughly two to four times your material cost, then adjust for time.
Where is the best place to sell handmade Dollar Tree crafts?
Local craft fairs and Facebook Marketplace have low fees and suit heavy items like shelves. Etsy suits giftable, shippable items like ornaments and bath salt jars, though it charges listing and transaction fees. Test one channel at a time so you can compare your results.
What supplies should I buy first to make crafts to sell?
A low-temperature hot glue gun, a matte spray sealer, a basic acrylic paint set in black, white, and sage, and a pack of kraft gift tags cover most projects. They cost under $50 together and apply across many of the ideas above. Buy Dollar Tree base items only after you’ve picked your first product.
Ready to Start Your Easy Dollar Tree Crafts to Make and Sell?
You’ve now got 17 projects across home decor, gifts, storage, and seasonal items, from clay dishes and jute baskets to hand-lettered bookmarks and crate shelves. Starting with one product and six units is the right approach, because small batches teach you what buyers actually want. Today, pick one idea, write down your supply list, and set a date for your first making session this weekend. When your first item sells, the shelf of plain dollar-store items will start to feel like a studio of possibilities. Pin your favorite three or four now, before the jars, coasters, and wreaths start to blur together in your saved tab.